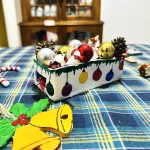
DIY Air Dry Clay Christmas Centerpiece Box (Easy Holiday Tutorial)
Learn how I made a festive Christmas centerpiece box with air dry clay! Get step-by-step slab building tips, painting ideas, and safe candle styling tricks.
Materials
Air dry clay (DAS, Mont Marte, Jovi or any reputed brand you can find is okay)
Acrylic rolling pin
PVC mat or silicone mat (or non-stick surface)
Clay crafting tools 🛠️
Clay cutting tool (X-acto knife or small knife) 🔪
A ruler 📏
Cup of water or spray bottle 💧
Acrylic paints 🎨
Gloss varnish ✨
Paintbrushes 🖌️
Paper towels 🧻
Optional: Sponge or silicone sculpting tool (or you can use your finger) 🧽
Instructions
Step 1: Condition & Knead
- Add a drop of water and knead well for 3–5 minutes to keep it crack-free. 🍕💧
Step 2: Roll the Clay
- Roll to 1/4"–5/16" thickness on a non-stick mat, rotating as you go. 📏🔄
Step 3: Cut the Pieces
- Use paper templates to cut out your base and wall panels easily. 📄✂️
Step 4: Firm Up
- Let slabs sit for 30–45 minutes until leather-hard so walls won't slump. 🧱⏳
Step 5: Score, Slip & Assemble
- Score joint edges, apply slip or water, and press the box together! 📦🧩
Step 6: Dry Slowly
- Allow 48–72 hours to air dry away from direct heat or hairdryers. 🌧️⌛
Step 7: Paint & Decorate
- Use colorful acrylic paints for a fun holiday look. ❤️💚🎨
Step 8: Seal & Protect
- Apply gloss varnish or resin to protect your masterpiece! ✨🌟