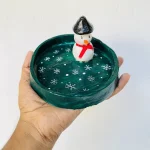
DIY Air Dry Clay Christmas Snowman Trinket Dish Tutorial
Learn how to make a charming Christmas snowman trinket dish using air dry clay! Follow this step-by-step DIY guide with tips on sculpting, drying, painting, and sealing for a festive holiday craft or handmade gift.
Materials
Air dry clay (DAS, Mont Marte, Jovi, or any reputed brand you can find is okay) 🧱
Acrylic rolling pin
PVC mat or silicone mat
Metal jar lid or steel bowl
Clay crafting tools
Clay cutting tool (X-acto knife or small knife)
Cup of water or spray bottle 💧
Acrylic paints (white and black) 🎨
Gloss varnish
Paintbrushes 🖌️
Drawing pen or pencil ✏️
Paper towels
Optional: Sponge or silicone sculpting tool (or you can use your finger 🖐️)
Instructions
1. Knead & Condition
- Soften your clay with a splash of water to prevent cracking later on. 🧱
2. Roll the Slab
- Roll out an even slab between ¼ inch and ½ inch thick, rotating often so it won't stick. 🥖
3. Cut the Base
- Press down a lid or steel bowl and cut out a circle with small up-and-down knife movements. ✂️
4. Attach the Rim
- Cut a 1-inch strip, score the edges, dab with water, and wrap it around your base. ⭕
5. Reinforce the Joint
- Smooth a thin clay coil along the inner seam to keep the rim firmly attached. 🐍
6. Sculpt the Snowman
- Shape a body, head, cone hat, and carrot nose, then attach using score and water/slip. ☃️
7. Dry Patiently
- Let your piece dry completely in a cool, ventilated space for 48–72 hours. ⏳
8. Paint & Decorate
- Add festive colors using acrylic paint and let dry completely. 🎨
9. Seal & Protect
- Apply 2–3 thin coats of gloss varnish for a gorgeous, water-resistant ceramic look! ✨