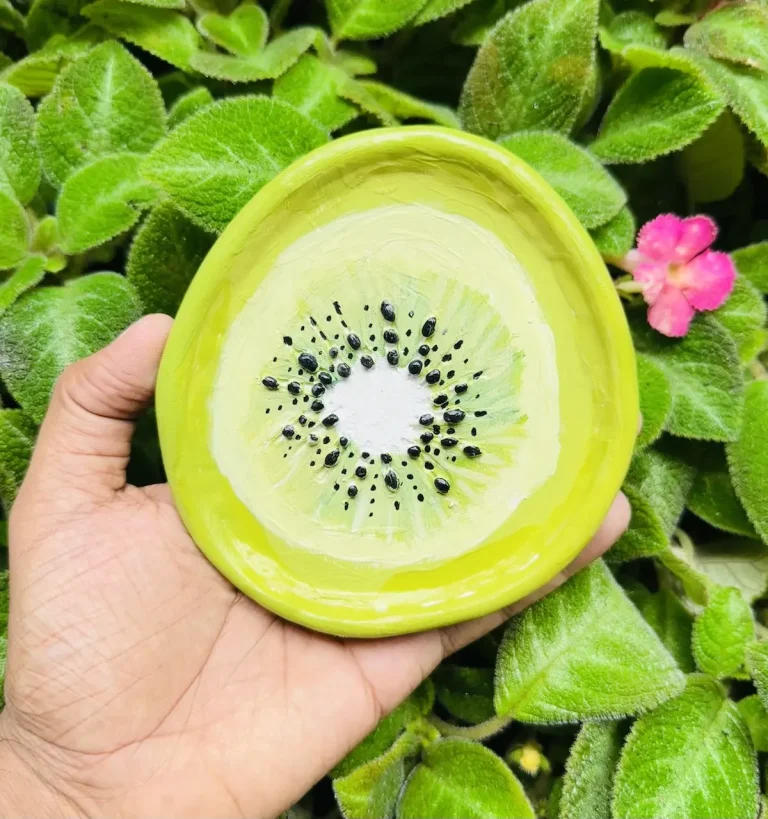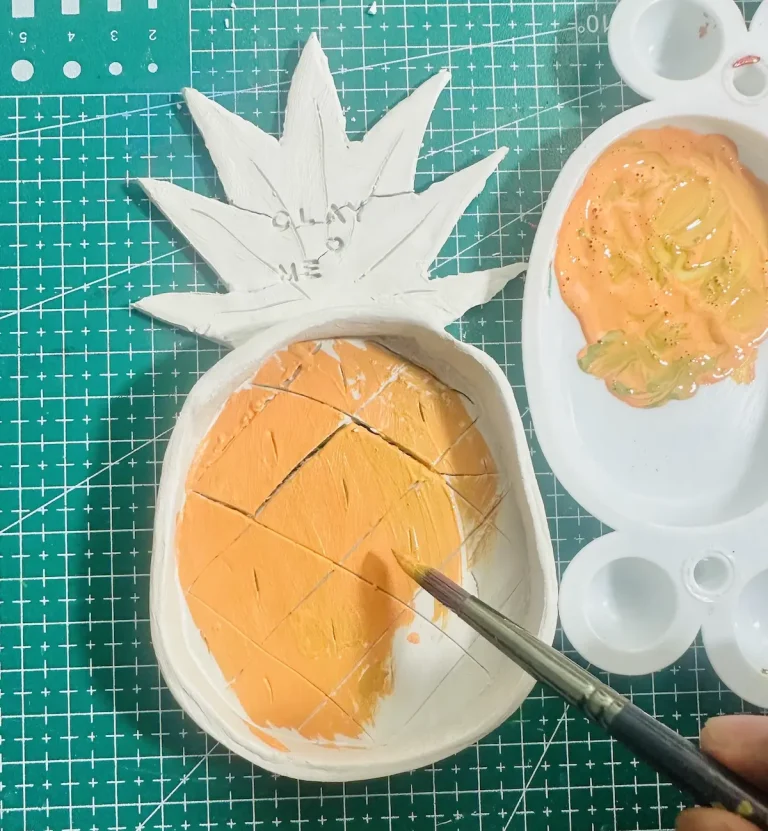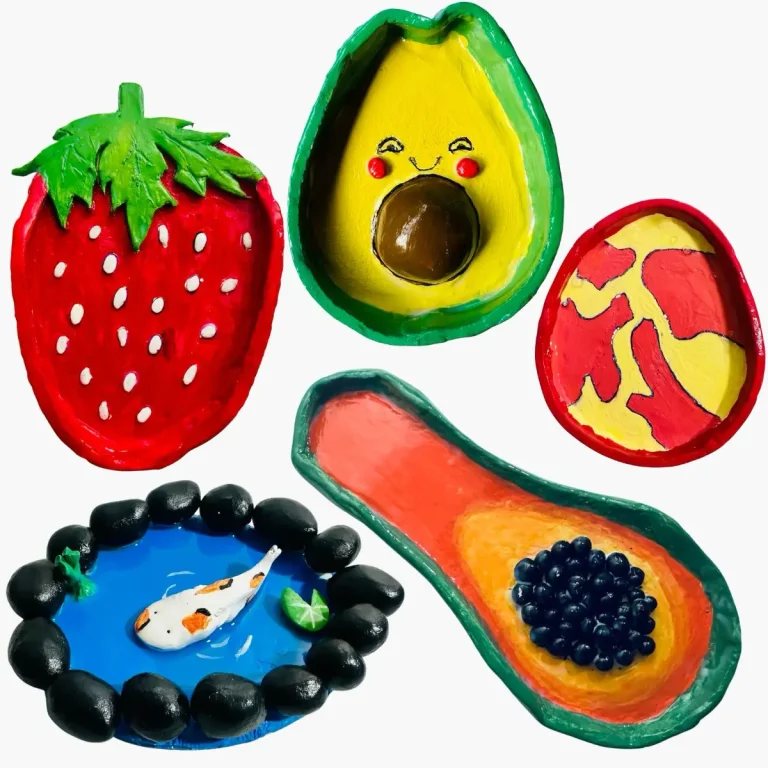

I have made a lot of trinket trays, jewelry dishes with air dry clay. 🎨 Most of them are fruit inspired ones. 🍓
But today I thought of making a trinket dish for this holiday season which can be used as a gift to make your loved ones feel special. 🎁
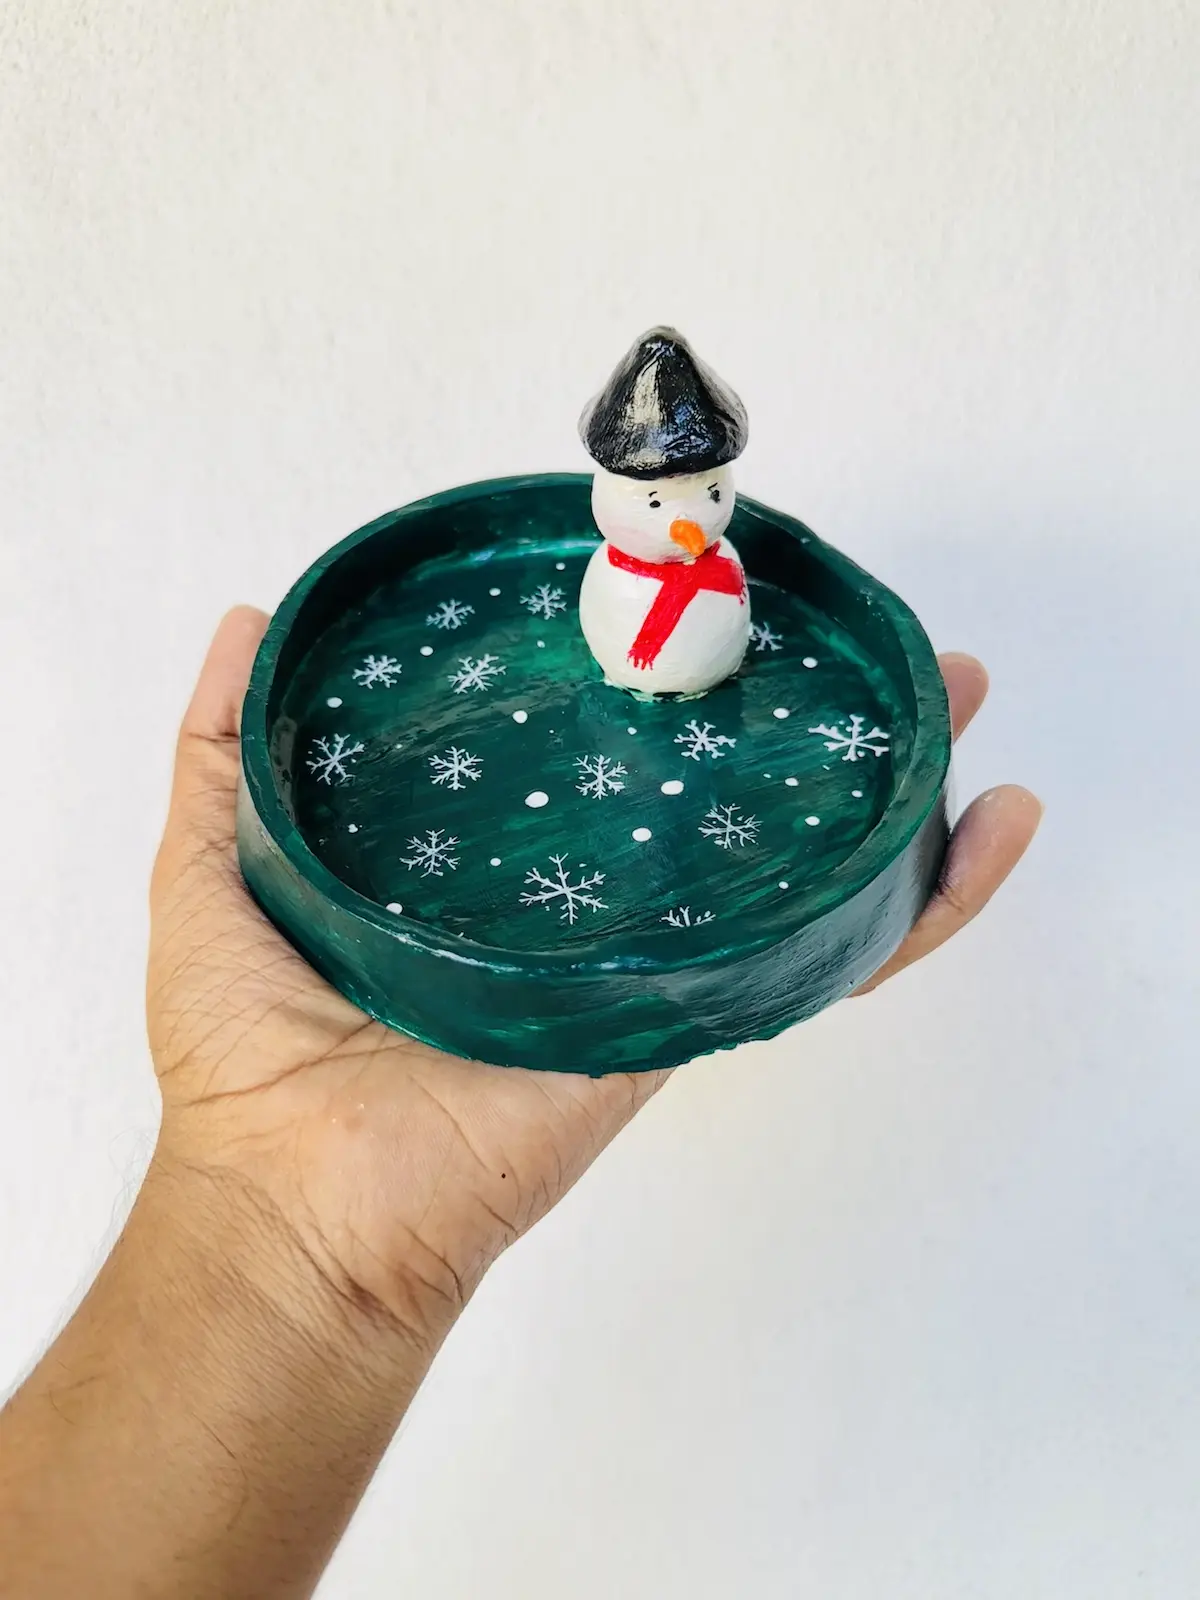
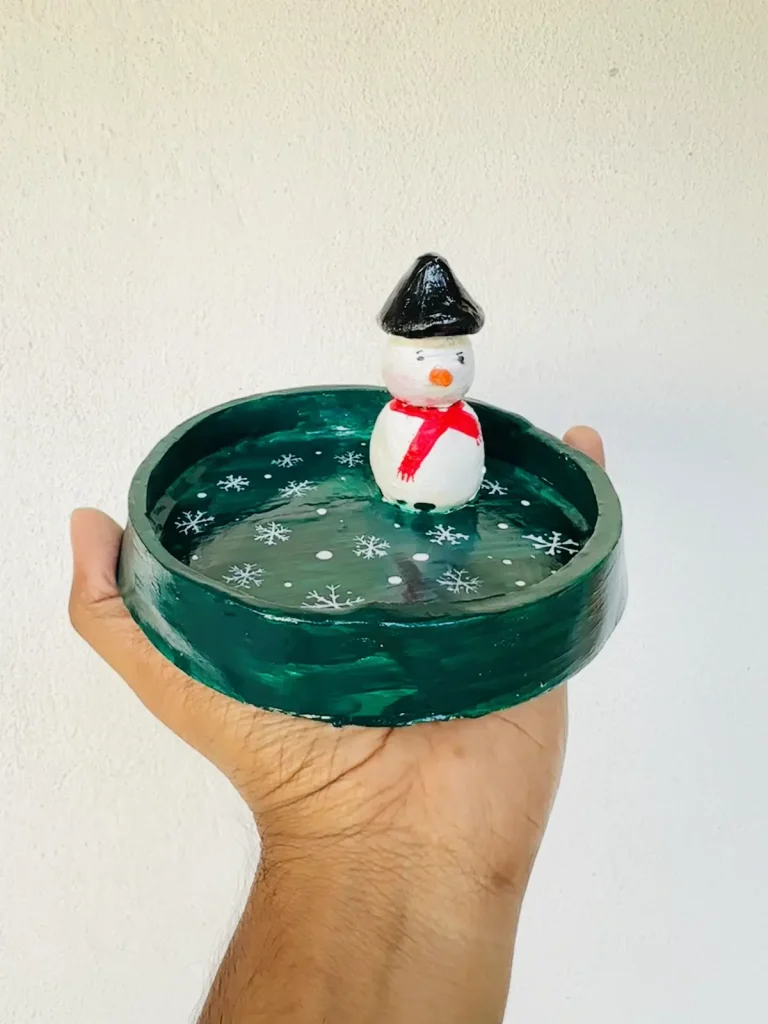
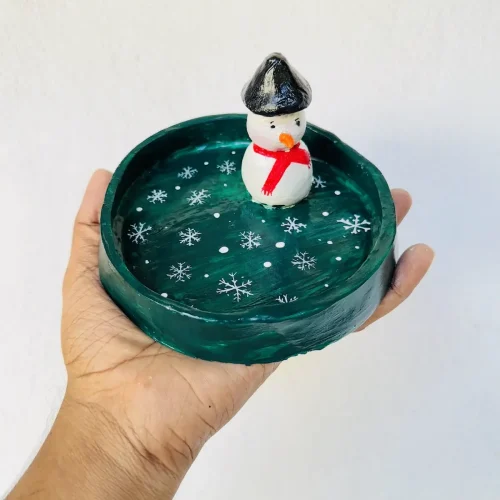
This is not only a Christmas trinket dish, it is a snowman trinket dish ☃️ which is unique and even beautiful to use as a home or desk decor item. 🏠
You can place this on your Christmas dinner table 🎄 and brag to everyone about the story about how you made this. Trust me it will be quite a story!
Don’t worry about complex or expert steps here. I’m also a beginner clay artist like you who likes to make awesome things with minimal effort.
I’ll tell you every step, tips and techniques I used to make this beautiful piece with all the mistakes I did along the way so you can avoid them and make one so much better than mine.
Enough chit chat! Let’s dive right in! 🚀
Why air dry clay?
Air dry clay is the most beginner friendly clay type. Yes, that’s a fact. Let me tell you why…
- Air dry clay is easy to shape and bend.
- Super cheap.
- Easy to correct mistakes.
- No kiln or baking needed.
- Dries in the air.
Don’t get confused I’ll explain each in brief.
Read: Air Dry Clay for Beginners: The Ultimate Step-by-Step Guide
You can make almost any shape, object or item with air dry clay. You simply have to tap the air dry clay surface with a little bit of water and boom it becomes bendy and super easily and comfy to shape.
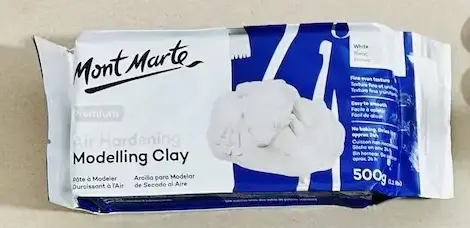
Air dry clay is cheap compared to any other clay type you can find online or in stores. Especially when compared to polymer clay, air dry clay is 2x or sometimes 3x cheap.
This cost effectiveness is super important especially when you’re a beginner. Let me tell you why,
As beginners we like to experiment and have fun with clay. Can’t say anything bad about it because that’s how we learn new tricks and techniques. But as a result of those fun experiments we do waste a lot of clay and that’s ok because otherwise we never learn new things. Only theory, no practical lessons.
If the clay is too expensive you can’t have fun and do little, cute experiments with it. That’s where air dry clay comes in. No other can beat its value for the money you pay.
Plus, air dry clay dries in the air and no oven is needed like other types of clay.
Because of the above reasons I really prefer air dry clay to make a christmas decor like this one we are about to make, especially if you’re a beginner.
For more: The Pros and Cons of Air Dry Clay: A Complete Beginner’s Guide
Materials and tools I used
- Air dry clay (DAS, Mont Marte, Jovi, or any reputed brand you can find is okay) 🧱
- Acrylic rolling pin
- PVC mat or silicone mat
- Metal jar lid or steel bowl
- Clay crafting tools
- Clay cutting tool (X-acto knife or small knife)
- Cup of water or spray bottle 💧
- Acrylic paints (white and black) 🎨
- Gloss varnish
- Paintbrushes 🖌️
- Drawing pen or pencil ✏️
- Paper towels
- Optional: Sponge or silicone sculpting tool (or you can use your finger 🖐️)
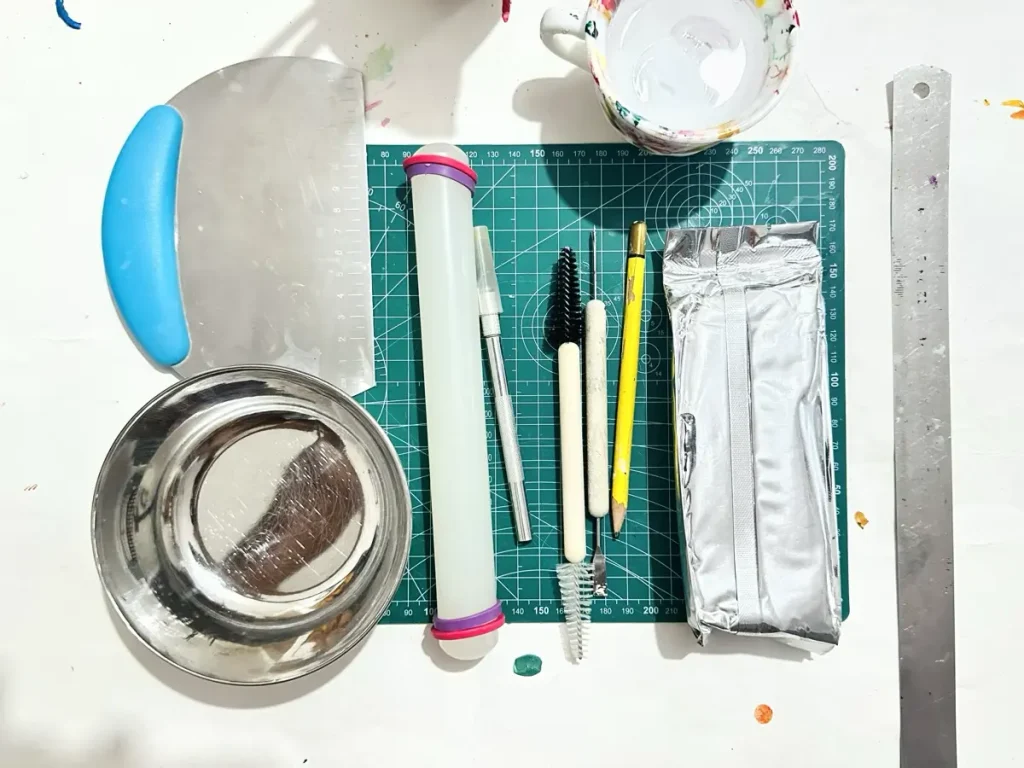
If you couldn’t find any of the above items, I highly suggest you check your kitchen drawers. You’ll find a handful of items like toothpicks, small knives, cutting boards that can be used as alternatives instead above.
But when you become good at this, please purchase a proper clay tool set which is a huge upgrade even for me.
Video tutorial of making the snowman trinket dish
I have recorded each and every step I followed when making this trinket dish from start to finish. You can watch it along with this tutorial to get a better understanding about how things need to be done for the best result. 🎬
Feel free to watch and make a nice Jack Skellington tray! 📺
Finished watching the video? Let’s have a look at the detailed written step-by-step guide. 📝
Step by step: How I made my christmas snowman trinket dish
Before starting, open all the windows in your working area or shift to a well ventilated space 🪟 because air dry clay contains fine particles that can cause breathing issues like cough.
Step 1: Conditioning and kneading the clay
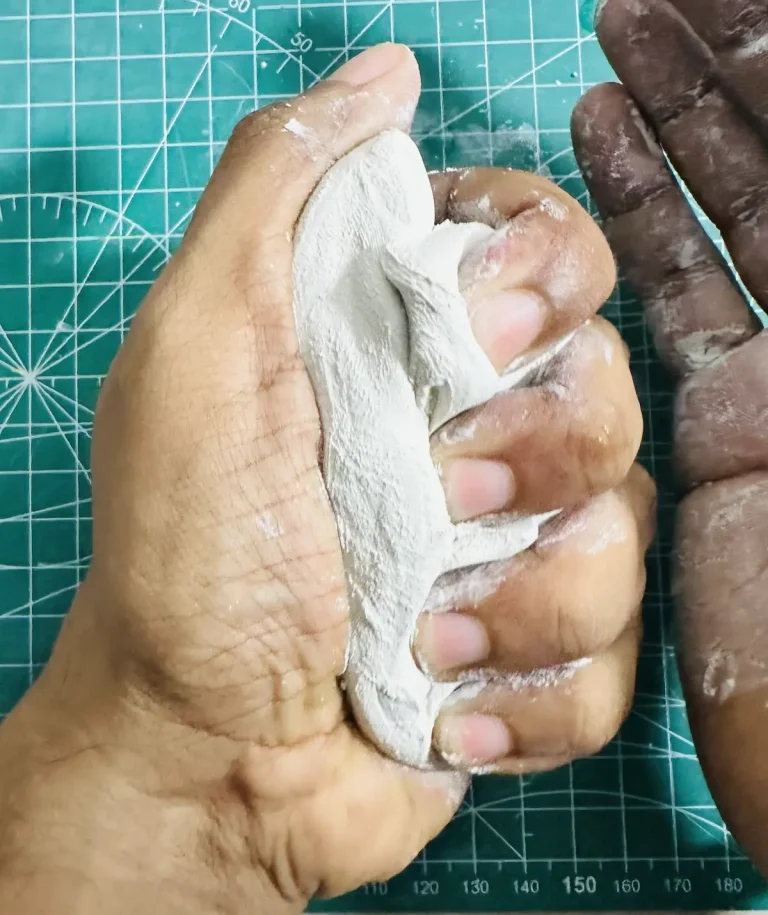
First of all take a fresh piece of clay and start conditioning it by tapping the surface with a little bit of water.
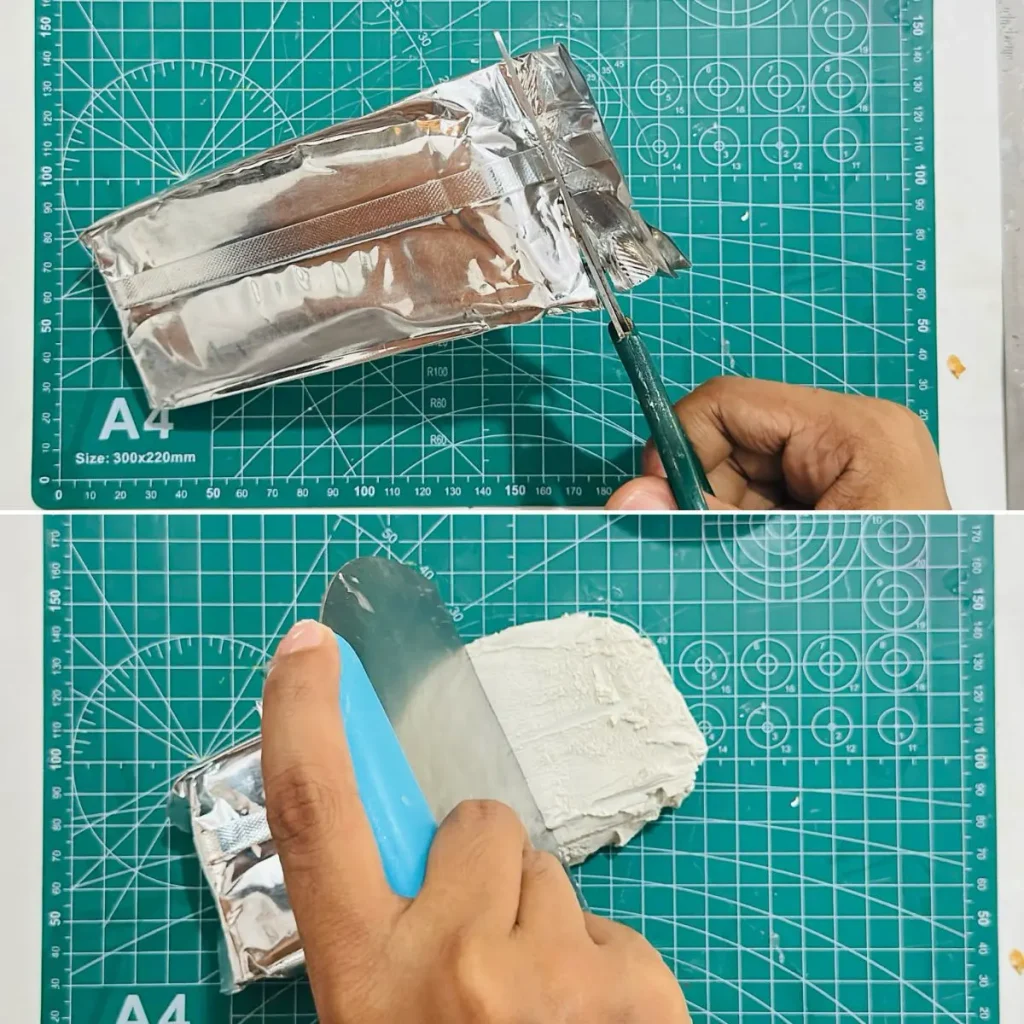
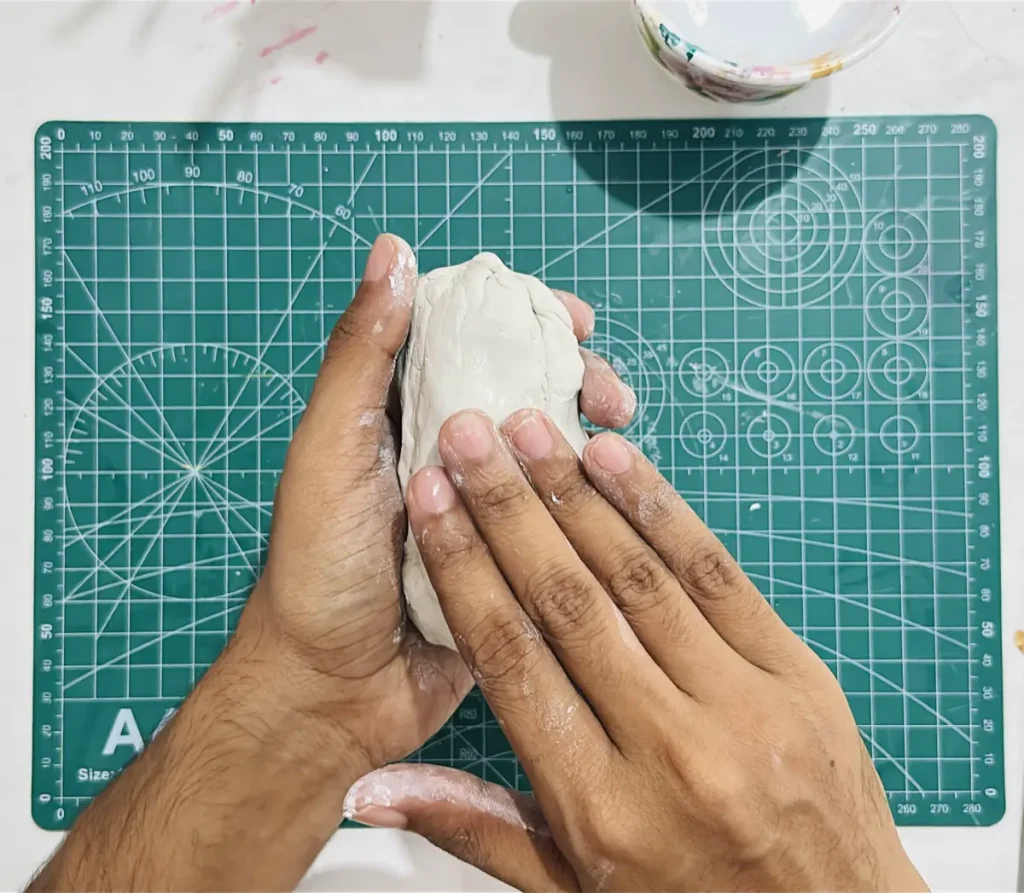
Fresh air dry clay is a bit stiff and hard to knead. Therefore conditioning is must to make it soft and easy to shape in future steps.
Next knead the clay piece well using pull, push and press techniques with a little bit of water just like when you’re making a pizza dough.
Kneading not only makes the clay soft and pliable but also avoids the surface from cracking as the clay dries. Let me tell you how.
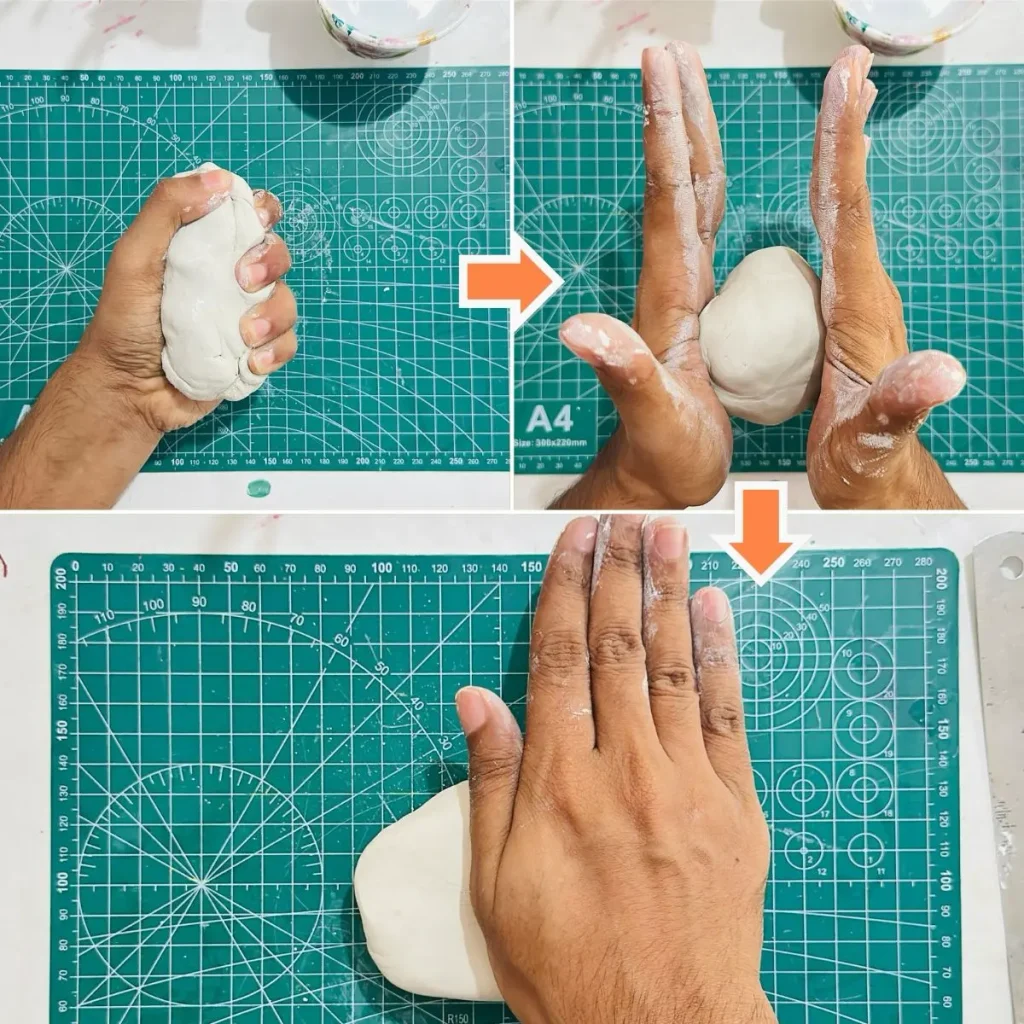
Air dry clay generally contains a lot of moisture and air bubbles inside. 🫧 But the moisture inside are spreaded unevenly across different layers of air dry clay.
As the clay dries the moisture inside will release to the outside world due to the evaporation. ☀️ As a result of evaporation, the clay will start to shrink which is completely normal.
But the clay shrinkage can happen unevenly when the moisture inside spreads randomly at the first place with lots of air pockets inside.
Uneven shrinkage of air dry clay builds up tension between the layers and your clay will start to crack as it dries due to this tension between the layers. In order to avoid that the shrinkage needs to be even across all the layers, which can only be done by kneading the clay well.
Kneading helps to spread the moisture evenly and release the air bubbles inside. This is why kneading is important at early stages to avoid your final air dry clay piece from cracking as it dries.
Now you can see kneading not only makes the clay soft but also saves your hours of work by avoiding your beautiful piece from cracking. So, whatever you are about to make, never forget kneading at first.
But makes sure to use only a little bit of water 💧 while kneading because too much water triggers the rapid evaporation of water as the clay dries which can also cause surface cracking.
Step 2: Roll the clay slab
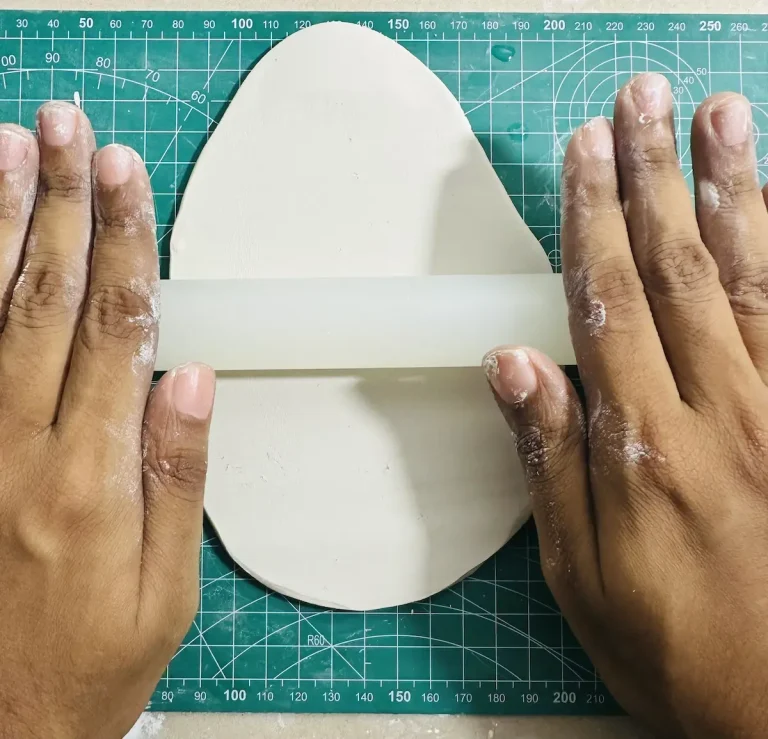
Now place the kneaded clay slab on your working mat and start roll it to an even thickness about ¼ inch.
Always use a non stick mat like PVC mat (what I use) or silicone mat to avoid clay from sticking to your surface while rolling.
Use an acrylic rolling pin to avoid clay from sticking to it while rolling.
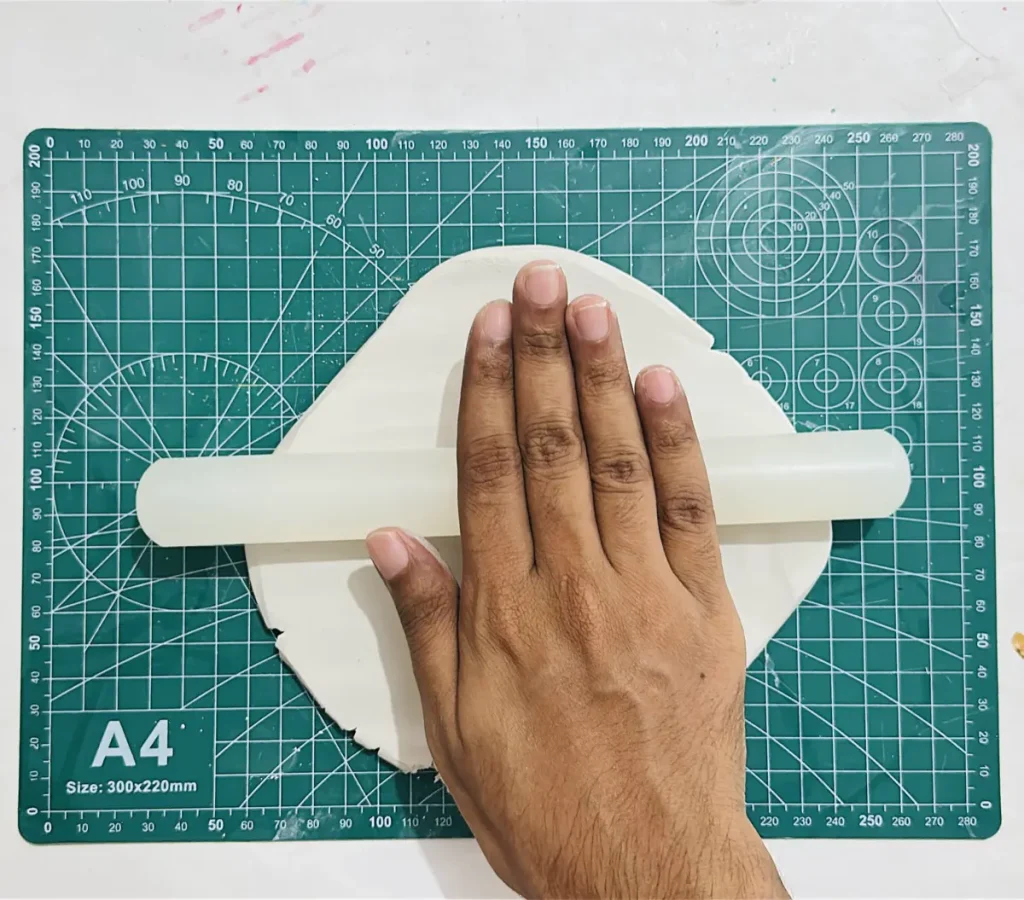
Rolling clay slab too thick and too thin can also cause issues. Let me tell you how,
Rolling clay slab too thick, I mean above ½ inch can affect the drying time. Too thick clay slabs take more days or sometimes weeks to dry fully and also cause surface cracks because outside layers will dry quickly while inside thick layers of clay will still be damp. This results in uneven shrinkage which leads to surface cracking as the clay dries.
Rolling clay slab too thin, I mean below ¼ inch, cause clay to warp asit dries. You can notice how it will start to curl up from the edges as it dries like a fried potato chip. In order to have a better structural integrity the thickness of your air dry clay slab should be above ¼ inch.
Therefore, the ideal thickness you need to roll your air dry clay slab should be in between ¼ inch to ½ inch.
If you’re using a wooden cutting board and wooden rolling pin as the rolling surfaces, place a parchment paper between the clay slab and the cutting board and another parchment paper between the clay slab and the rolling pin like a sandwich. 🥪
Wooden surfaces sucks out moisture from your clay slab quickly and build a high grip between the clay which can cause clay to tear apart when rolling and when you try to lift the clay up after rolling. This is why we place a non stick barrier like parchment paper between the wood and the clay.
During my first trinket tray project, I noticed my clay was sticking to my mat even though it was made with non stick PVC material. Later I found that you need to change the position of your clay slab while rolling to avoid it from sticking to the surface.
While you’re rolling the clay slab, the moisture inside will come out and make a seal like grip between the surface. This high grip can make the clay split and crack as you roll and some will stick so hard to the surface.
To avoid that, flip, turn and rotate the clay slab while you’re rolling. Changing the position of the clay slab regularly stops it from bonding with the surface underneath and you can get a nice and polished surface.
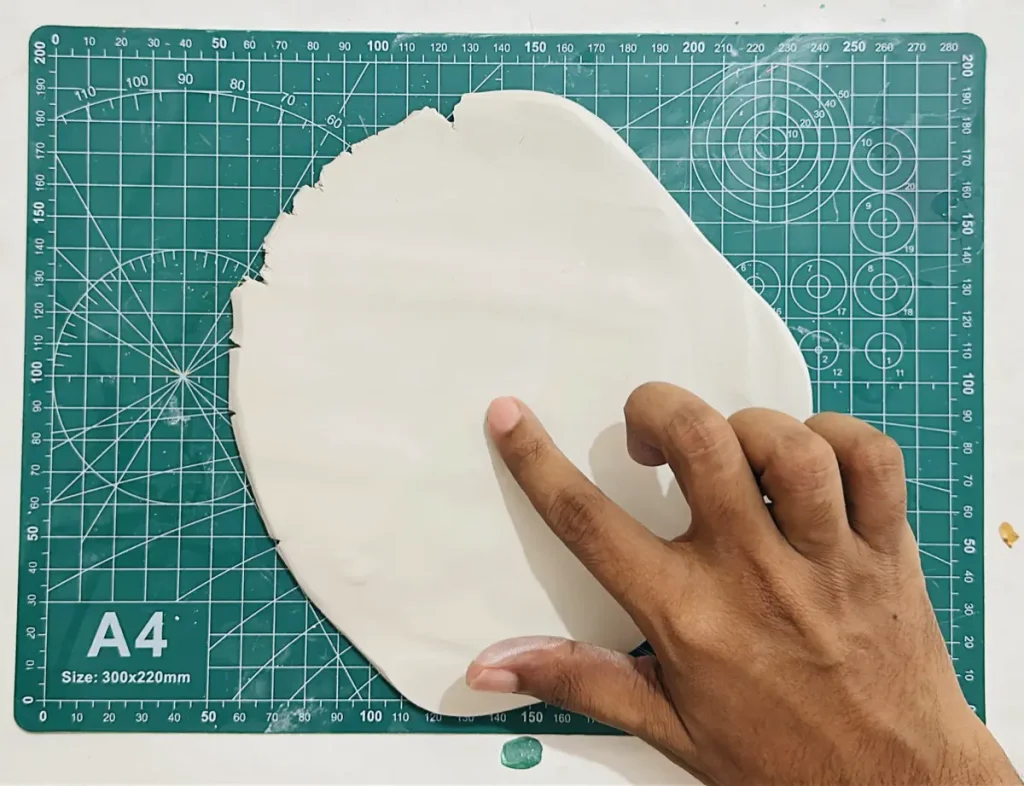
After rolling the clay slab to an even thickness, don’t forget to smooth out the surface by dipping your index finger in a cup of water and gliding repeatedly over the clay surface to remove tiny bumps, micro cracks and tiny imperfections on the surface.
Smoothing is must from now onwards after each step for a better and smooth surface, but only with a little bit of water.
Step 3: Cutting the circular dish base
Now place the metal jar lid or steel bowl on the clay slab upside down and press it down.
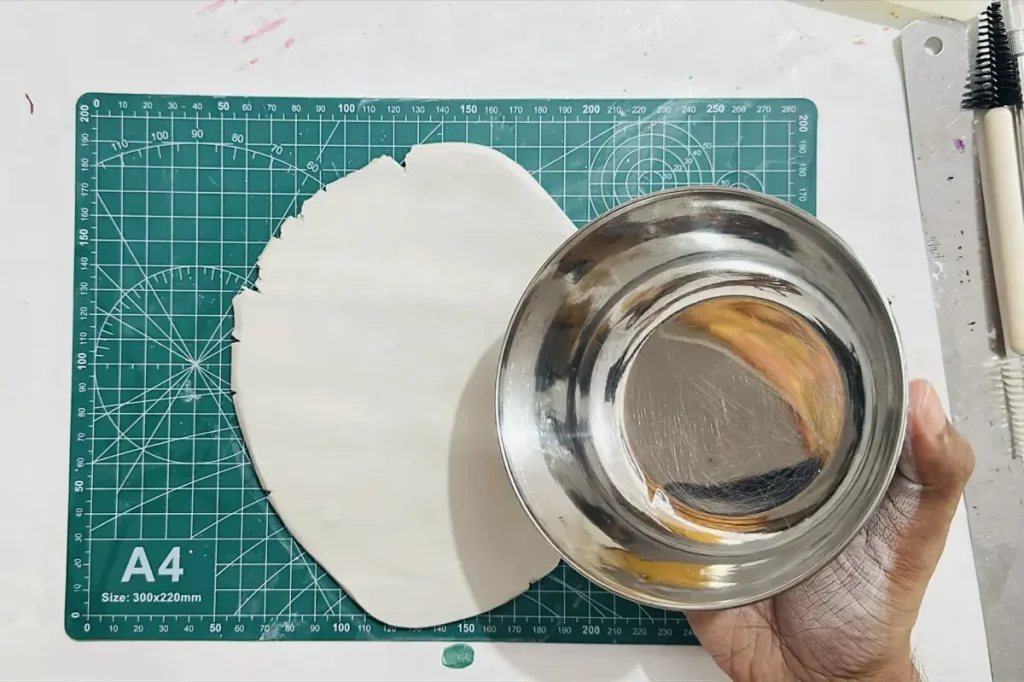
Read: How to Cut Perfectly Round Air Dry Clay Bases Using Household Templates
Then cut along the outline of the lid/bowl using the x-acto knife.
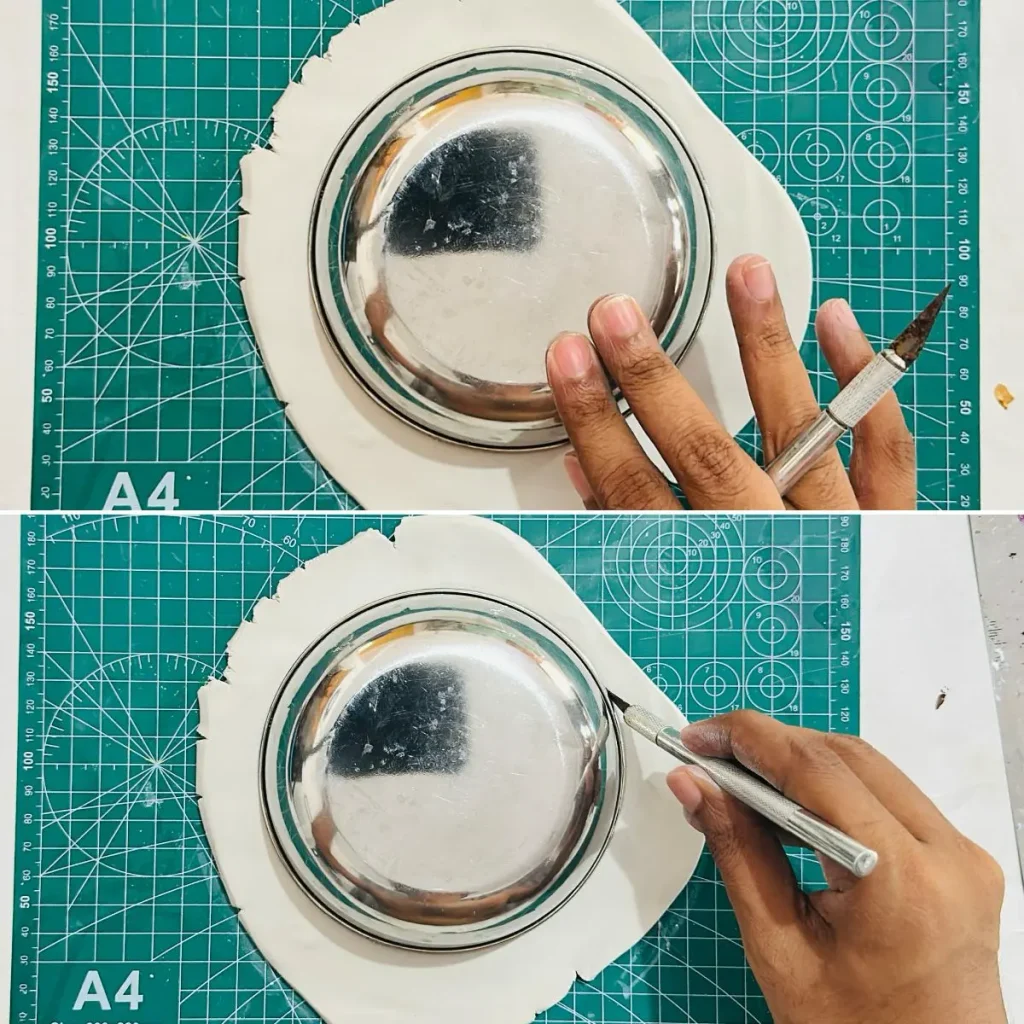
When you’re cutting make sure not to drag the knife horizontally across the board. Instead lift the blade continuously as you cut with up and down motion and clean the stuck tiny clay pieces on the blade before you go for the next cut. This way you can achieve sharp, nice and clean cut along the dish with no jagged or splitted edges.
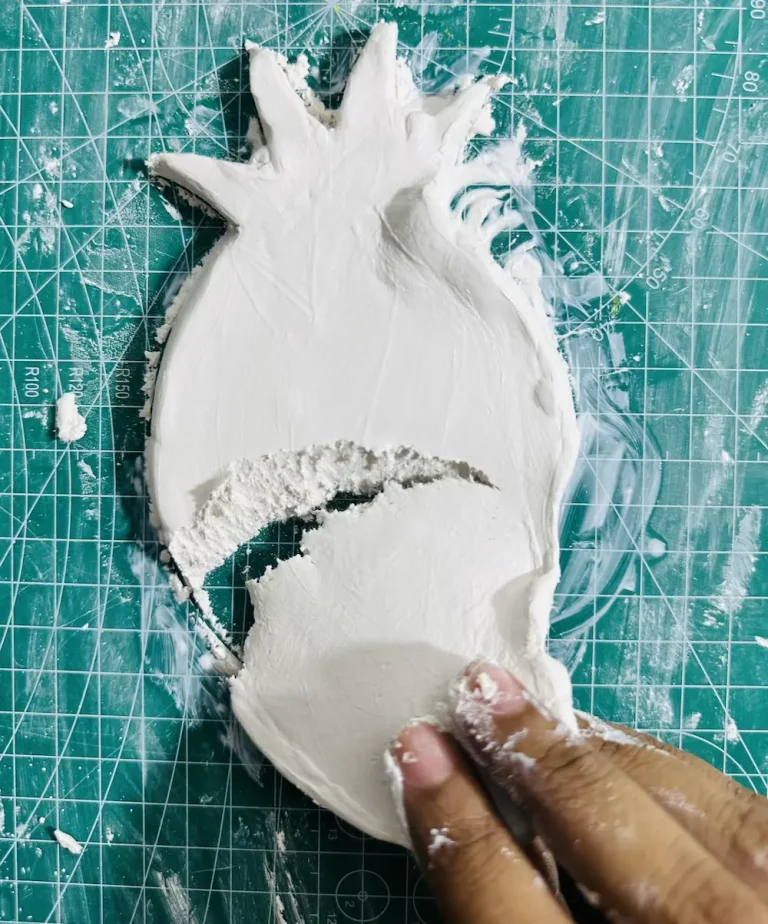
I learned that hard way during my failed pineapple trinket dish project. 🍍
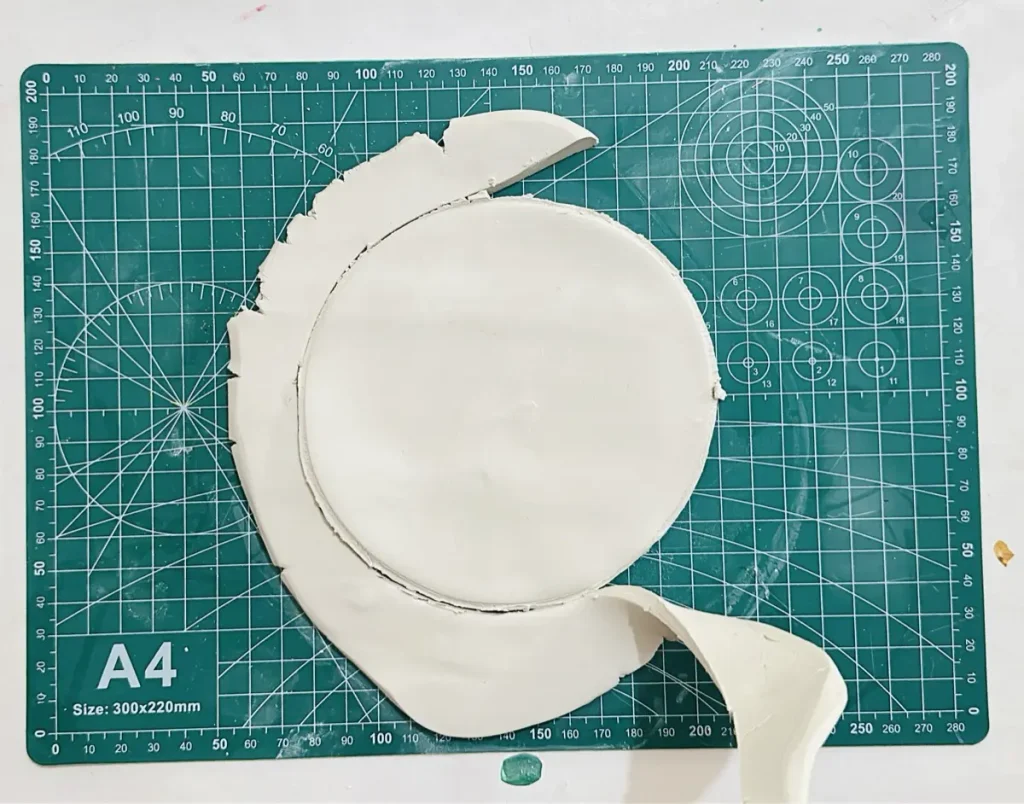
Now we successfully made the dish base. Before we move into making the dish rim, don’t forget to smooth out the dish base surface and along the edge with a little bit of water.
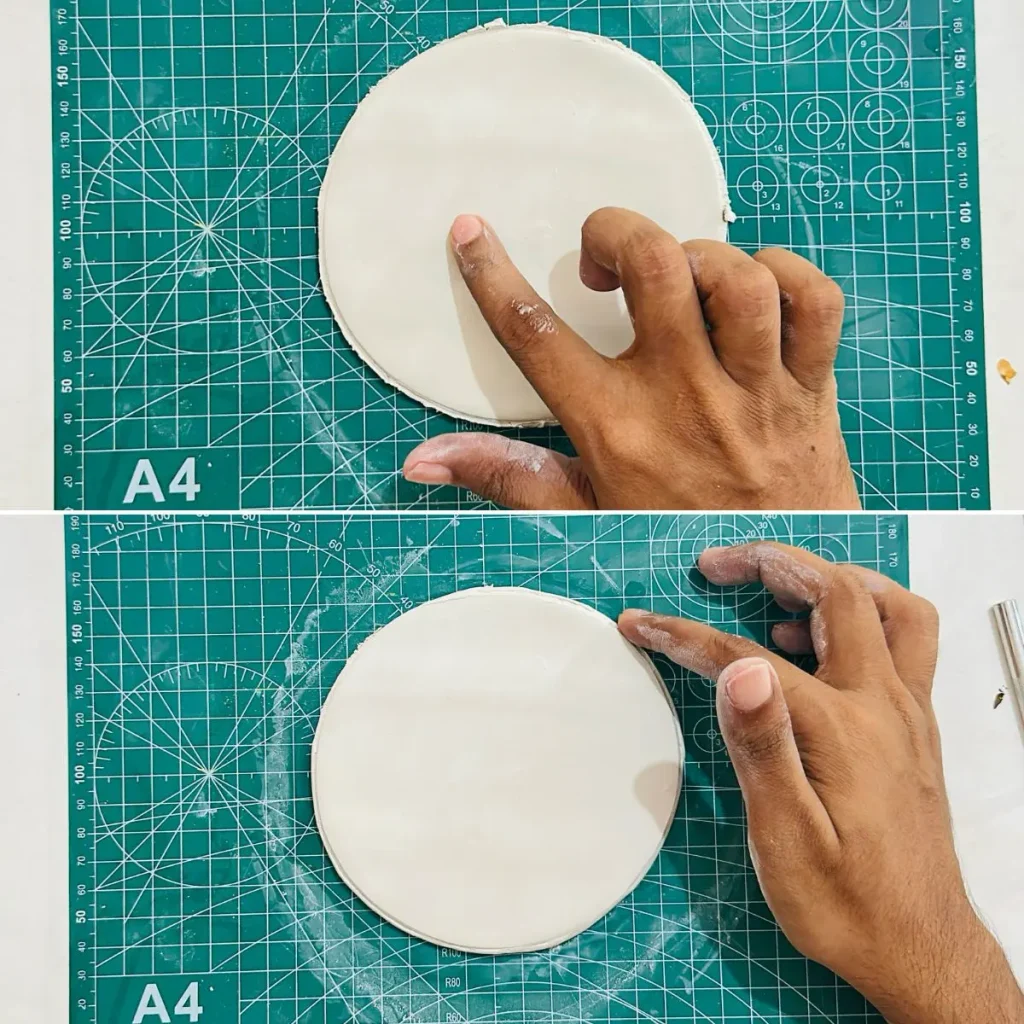
Step 4: Making the dish rim
Now knead another fresh piece of clay and roll it to an even thickness as before about ¼ inch.
Next cut about 1 inch width clay strip using the ruler. Width should be the same along the length.
If one piece of strip is not long enough, cut another strip which also has the same width across the length.
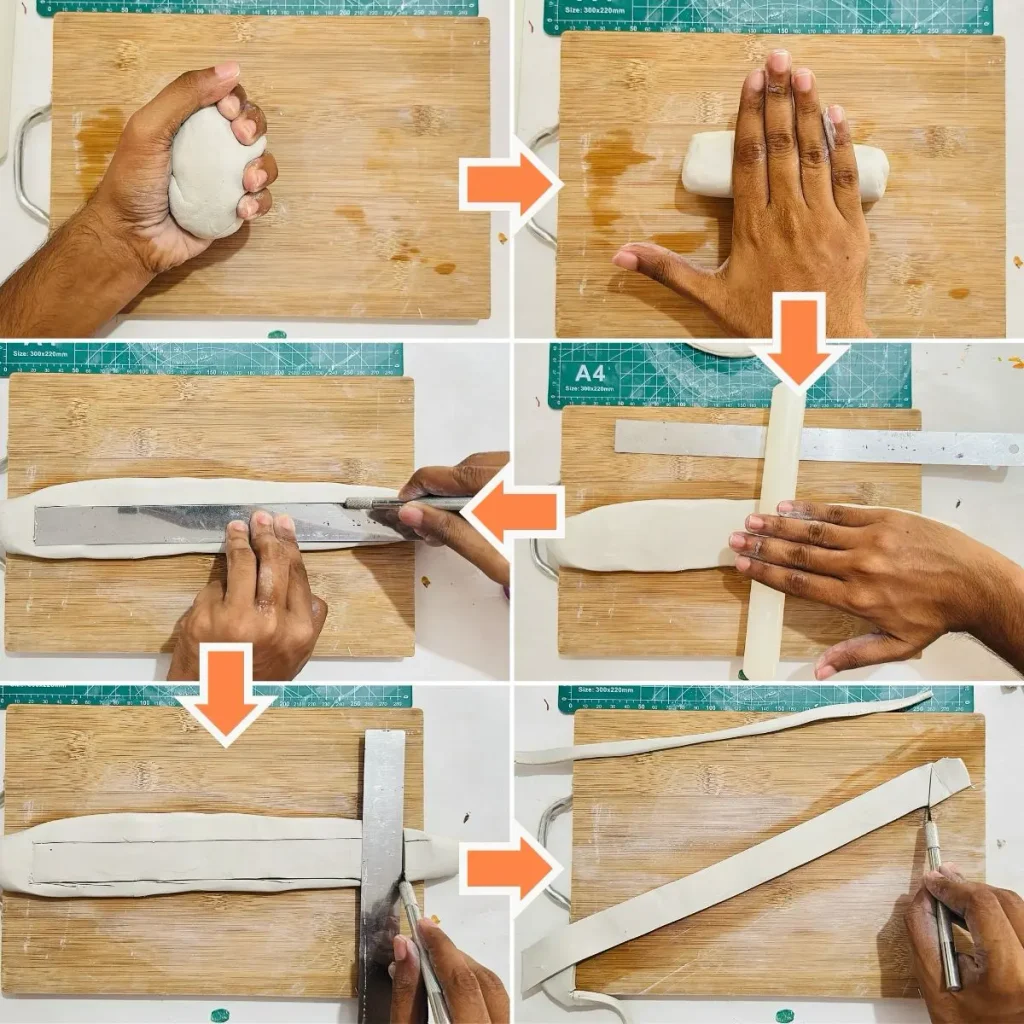
Next cut the edges of the dish rim at an angle which helps to attach the edges without occurring bumps.
Finally smooth out the dish rim surface using a little bit of water as I told earlier. Yes, we’re gonna make a trinket dish with raised rim.
Step 5: Attach dish rim to the dish base
Now it’s time to attach the train rim we made to the dish base.
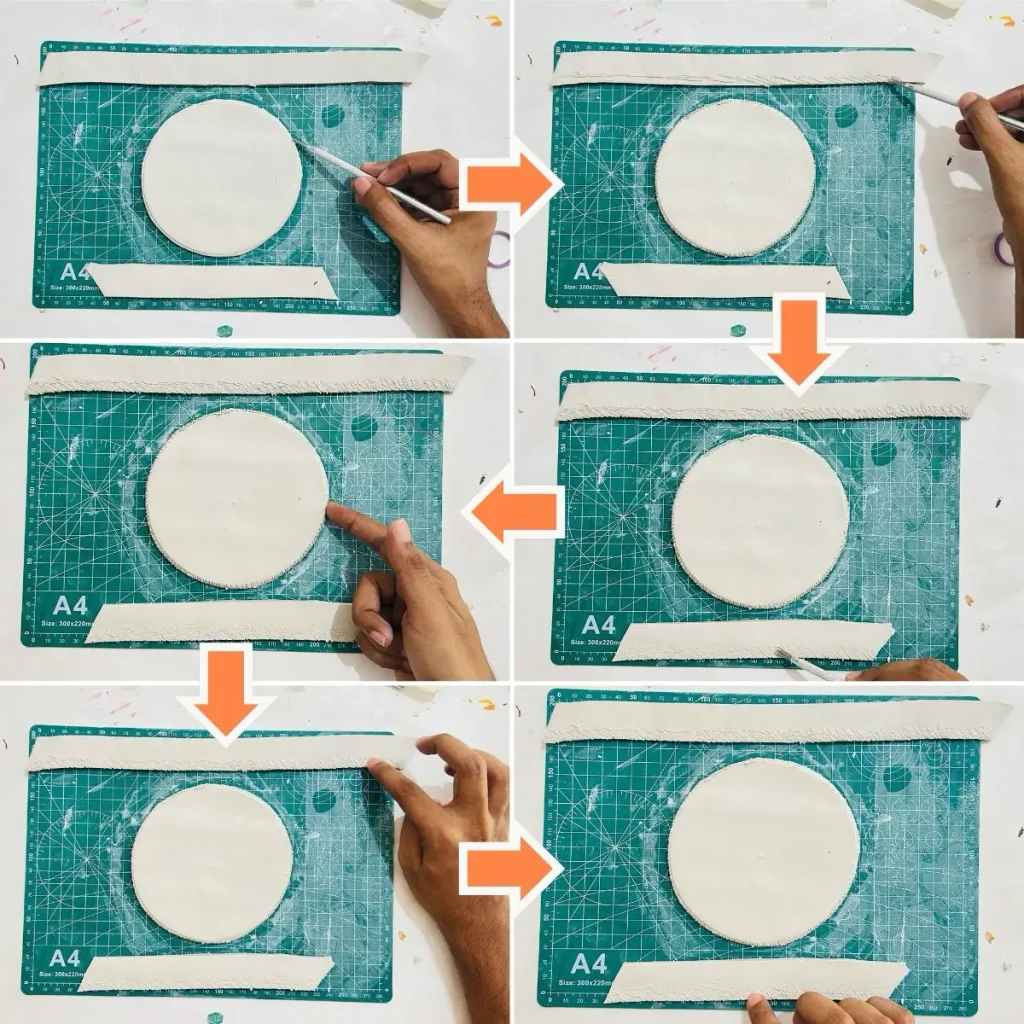
You can’t attach two air dry clay pieces just by pressing them together. There is a special method for that which is called the “score and slip method”.
In the score and slip method first you need to score the air dry clay surfaces that you’re going to attach. Then apply a clay and water mix paste called “slip” over the scored areas to have a better grip between the surfaces. After applying the slip you can press and attach the two pieces together and they won’t separate or lose the clay joint as the clay dries.
Slip is made by mixing equal amounts of air dry clay pieces and water thoroughly in a small plastic can and letting it sit for hours. It is a creamy looking paste that can be used when attaching air dry clay pieces and used again for future projects as well.
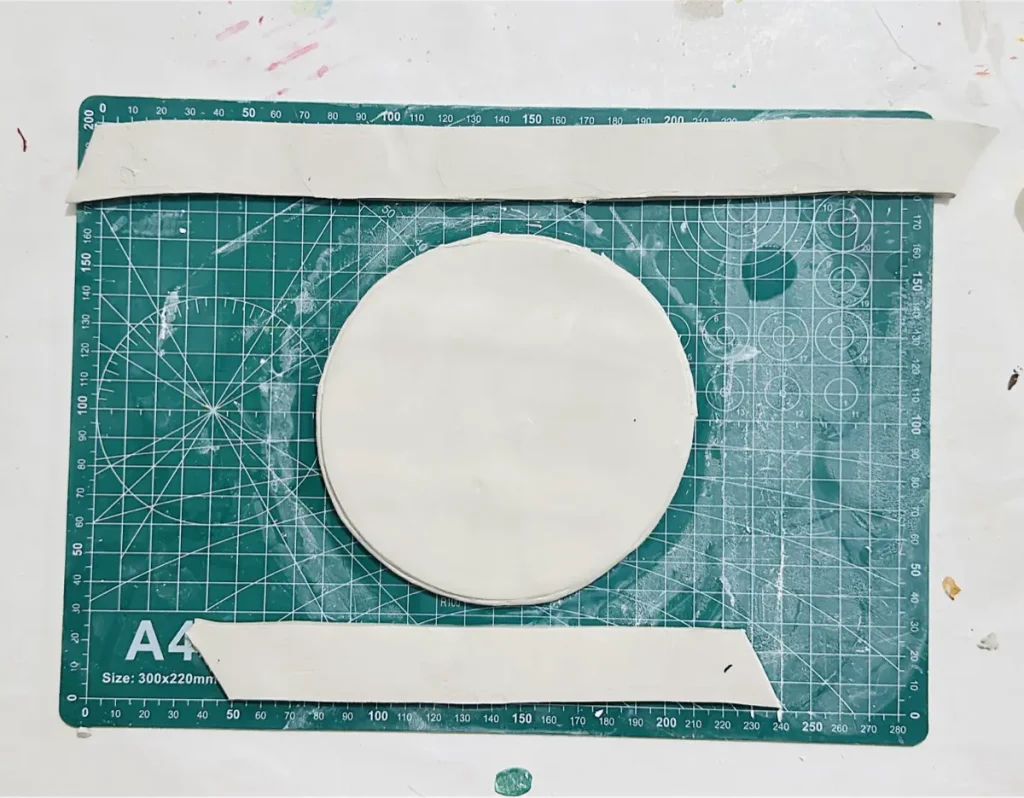
First of all I scored along the edge of the dish base using my clay scoring tool.
Then I scored along the bottom length of the dish rim.
I didn’t have the “slip”. Therefore, I tapped the scored surfaces with a little bit of water. Trust me water works as good as the slip because water is one of the main ingredients of the slip. If you don’t have the slip, use water as I did and it works just fine. Don’t worry.
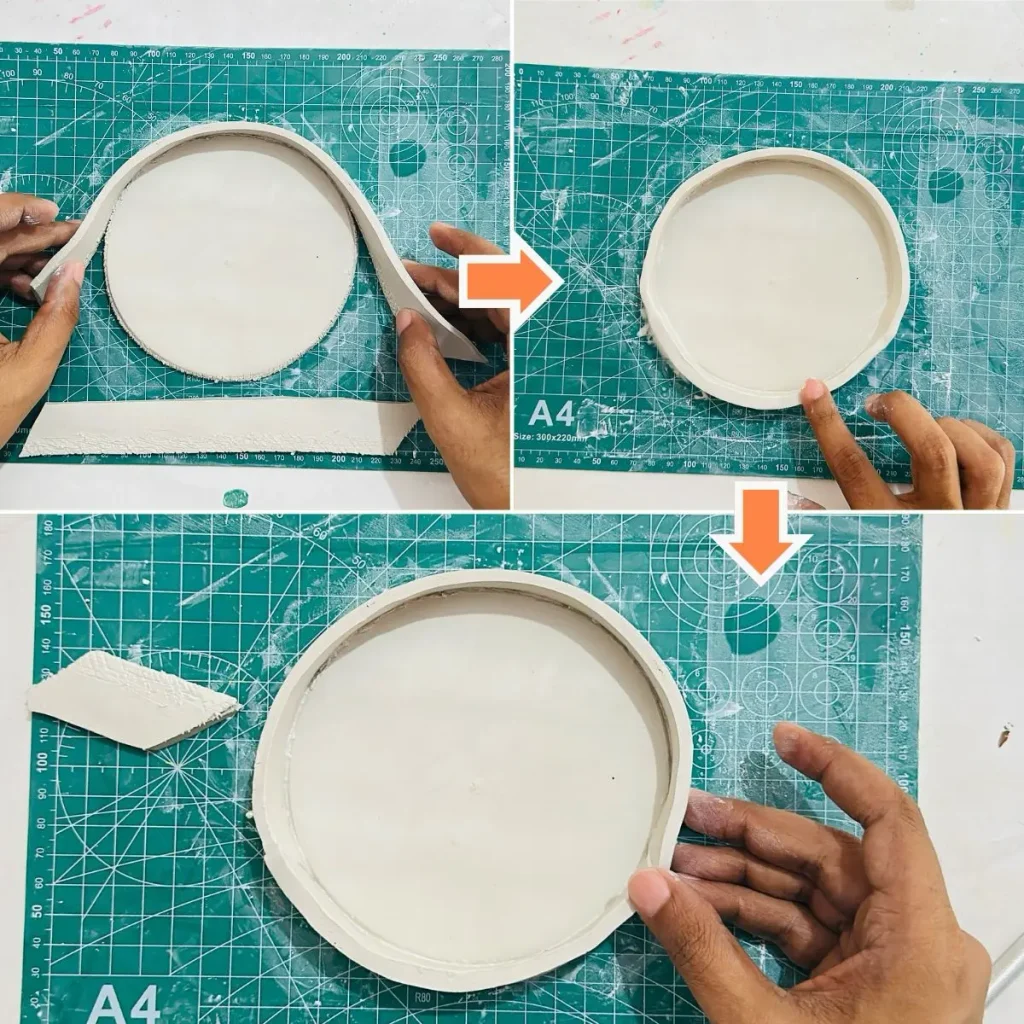
Next attach the dish rim around the dish base carefully and cut the edges of the dish rim at an angle to attach the two ends smoothly without occurring a bump.
After attaching the dish rim to the dish base, smooth out the surface and around the dish rim to remove any seams and micro cracks.
Step 6: Reinforce the joint by adding a thin clay coil
Notice the sharp 90 degree angle between the dish base and the dish rim. As the clay dries the force towards this sharp joint will increase due to the shrinkage of the clay.
So we need to make sure the joint won’t lose as the clay dries by adding a thin clay coil seam to it.
Adding a thin clay coil seam reinforces the joint between the dish base and the dish rim by making the joint area more thick and removing the 90 degree sharp angle. This helps to keep the joint strong enough under clay shrinkage and bare more forces.
Make the clay coil as thin as possible because we don’t wanna make it look separate sections as the clay dries.
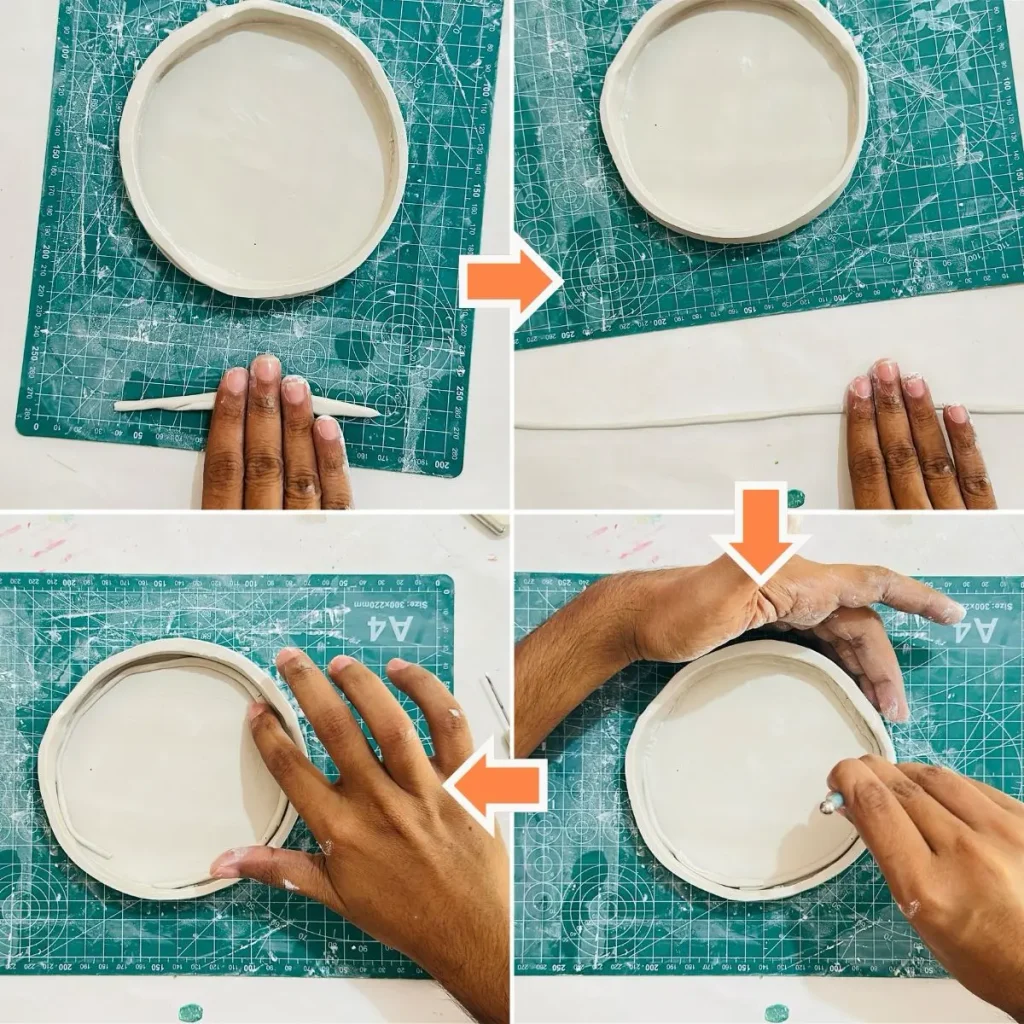
Use a little bit of water and smooth along the thin clay coil to get rid of the seam.
Great work! ✨ We made the dish. Now it’s time to make our cute snowman. ☃️
Step 7: Sculpting the 3D snowman
It’s not hard to make a 3d snowman figure. First take a fresh piece of air dry clay and knead it so well.
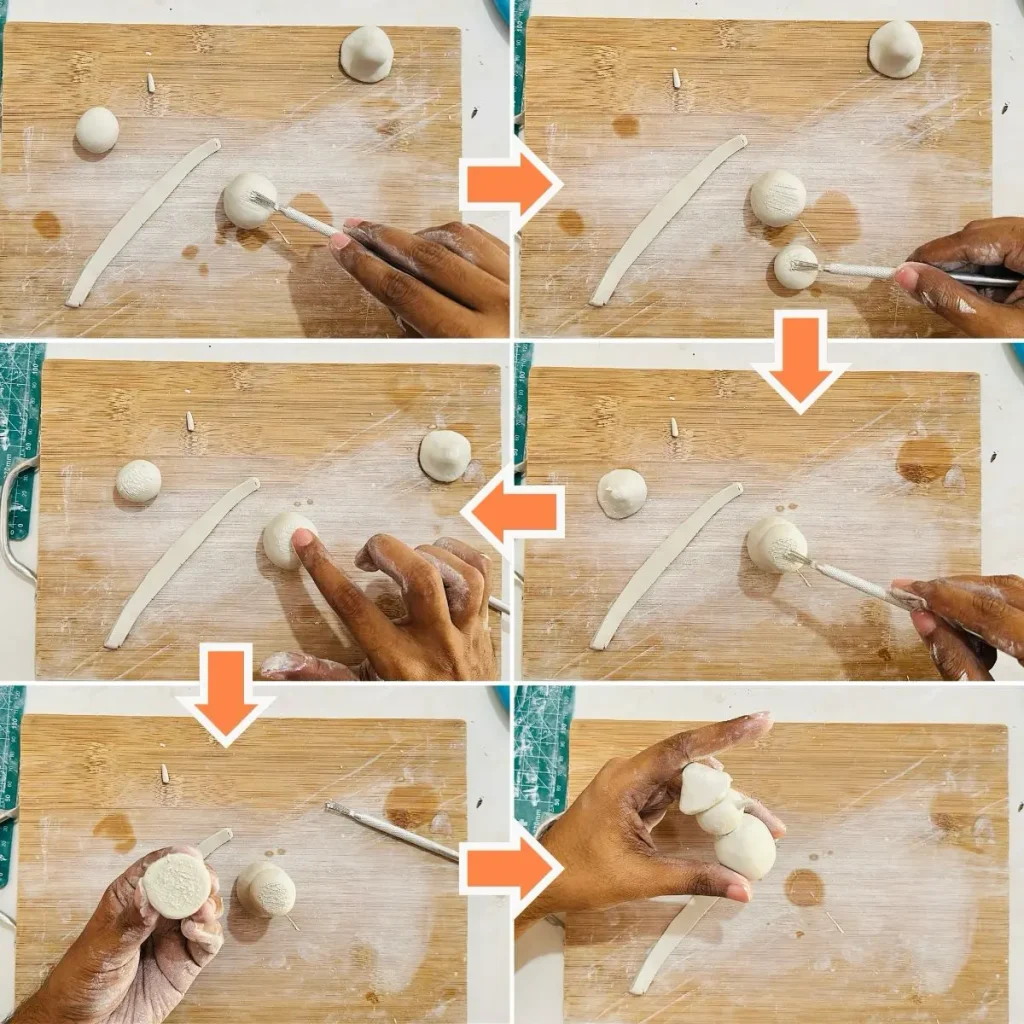
Next make two balls, one should be bigger, which is the belly of our cute snowman and the other one should be his head.
Next, make a cone shaped hat for him. Carefully make it using your fingers. The hat should be pointed.
Finally take a tiny piece of clay and make a carrot shaped nose. 🥕
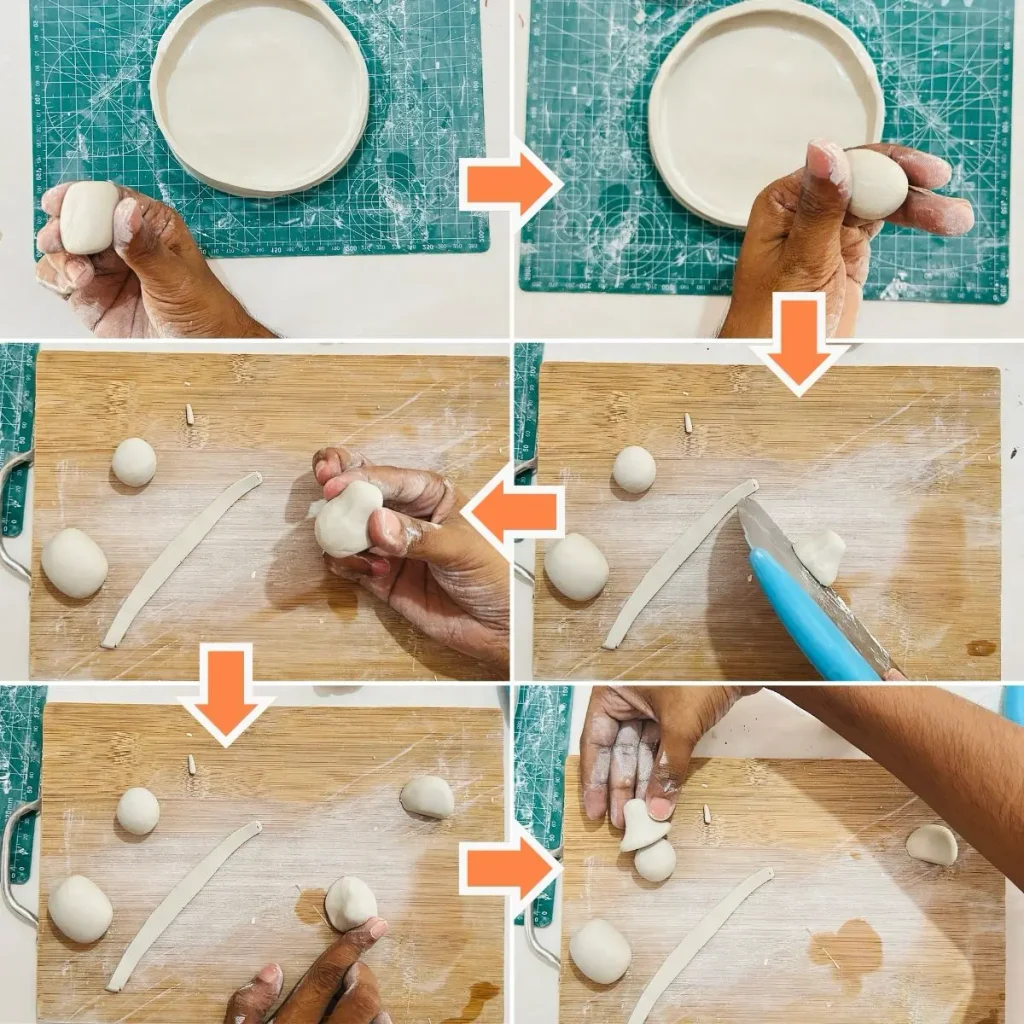
Now use the score and slip method to attach the head to the belly and hat and nose to the head.
First make the head and belly attachment areas a bit flat using my fingers and score both surfaces well. Next I scored the bottom of the hat and the top of the head where the hat was gonna attach.
Since I didn’t have slip paste I tapped the scored surfaces with a little bit of water and attached them. The result was so good.
Congratulations my friend! 🎉 We have successfully made the Christmas snowman trinket dish with air dry clay. What a beautiful job.
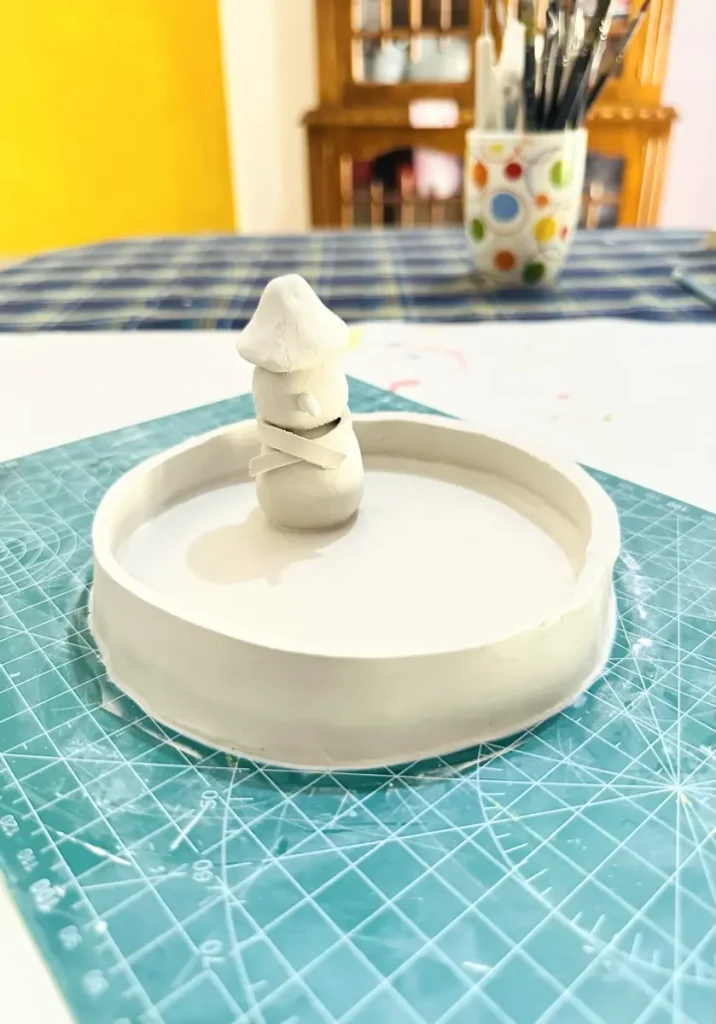
Step 8: Let it dry
Now let the trinket dish you made dry for 48-72 hours. ⏳ Drying time depends on the humidity of your area and the thickness of the clay slabs you made.
However make sure not to paint or seal the project until it dries fully to avoid getting tacky spots and mushy core.
Let the trinket dish dry in a cool, well ventilated area. Never ever place it outside, under direct sunlight or apply a hair blower which can trigger rapid evaporation of water. Rushing the drying process leads to surface cracks because the outside layer of air dry clay dries significantly faster while the inside is still damp.
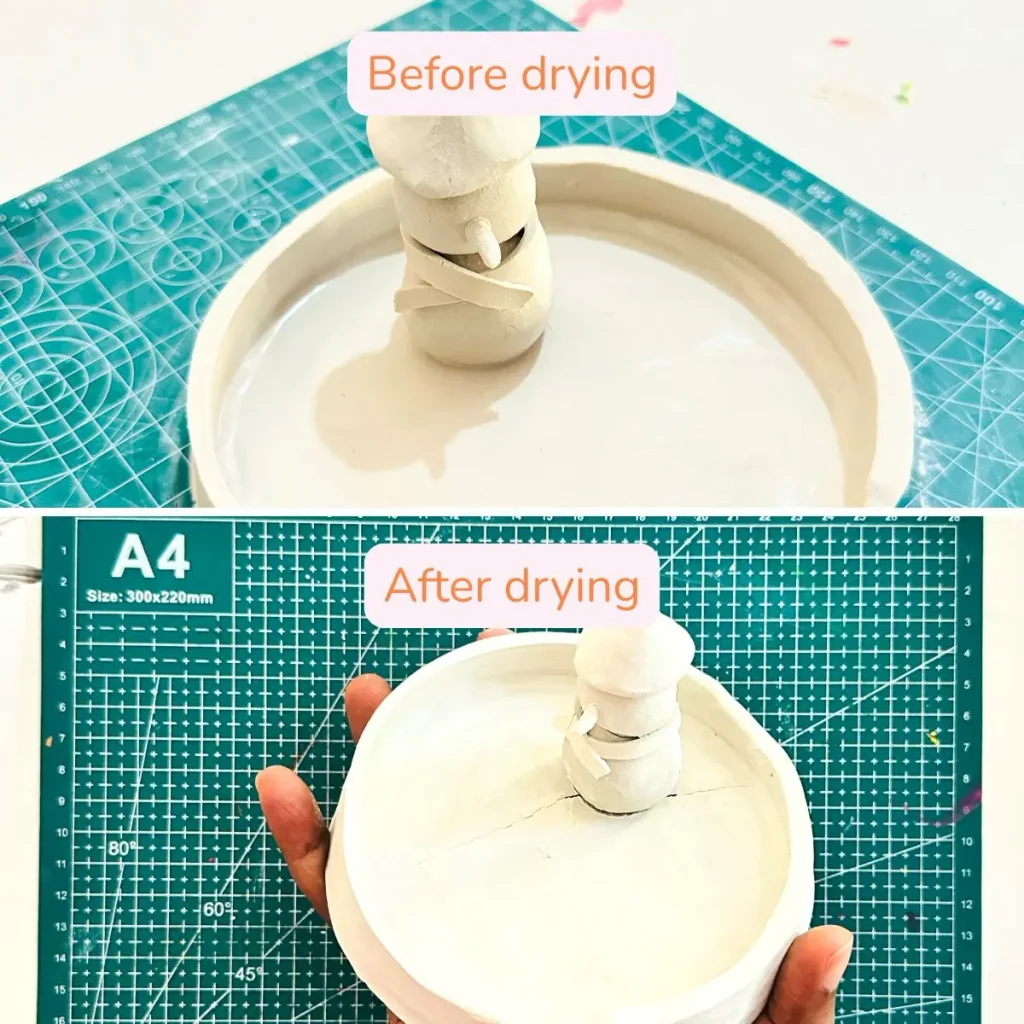
You can identify whether it is fully dried by the color of the surface and by touching. Usually wet air dry clay has a grey off white color and it changes to pure white and more bright white color once it is fully dried.
Plus, wet air dry clay feel cold to touch due to the evaporation of the moisture inside.
Check the surface after 2 days. 🗓️ If you see grey patches, let it dry more for another 24 hours.
However, don’t move into the next step until the dish is fully dried. Patience is the key to success, especially when drying. 🧘
Step 9: Paint the dish
Once the trinket dish is fully dried, you can start painting the project. 🖌️ Since my tray is made for christmas I used white, green and black colors. 🎨
Oh I forgot to tell you, always use acrylic paints for your air dry clay projects because they come in vivid colors, dries fast within 2 hours, no need to mix with water for preparation and most importantly makes a water resistant coating over the project.
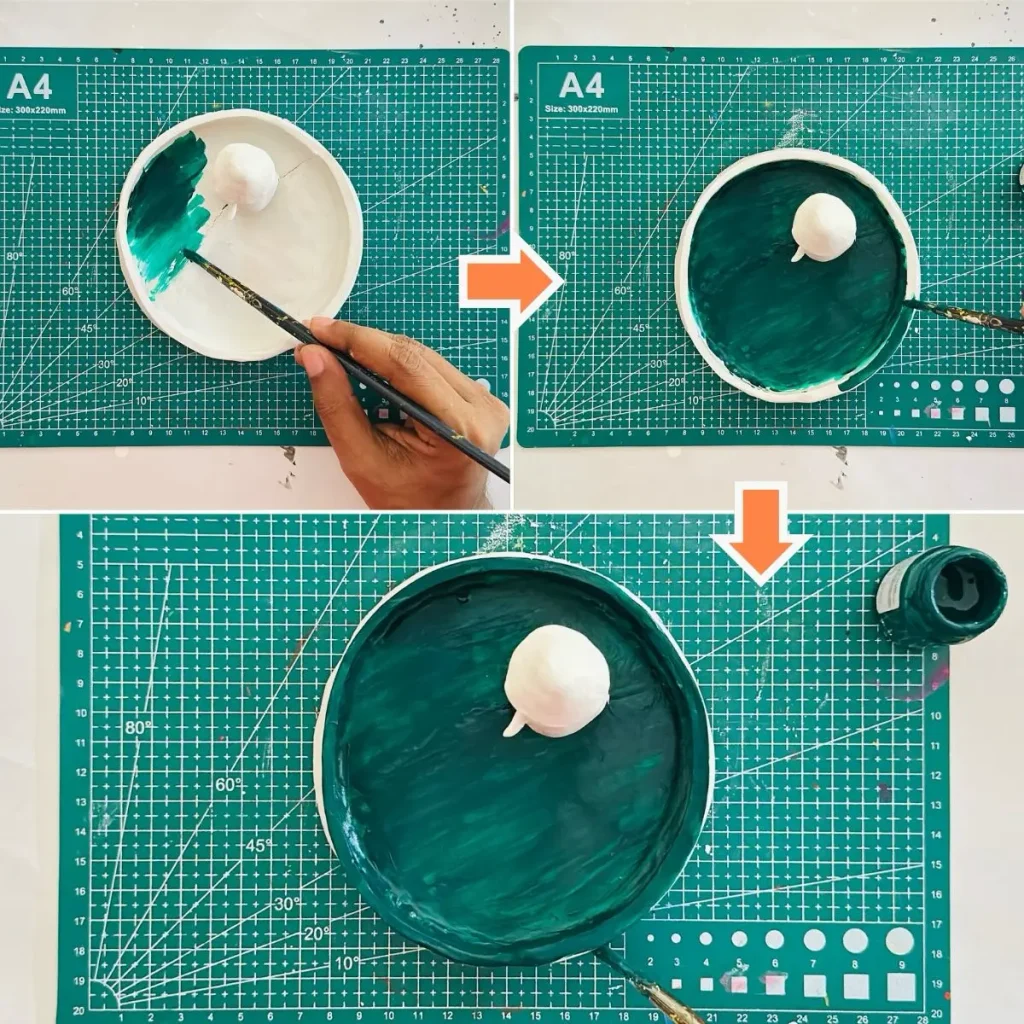
Apply thin and even coats of acrylic in one direction for a nice and smooth finish.
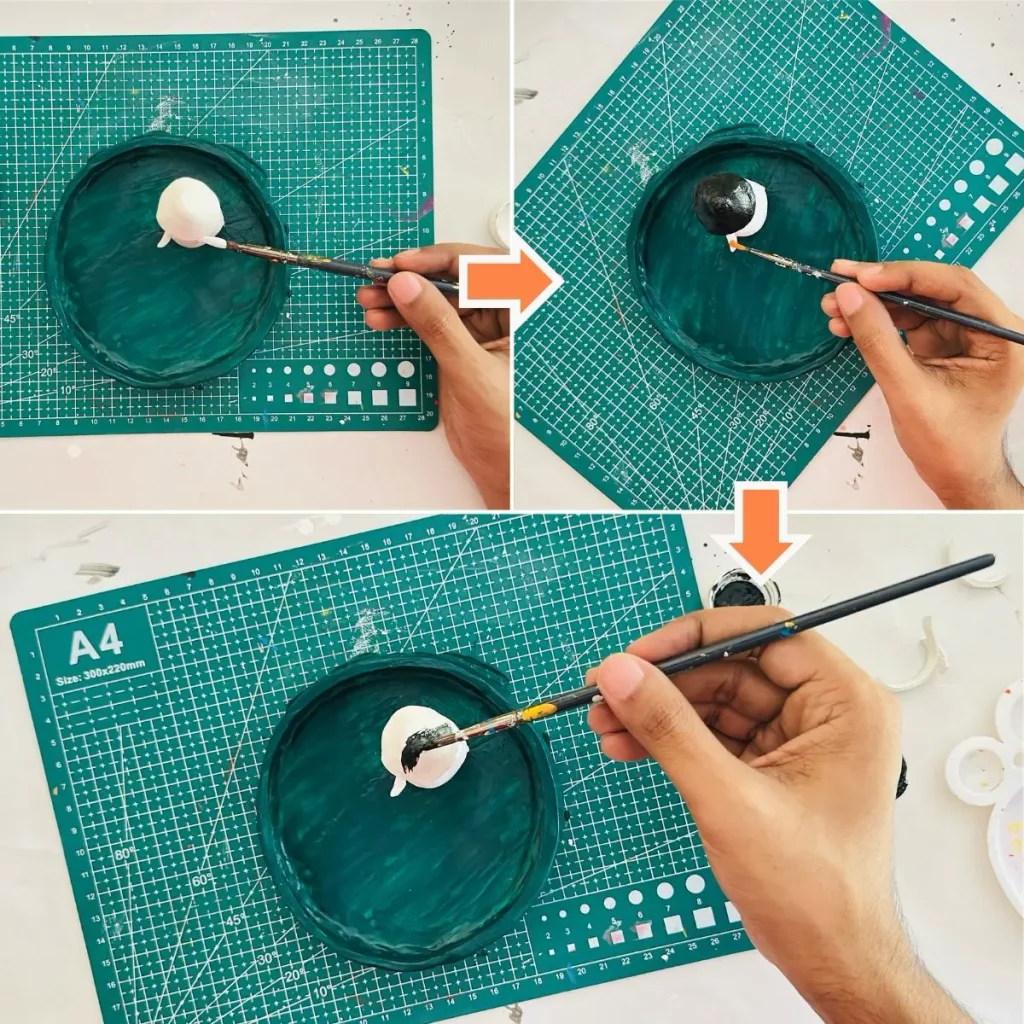
First of all I painted the dish base and rim with green acrylic color.
Next I painted the 3D snowman we built with white color. The hat was painted with black and the carrot shaped nose was orange. Eyes were marked with black.
Finally I did some snowflake decorations on the tray base with white acrylics. ❄️
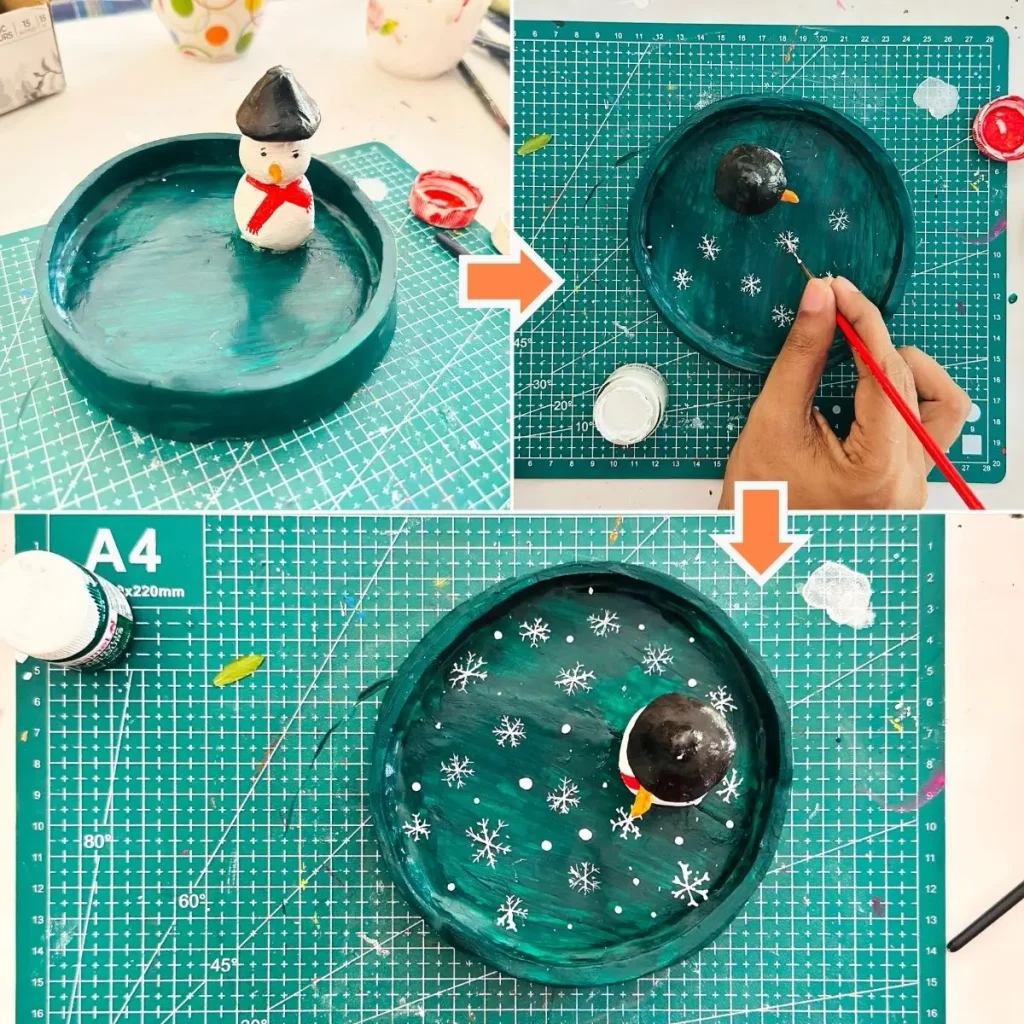
I let each coat of acrylic dry for 2 hours before applying another.
After the final coat, let it dry and cure for 2 hours before sealing.
Step 10: Seal the christmas snowman trinket dish
I used gloss varnish for sealing this dish and the snowman or you can either use UV resin, polyurethane varnish, Mod Podge or epoxy resin if you need a glassy finish. All above sealers protect your item from outside moisture and splashes.
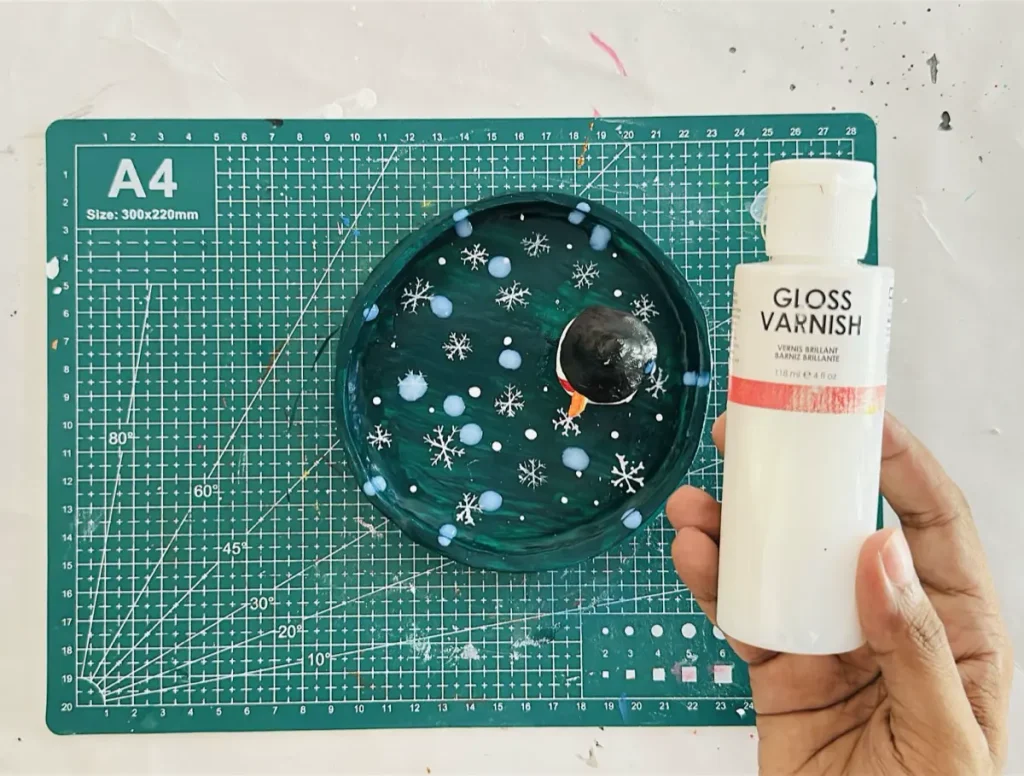
Gloss varnish makes a water resistant coating which helps to protect our clay dish long term. Plus, it provides a glossy ceramic like finish.
Apply 2-3 thin and even coats in one direction and seal the tray completely. Let each coat dry for 24 hours before applying another.
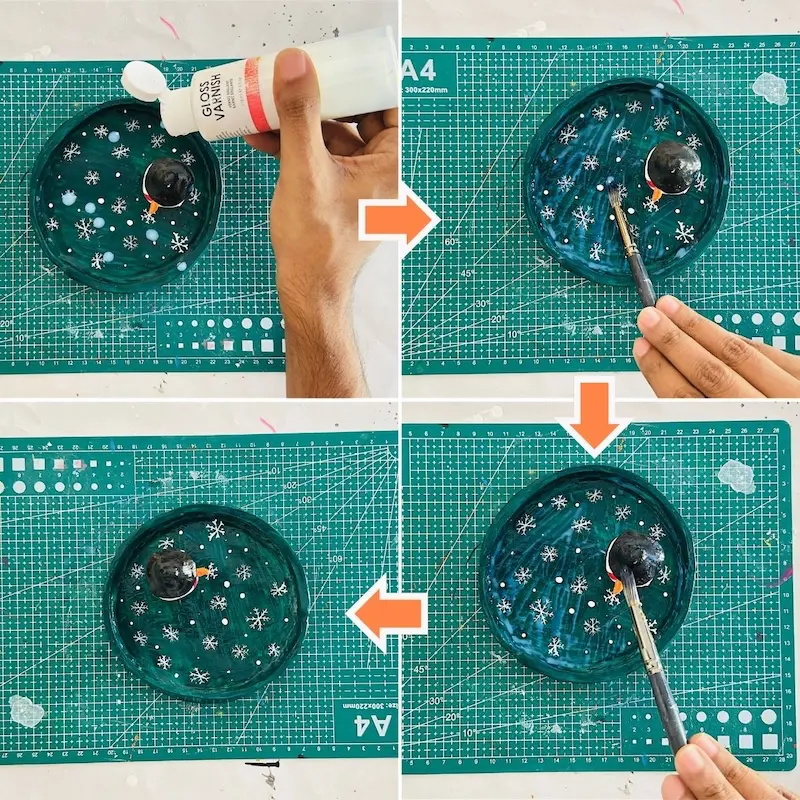
After the final coat, let it dry and cure for 24 hours.
Even after sealing the project, never ever try to place it outside. Air dry clay can’t withstand outside due to the harsh weather conditions like rain and winter. They damage the coat and find a way to sneak inside and damage the tray.
Congratulations ladies and gentlemen! 🥳 We have finally successfully made out a beautiful Christmas snowman trinket dish with air dry clay. Now it’s your time to make your next holiday decor!
Final thoughts
I think I have described every step I did, every tip, trick and technique I followed to make my snowman trinket dish. Trust me it looks so beautiful and images can’t justify that.
Try to make the face of your snowman as cute as possible because my snowman’s face is like he went through a lot. Lol. Just like me.
Place this awesome trinket dish on your Christmas dinner table. 🍽️ I’m sure every guest and family member will appreciate your effort and they might request you to make one for them as well. You can be so proud!
If you found out new techniques or tips while making your dish, don’t forget to leave them in the comments section. 💬 As a community we should help each other.
Also if you faced any troubles while making this, add them in the comments section as well. I’ll try to answer them all asap. Or directly reach out to me through contact@clayandme.com 📧
Be sure to tag @clayandmestudios in your Christmas snowman trinket dish project. I sure love to see them when you do. I’ll see you next time with another awesome project! Cheers! 🤟🏾
DIY Air Dry Clay Christmas Snowman Trinket Dish Tutorial

Supplies Needed
Air dry clay (DAS, Mont Marte, Jovi, or any reputed brand you can find is okay) 🧱
Acrylic rolling pin
PVC mat or silicone mat
Metal jar lid or steel bowl
Clay crafting tools
Clay cutting tool (X-acto knife or small knife)
Cup of water or spray bottle 💧
Acrylic paints (white and black) 🎨
Gloss varnish
Paintbrushes 🖌️
Drawing pen or pencil ✏️
Paper towels
Optional: Sponge or silicone sculpting tool (or you can use your finger 🖐️)
Instructions
1. Knead & Condition
- Soften your clay with a splash of water to prevent cracking later on. 🧱
2. Roll the Slab
- Roll out an even slab between ¼ inch and ½ inch thick, rotating often so it won’t stick. 🥖
3. Cut the Base
- Press down a lid or steel bowl and cut out a circle with small up-and-down knife movements. ✂️
4. Attach the Rim
- Cut a 1-inch strip, score the edges, dab with water, and wrap it around your base. ⭕
5. Reinforce the Joint
- Smooth a thin clay coil along the inner seam to keep the rim firmly attached. 🐍
6. Sculpt the Snowman
- Shape a body, head, cone hat, and carrot nose, then attach using score and water/slip. ☃️
7. Dry Patiently
- Let your piece dry completely in a cool, ventilated space for 48–72 hours. ⏳
8. Paint & Decorate
- Add festive colors using acrylic paint and let dry completely. 🎨
9. Seal & Protect
- Apply 2–3 thin coats of gloss varnish for a gorgeous, water-resistant ceramic look! ✨