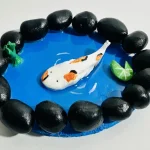
DIY Air Dry Clay Koi Fish Pond
A DIY clay koi fish pond is an excellent home decor project for beginners. You only need simple techniques, such as rolling balls and basic hand-shaping. All without the need for a kiln or baking.
Cost: $6
Materials
Air dry clay (any brand you can find is okay)
Acrylic rolling pin or cooking rolling pin
PVC mat or silicone mat or unsealed wooden cutting board
Clay tools (or use toothpicks)
Clay cutting tool (or small knife)
Fine sandpaper (good to have, but I didn’t have any)
Cup of Water or spray bottle
Paper towels
Optional: Sponge or silicone sculpting tool
Acrylic paint (blue, black, white, crimson, yellow)
Two-part epoxy (resin and a hardener)
Plastic cup
Paintbrushes
Respirator
Paper towels
Instructions
1. Prepare the Tray Base
- Condition your clay, roll it (aim for ¼ inch), and cut your pond shape! ⭕
2. Build Clay Rocks
- Make little clay balls and attach them around the edge using the "score and slip" method. 🪨
3. Shape the Koi Fish
- Shape a smooth, streamlined fish. Keep it simple! 🐠
4. Add Pond Plants
- Attach your clay plants and lily pads with score and slip. 🍃
5. Let it Dry
- Let your creation dry for 2 days in a cool, ventilated spot. 🌬️
6. Paint Time
- Paint your pond and fish. Focus is key! 🎨
7. Seal the Clay Koi Fish Pond
- Mix your resin (don't forget the hardener!) and pour to create that beautiful water effect. Let it cure for 24-48 hours. 🌊
Video
Notes
- Please read blog post in its entirety for more tips + tricks.
Don't forget to tag @clayandmestudios with your creations! Cheers! 🤟🏾