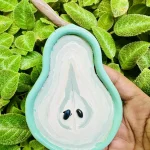
DIY Air Dry Clay Pear Trinket Tray
Learn how to craft an adorable, beginner-friendly pear trinket tray using air dry clay! Follow this simple, step-by-step DIY guide!
Materials
Air dry clay (DAS, Mont Marte or any reputed brand you can find is okay)
Acrylic rolling pin
PVC mat or silicone mat (or non-stick surface)
Clay crafting tools
Clay cutting tool (X-acto knife or small knife)
Cup of water or spray bottle
Acrylic paints
Gloss varnish
Paintbrushes
Paper towels
Optional: Sponge or silicone sculpting tool (or you can use your finger)
Instructions
1. Prepare & Knead the Clay
- Wet your palms slightly and knead your clay for 3–5 minutes. Don’t over-water it, or you’ll risk surface cracks later! Kneading helps distribute moisture evenly.
2. Roll the Clay
- Roll to a ¼-inch thickness. Remember to flip and rotate your clay frequently—this prevents a "vacuum seal" between the clay and the mat, which stops it from tearing.
3. Cut the Pear Tray Base
- Trace your pear shape, then cut along the lines. Clean your knife blade often to remove stuck clay; it helps you get those nice, sharp edges!
4. Attach the Tray Rim
- Roll a "snake" for your border. Use the "score-and-slip" method (scratch the surfaces and add a dab of water) to bond the rim to the base securely.
5. Add Cute Details
- Sculpt your stem and seeds. After attaching them, use a damp finger to smooth out any seams so they look seamless and natural.
6. Dry Slowly
- Let it dry for 48–72 hours in a ventilated spot. Flip it occasionally to prevent warping. If you see grey patches, it’s still wet—keep waiting!
7. Paint 🎨
- Apply 2–3 thin coats of acrylic paint. Tip: Brush in one direction to avoid streaks and tacky spots. Let each coat dry for 2 hours.
8. Seal & Protect the Tray 🛡️
- Finish with 2–3 thin coats of gloss varnish for a professional, water-resistant shine. Let each coat cure for 24 hours.