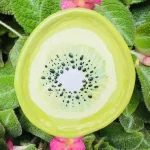
Easy DIY Kiwi Trinket Tray with Air Dry Clay
Ready to bring this adorable craft to life? Below is a quick, handy summary card covering everything you need, from supplies to step-by-step instructions, so you can easily follow along or save it for later! 🥝
Materials
Air dry clay (DAS, Mont Marte, Jovi or any reputed brand you can find is okay)
Acrylic rolling pin
PVC mat or silicone mat (or non-stick surface)
Clay crafting tools
Clay cutting tool (X-acto knife or small knife)
Cup of water or spray bottle
Acrylic paints
Gloss varnish
Paintbrushes
Paper towels
Optional: Sponge or silicone sculpting tool (or you can use your finger)
Instructions
1. Condition & Knead the Clay 🤲
- Take fresh air dry clay, add a tiny bit of water, and knead using push-pull-press motions (like pizza dough!) until soft. This removes air pockets and prevents cracking later.
2. Roll the Clay Slab 🪵
- Roll clay to an even ¼-inch thickness. Rotate and flip the slab repeatedly to prevent sticking. Smooth away tiny surface cracks using a wet finger.
3. Trace & Cut the Kiwi Base 🥝
- Freehand draw an organic egg/oval kiwi shape onto the slab. Carefully cut along the lines, lifting the knife frequently to clean off clay residue.
4. Roll & Attach the Rim 🥣
- Roll a thin clay snake for the rim. Score (scratch) both the edge of the base and the rim, apply water/slip, and press them together firmly. Cut rim ends at an angle to join smoothly.
5. Reinforce the Joint ⭕
- Roll a super thin clay coil and smooth it into the inner joint where the rim meets the base. This keeps your tray from cracking or separating as it dries.
6. Add the Seeds & Core Details 🖤
- Mark the central core (loculus area). Roll tiny clay balls for seeds and attach them in a radiating ring pattern around the center using a dab of water.
7. Dry Slowly ⏳
- Let the tray air dry in a cool, ventilated area for 48–72 hours. Avoid heat or direct sunlight to prevent cracking. Wait until the clay turns pure white!
8. Paint the Fruit Colors 🎨
- Apply 2–3 thin coats of acrylic paint: outer rim & edge in deep green, inner flesh in pale green, central core in white, and seeds in black. Let dry for 2 hours.
9. Seal for Protection 🛡️
- Apply 2–3 thin coats of gloss varnish (letting each coat dry for 24 hours) to make your tray water-resistant with a shiny ceramic finish!