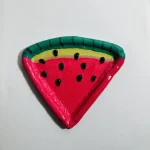
Watermelon Trinket Tray
Welcome to your clay journey! Here’s the simple roadmap to make your own watermelon tray without the stress. You’ve got this! ✨
Materials
Air dry clay (any brand you can find is okay, I used Mont Marte)
Acrylic rolling pin or cooking rolling pin
PVC mat or silicone mat (or non-stick surface)
Clay tools (or use toothpicks)
Clay cutting tool (or small knife)
Cup of water or spray bottle
Acrylic paint (crimson, black, white, green)
Gloss varnish
Paintbrushes
PVA glue
Scissors
Paper towels
Optional: Sponge or silicone sculpting tool (or you can use your finger)
Instructions
1. Knead the clay
- Spend 3-5 mins kneading with a little water until soft like dough. Gets those air bubbles out! 🫧
2. Roll the clay
- Aim for ½ inch thickness. Remember to flip, turn, and rotate your clay often so it doesn't stick!
3. Trace & Cut the tray base
- Don't go freehand right away! Trace your shape first, then cut. It saves you from so many "oops" moments. 🔪
4. Make the tray rim
- Roll two long "clay snakes" for the edges. Use the score and slip method (scratch, add water, press) to attach them.
5. Reinforce the tray base and rim joint
- Add a thin clay coil along the inside of the rim to keep everything sturdy. Smooth it out with your finger and water. 💧
6. Make watermelon seeds
- Make tiny teardrop seeds separately. Let them dry for 2 days while the tray dries.
7. Let it dry
- Let it chill for 48 hours in a cool, well-ventilated spot. No direct sunlight—we want it dry, not cracked! ⏳
8. Paint
- Use thin, even coats of acrylics. Paint in one direction for that smooth, professional look. 🎨
9. Attach watermelon seeds
- Once everything is dry, use PVA glue to stick those cute seeds on.
10. Seal the tray
- Protect your masterpiece with 2-3 coats of gloss varnish. Let it cure for 24 hours.