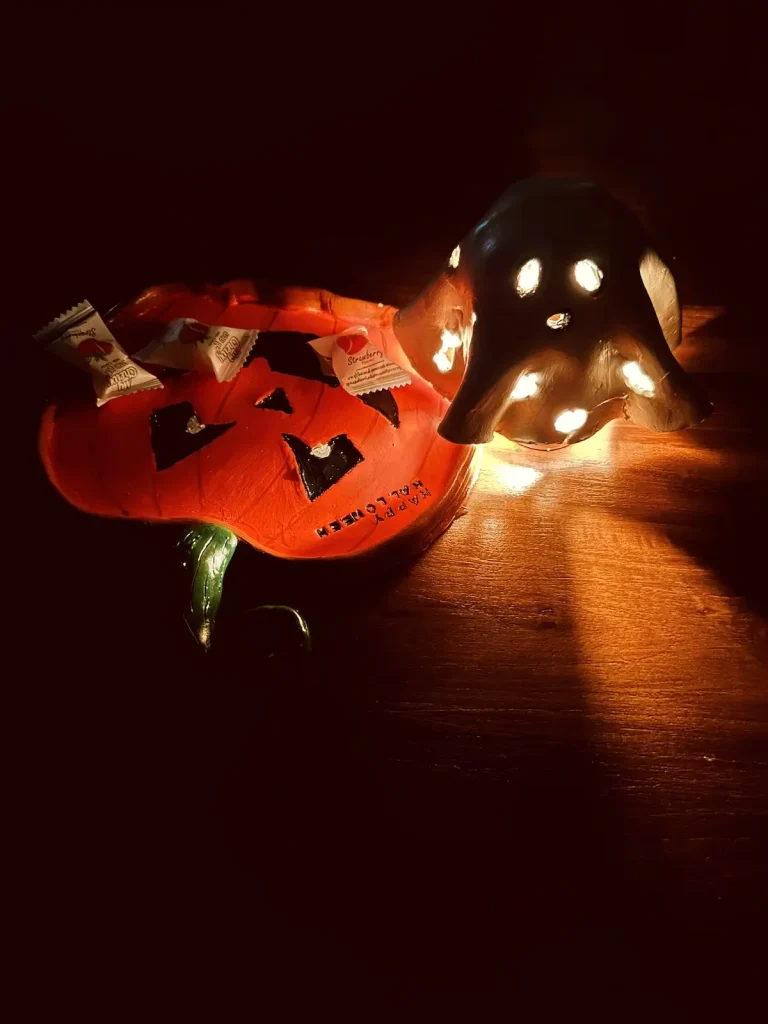
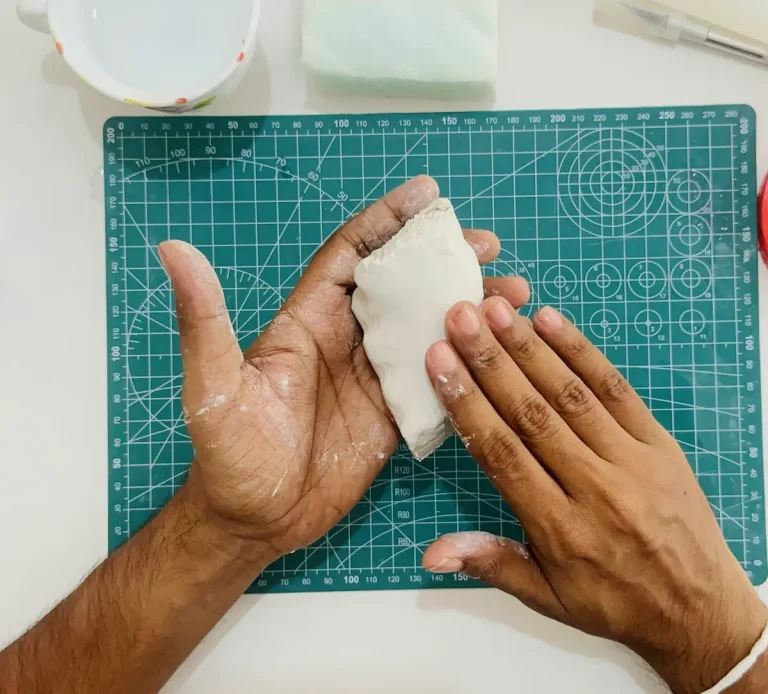
I’m interested in fruits these days 🍎. Not just fruit, they are fruit inspired air dry clay projects. So, when I was scrolling through TikTok, I saw a bunch of beautiful fruit trinket trays made of air dry clay. Some are strawberry shaped 🍓, some are banana-shaped 🍌, some are papaya and many more.
But from all of them, I really loved the avocado one, because it has a pit in the middle and it looked awesome.
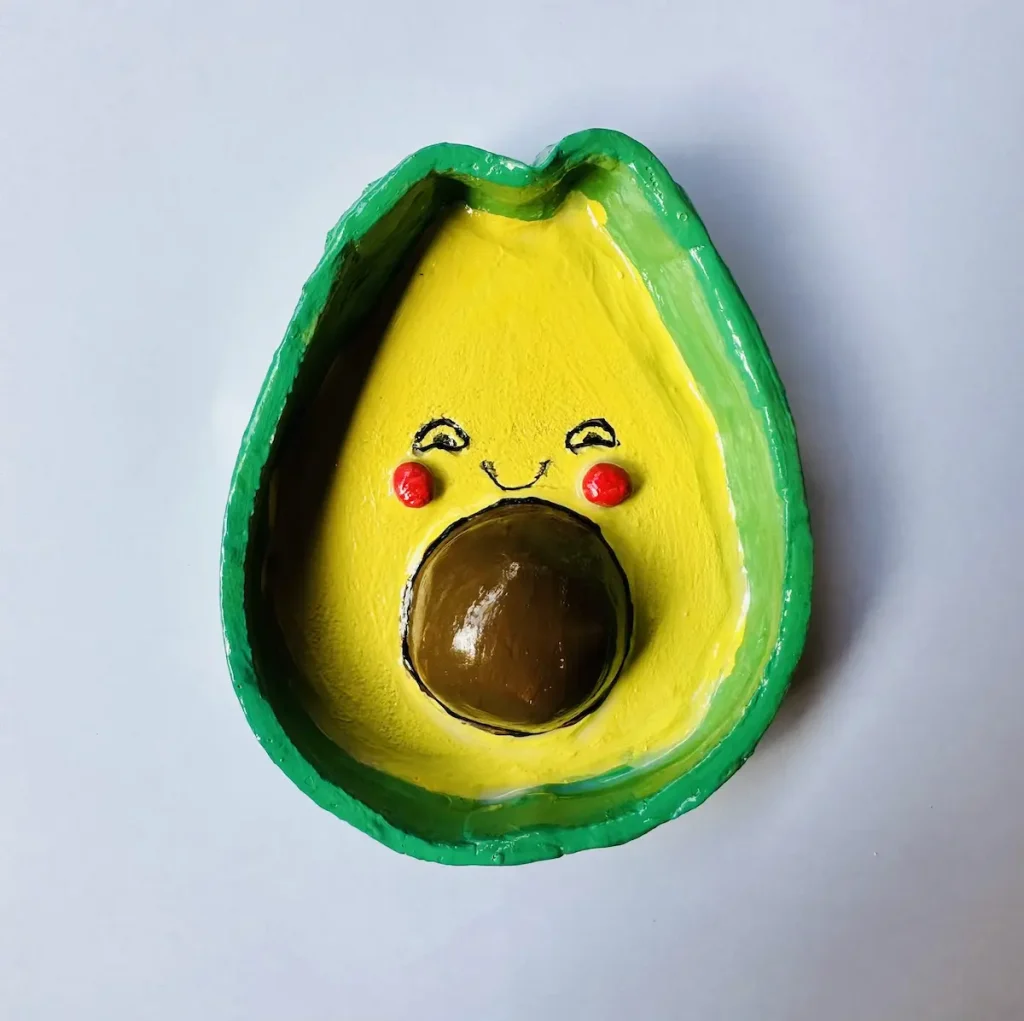
So, I grabbed a piece of air dry clay and started making one. Oh! I forgot to say, this is my second trinket tray project and my fourth air dry clay project. Therefore, pardon me if this looks ugly or I did something wrong during the process 🛠️.
But as a beginner who is still improving skills, I’d love to tell you what simple, beginner-friendly techniques I used when making this, what I used and how you can make a similar or better one than this.
Sometimes it’s better to learn from a person who is still a beginner and has the courage to improve than from an expert because we understand nothing what they teach due to the steep learning curve.
As a beginner myself, I vividly remember the exact roadblocks you are facing right now. Haha. We are both in the same boat and speak the same language. The only difference is, I made an avocado trinket tray first lol.
Ok! Stop chatterbox! Let’s start making!
Why this avocado clay dish is the perfect beginner project
I thought of making this avocado tray only because it looked so beautiful and cute. But when I was making the project, I realized that, as a beginner, this is one of the best projects for me.
First and foremost air dry clay is the best beginner friendly clay. It is cheap so you don’t have to worry much about the wastage (because during beginner stages, we waste a lot), no kiln or baking needed, easy to reshape during an error by using a bit of water 💧. Simple as that!
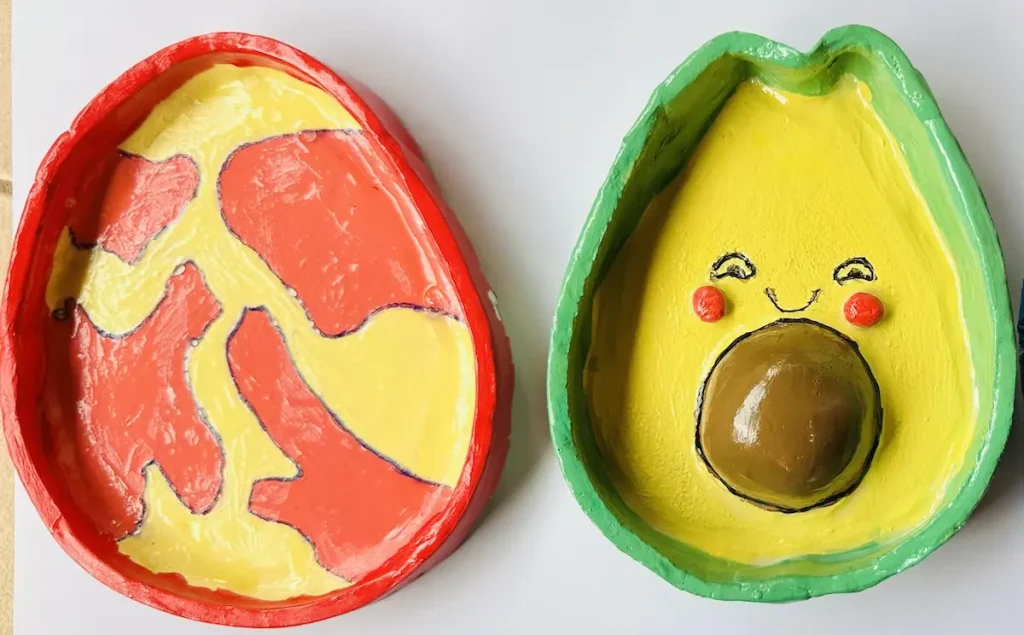
Because during the process, you’ll learn how to condition the clay which is obviously the first most important lesson in air dry clay.
As beginners, we are really bad at drawing, especially drawing on a clay surface. So, I found an easy technique to do that using my phone. That’s a plus point I can use even in my future projects.
I was able to learn how to shape it, cut it and most importantly, how to attach the avocado shaped tray base to its rim using a clever technique.
And after making I learned what paint I should use for this and how to paint, how to draw fine details, and finally how to seal the project for the long term protection. All those little but important skills were learned during this project.
Plus, this avocado clay dish project does not have difficult things, just simple shapes and cuts. So, why can’t we call it the perfect project for beginners? Of course we can.
Supplies you’ll need
If you couldn’t find any of the supplies below, don’t worry, use an alternative one. I did the same when I lacked tools. Just don’t stop anything that makes you down ✨.
Supplies for making and shaping
- Air dry clay (any brand you can find is okay. I used Mont Marte)
- Acrylic rolling pin or cooking rolling pin
- PVC mat or silicone mat or an unsealed wooden cutting board
- Clay tools (or use toothpicks)
- Clay cutting tool (or small knife)
- Fine sandpaper (good to have, but I didn’t have any)
- Cup of water or spray bottle
- Paper towels
- Optional: Sponge or silicone sculpting tool (or you can use your finger)
Supplies for painting and sealing
- Acrylic paint (black, white, crimson, brown, green, yellow)
- Gloss varnish
- Paintbrushes
- Paper towels
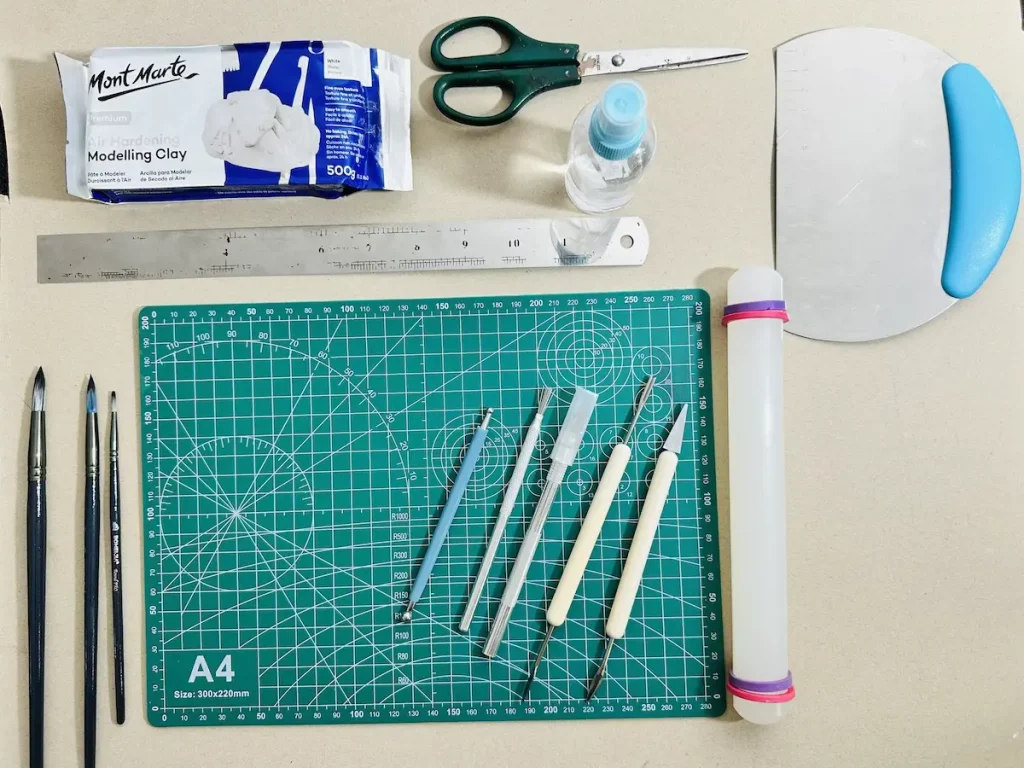
Tip: make sure to use PVC mat or unbleached cotton canvas or duck cloth fabric, because they are the best to avoid air dry clay from sticking to the table.
Easy diy avocado trinket tray tutorial video
Below is the full tutorial video on how to make this diy avocado trinket tray with air dry clay, and how I painted and sealed it. I’ve included every technique I used, mistakes I made and how I fixed them in detail.
Now let’s see the detailed written step by step tutorial.
Making the air dry clay avocado trinket tray
Grab the above tools, materials and go to a well ventilated area (open all the windows in your room 🪟). Wipe your mat because we don’t want our air dry clay gets dusty.
Step1: Condition and knead the clay
First, cut a piece of air dry you want for the project from the big chunk using the cutting tool or knife. If the clay isn’t enough, you can always add more after a little preparation to the main project.
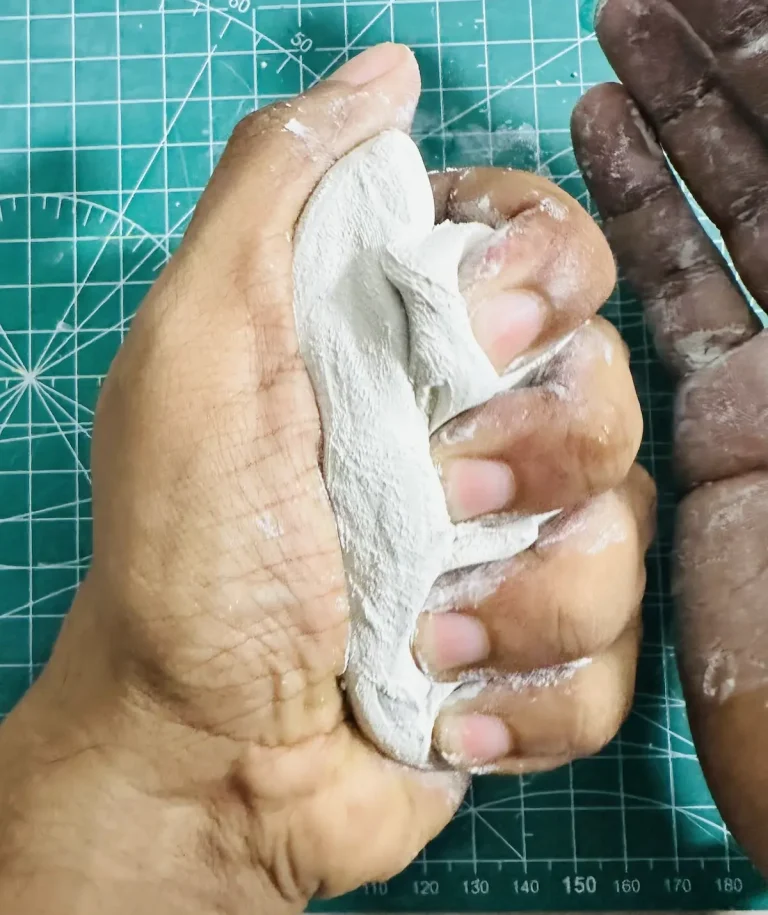
Now, start conditioning the clay. First, add a little bit of water onto the clay surface and onto your palms and knead the clay like a dough.
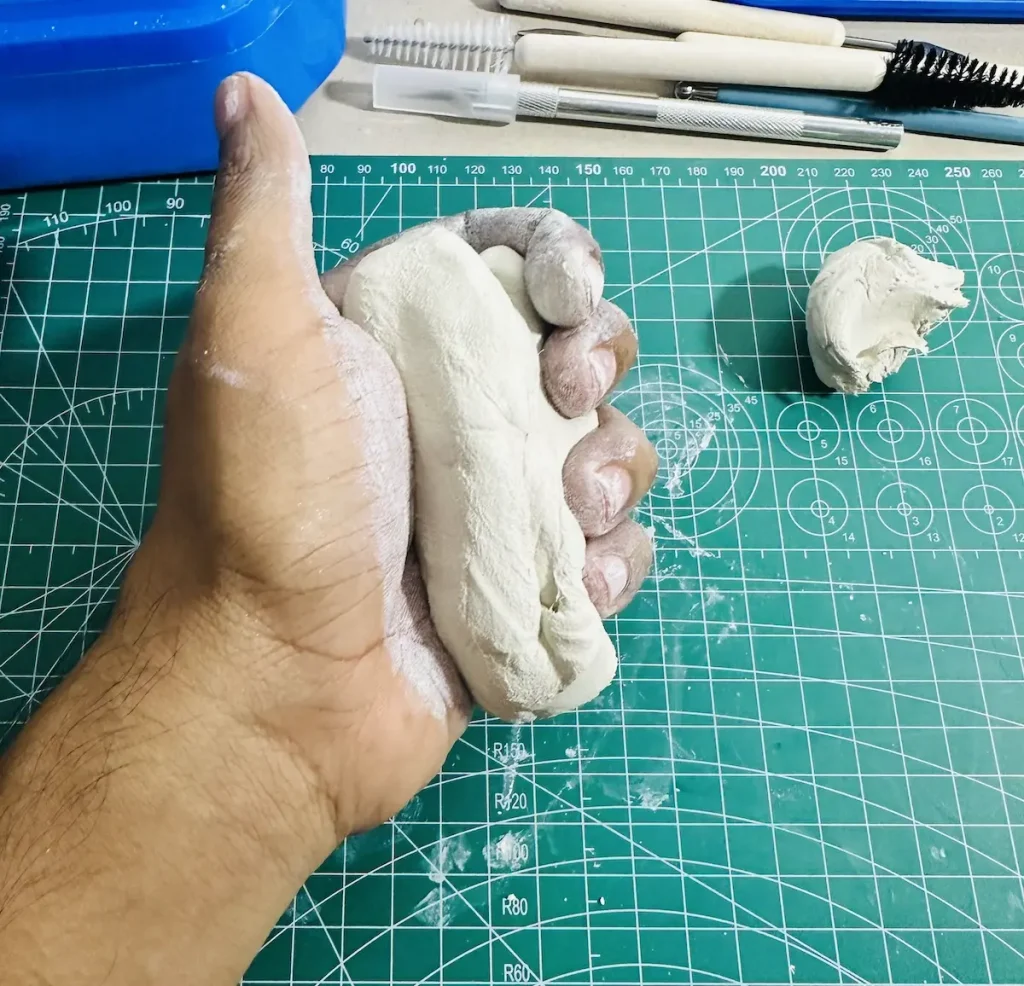
Just think you are making a pizza 🍕. Keep kneading until air dry clay become super soft. Your hands will feel that, If it’s still too hard after several kneading rounds, add little more water and knead again.
Make sure not to wet your air dry clay with too much water because upon drying water evaporates and shrink the clay. So, more water means more shrinkage and if it gets uneven, clay will start to crack. We don’t want that to happen. Therefore, little water is the perfect amount when working with air dry clay.
When you’re kneading the clay, the air bubbles that trapped inside air dry clay release out, which is a good thing because otherwise they form bubbles during the painting step and form cracks upon drying the project.
Step 2: Roll the clay
After kneading the clay thoroughly, place it on your mat/work table and roll using the rolling pin.
Make sure to flip, turn and rotate the clay 90 degrees while you are rolling the air dry clay to stop it from sticking to the table.
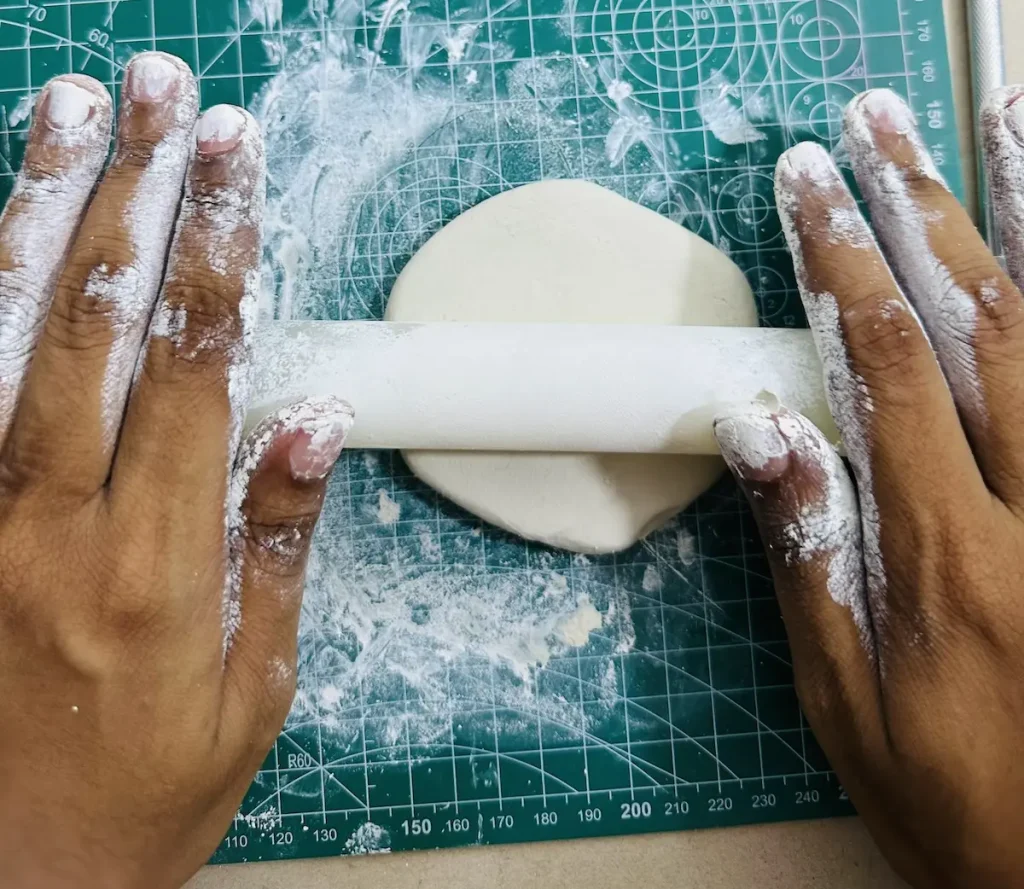
I just kept rolling and rolling during my first trinket tray project and ended up clay sticking to the surface. When I lifted the clay up after rolling, it cracked because it was stuck. I had to restart and do the rolling step several times I learnt the lesson the hard way. So, don’t be like me, mate.
Roll clay to an even thickness because tray base you are making should have the same thickness everywhere. You can use acrylic guide rulers for that. I used rubber rings around the rolling pin as guides.
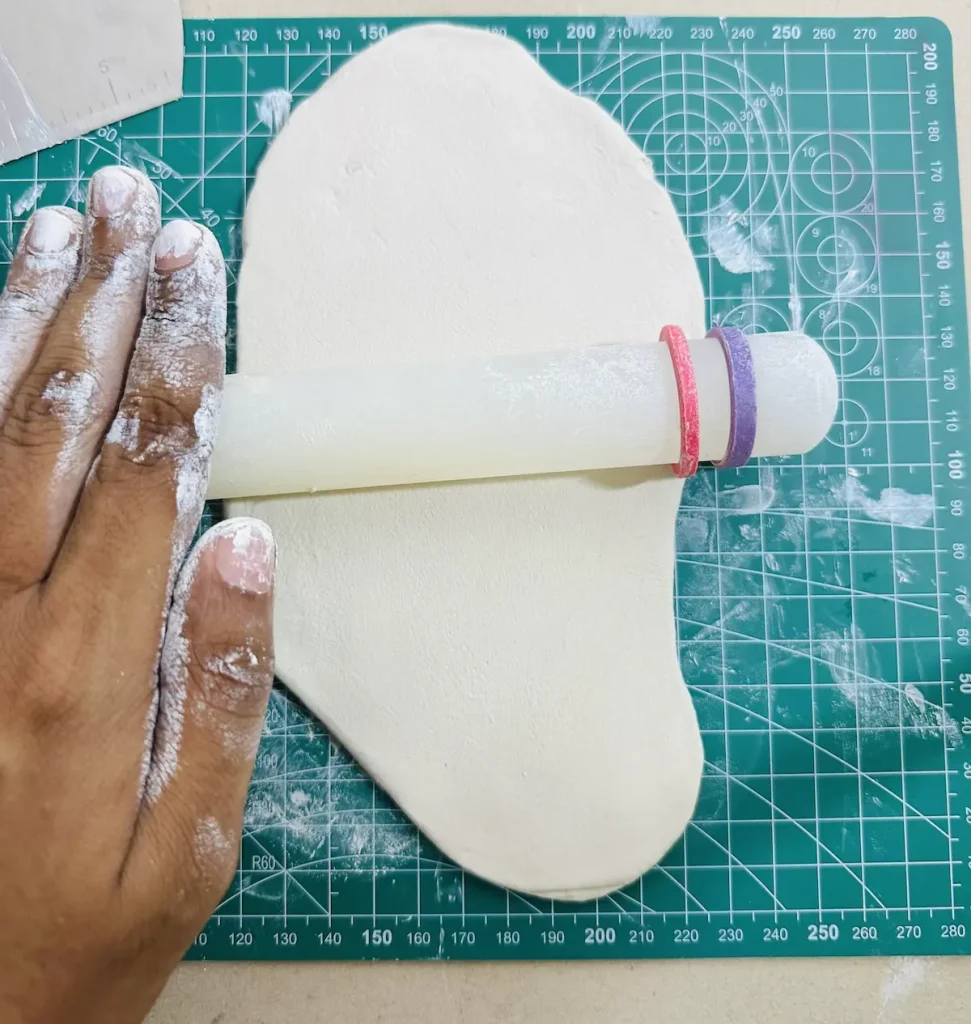
I tried to get ½ inch thickness for the tray base. But you can take any thickness you want, but dont roll too thin because too thin tray bases tend to crack quickly.
Step 3: Cut out the avocado base
After making a flat, even thickness clay piece, its time to cut the shape of the tray base.
As I told you earlier, I’m bad at drawing and I’m trying to improve it.
Therefore, to trace the design onto my clay, I used an AR drawing app on my phone. By positioning my phone over the clay, I was able to view the avocado image through the screen and trace the lines directly onto the clay surface.
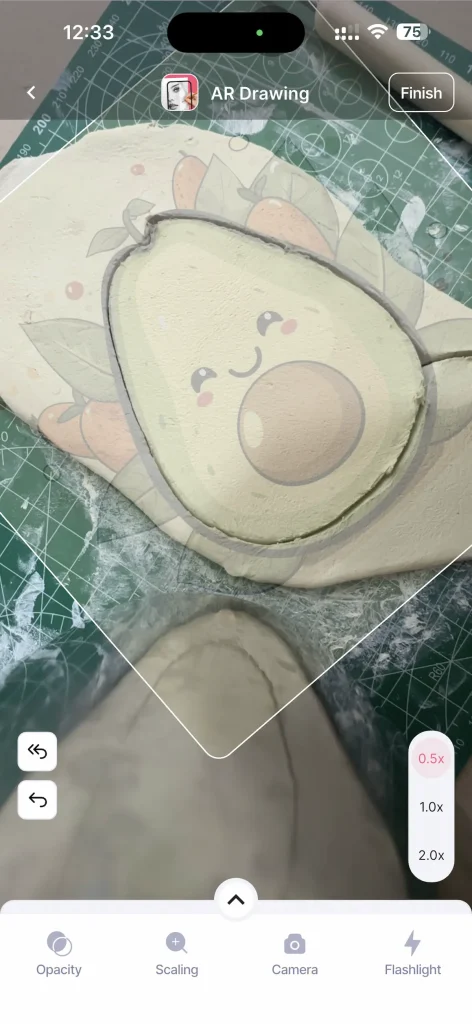
I know this sounds a bit confusing, but look at the above picture. That’s how I did it. You can use any AR drawing app for this. This is not a sponsored post. I just saw this method on Instagram lol.
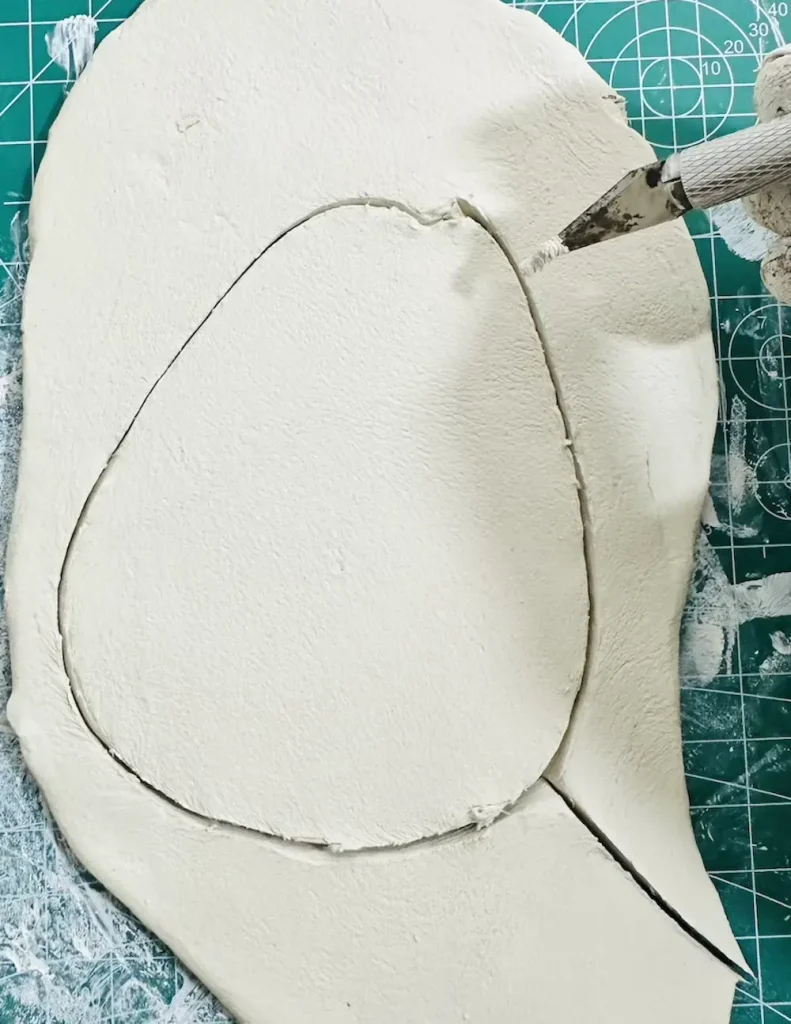
After tracing the lines, I cut out the pear shaped avocado base with the cutting tool and it came out so good. I even detailed its eyes, cheeks and mouth as well. Plus, separated an area in the middle for the avocado pit/seed 🥑.
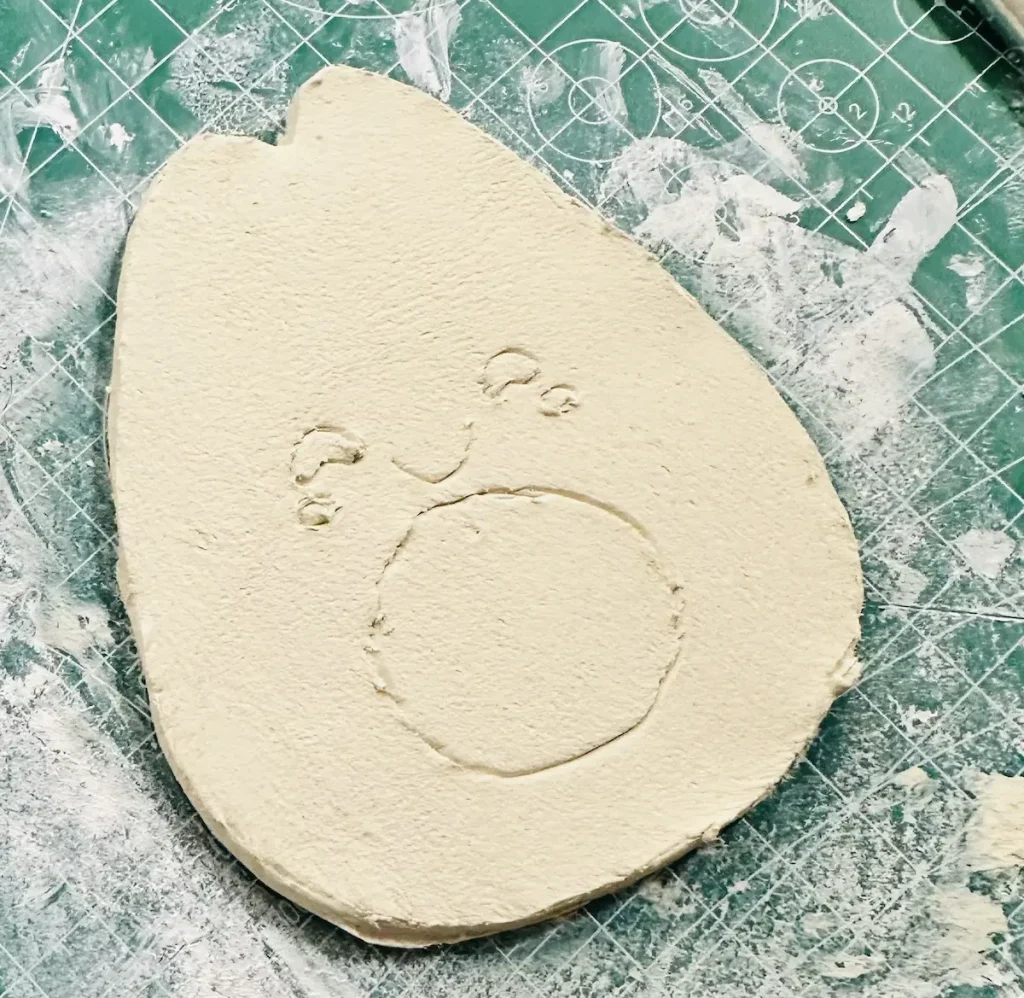
Step 4: Make and attach the tray rim
I took the removed clay after making tray base and knead them to make one clay piece. Then I rolled it to an even thickness.
I followed the same ½ inch thickness for making the tray rim as well. Then I cut the same width and approximately the same length clay pieces to make tray rim. They were like thin lines.
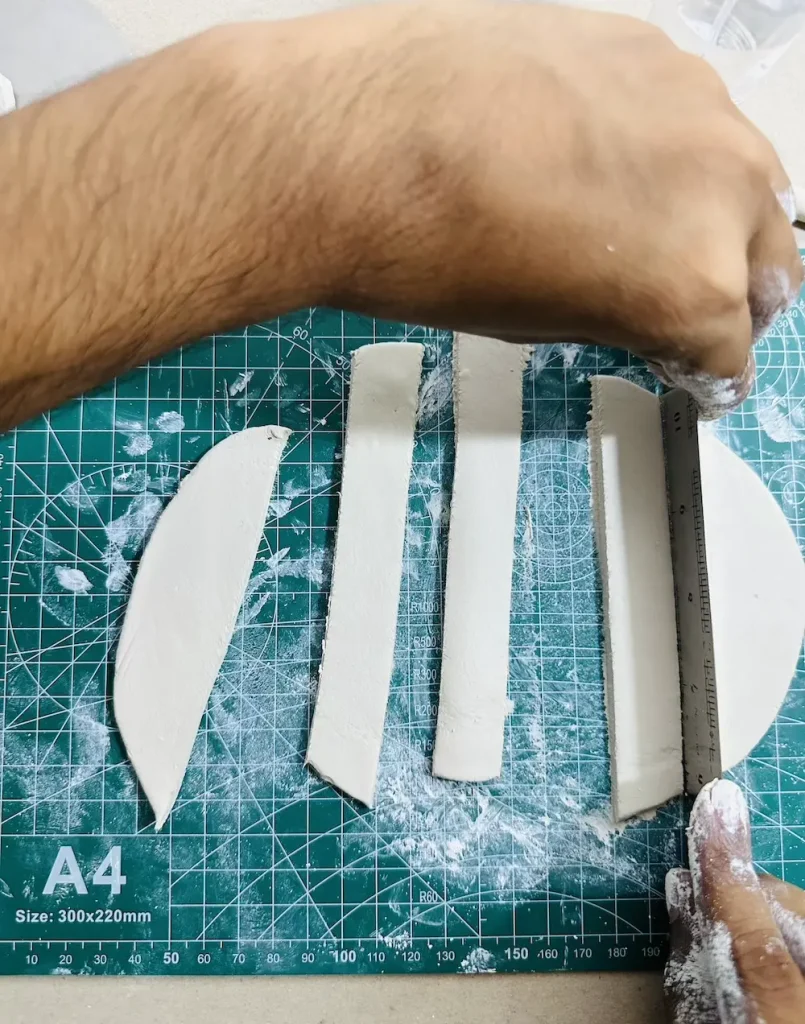
In order to attach tray rims I made to tray base, I used “score and slip” method.
Score and slip method is the best attaching technique in air dry clay world.
In the score and slip method, you first score both clay surfaces using the tool or with a toothpick and then tap those scored surfaces with a little bit of water or a mixture called slip. Then gently press those surfaces together. Now they have a place to grip and for better adhesion. Therefore, upon drying, those attached clay pieces won’t break due to that string bond.
Slip is a mixture you can make by mixing air dry clay with water in a 1:1 ratio. It works as a glue. Or you can use just water. Both are fine.
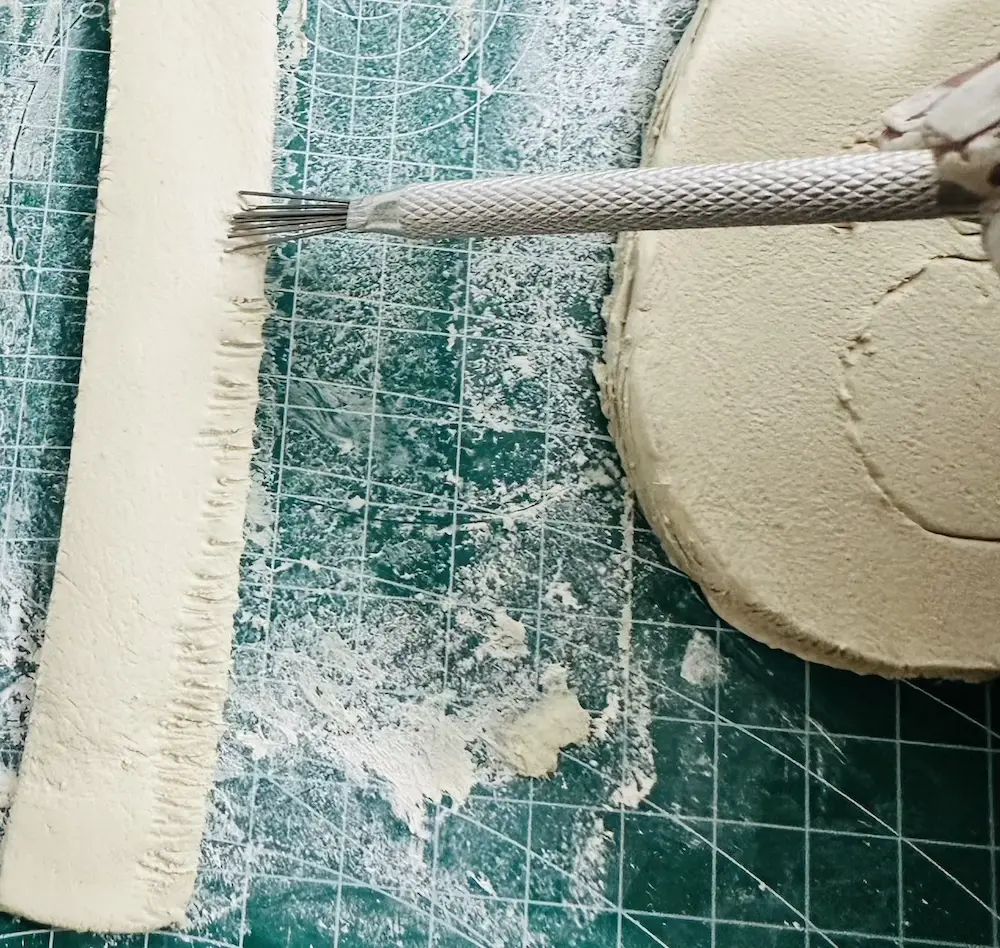
First, you need to score along the edge of the avocado tray base. This is where the rims attach.
Then score the bottom area of one side of the tray rims. Then dip your finger in water and wet the scored surfaces by tapping.
Then quickly place the tray rims and tray base together, touching those scored areas and gently press them. Please be gentle. We don’t want to deshape the rim and base.
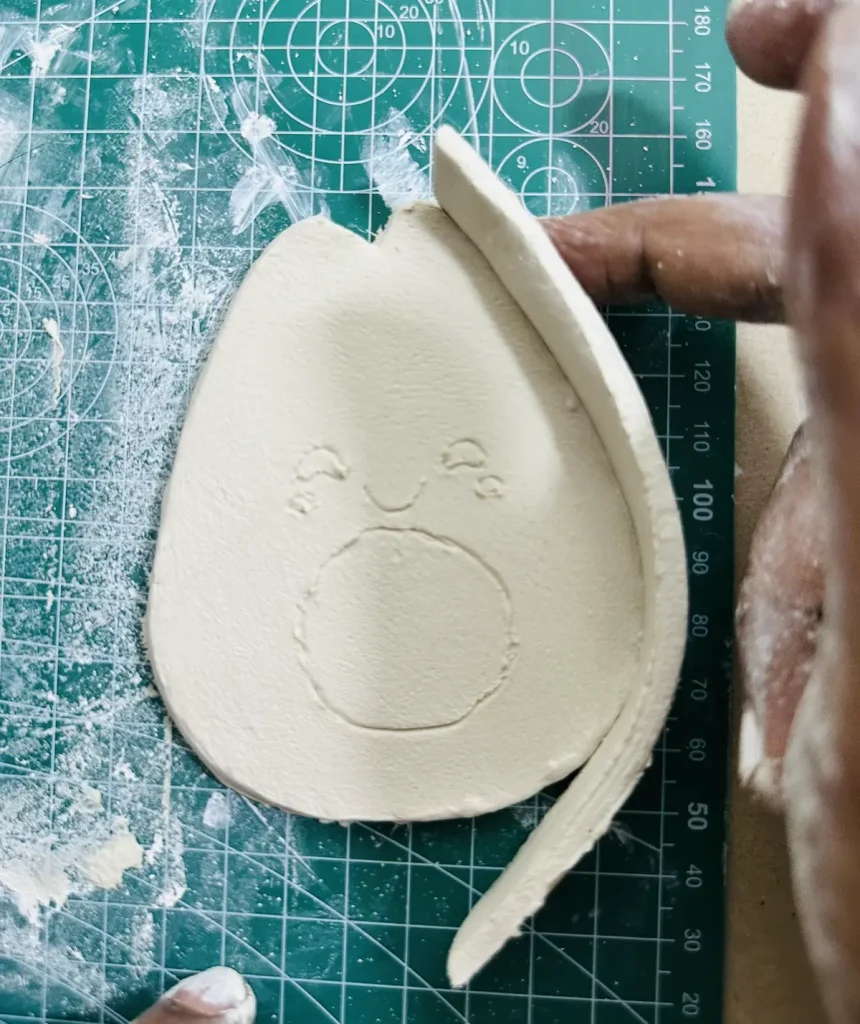
I made a bad mistake when attaching the tray rim to the base. I started at the bottom because it was straighter, but that made it difficult to connect the rim pieces later. Since the top of the avocado shape has a sharper curve, trying to join the ends there was challenging. To avoid this, I recommend starting to attach your rim from the top curve, or even better, roll out one long strip for the rim, attach it continuously, and trim the excess at the bottom.
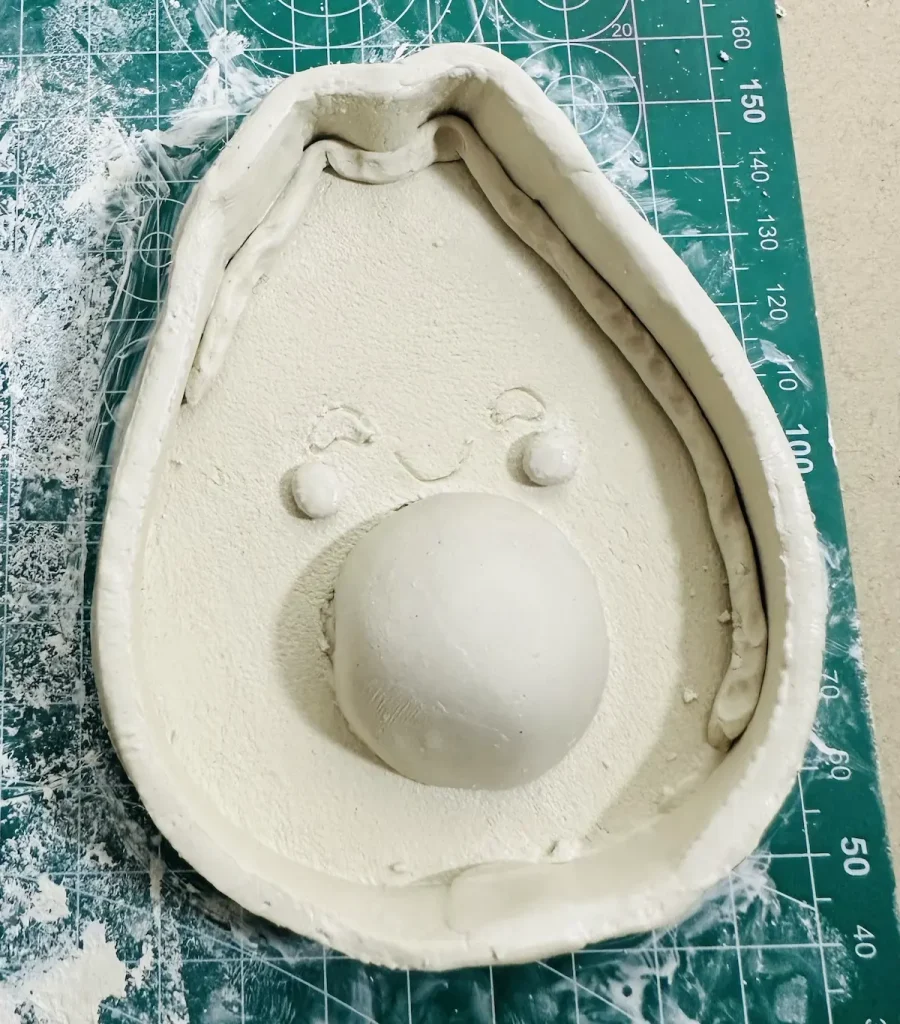
After attaching tray rim to the base, I rolled a very thin air dry clay coil seam and placed it along the bond of the tray rim and base and gently pressed along the joint. Then smooth and blend it with the clay using water and your finger.
Now the tray base and tray rim combo is done. I dipped my finger in water and slide all over the avocado tray base and rim to make the surface and edges smooth to leave no finger marks and scratches.
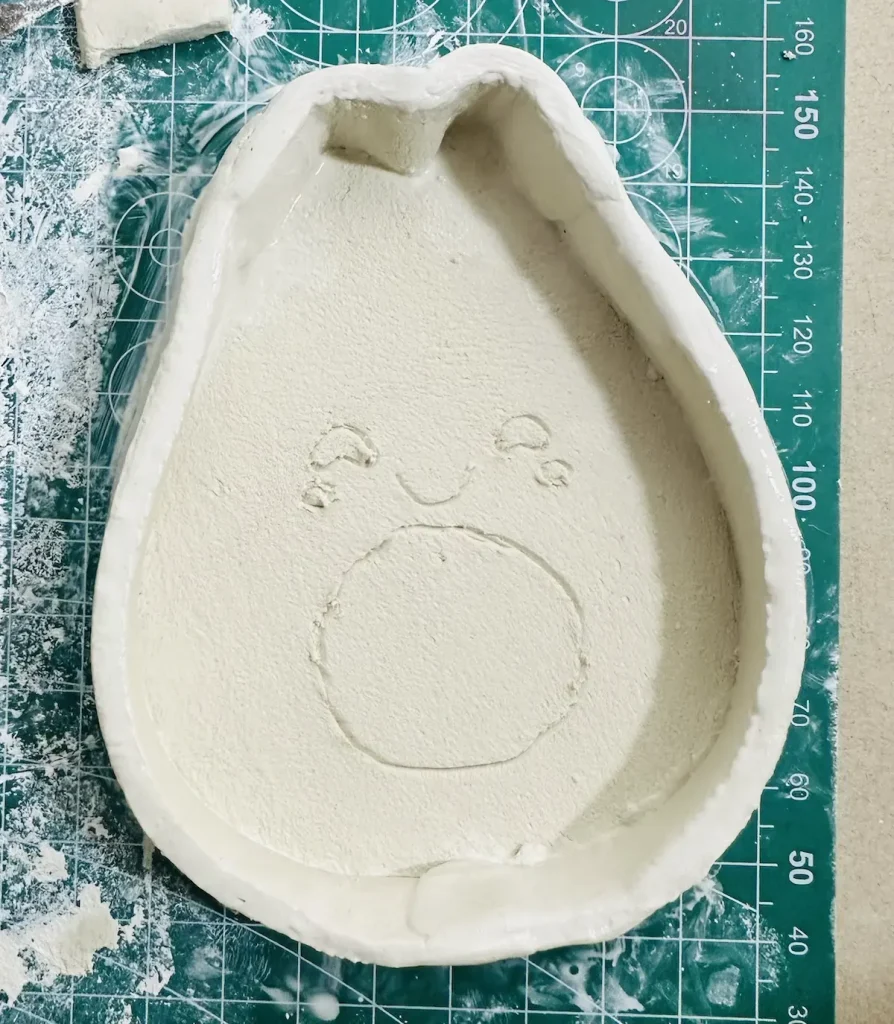
Then I placed the tray aside to focus on the pit.
Step 5: Sculpt and attach the pit
I took a small piece of air dry clay, kneaded it well and made a ball. Then placed that ball over the area I separated earlier for the pit in the tray. Then I made a size adjustment and got the size I want 🟤.
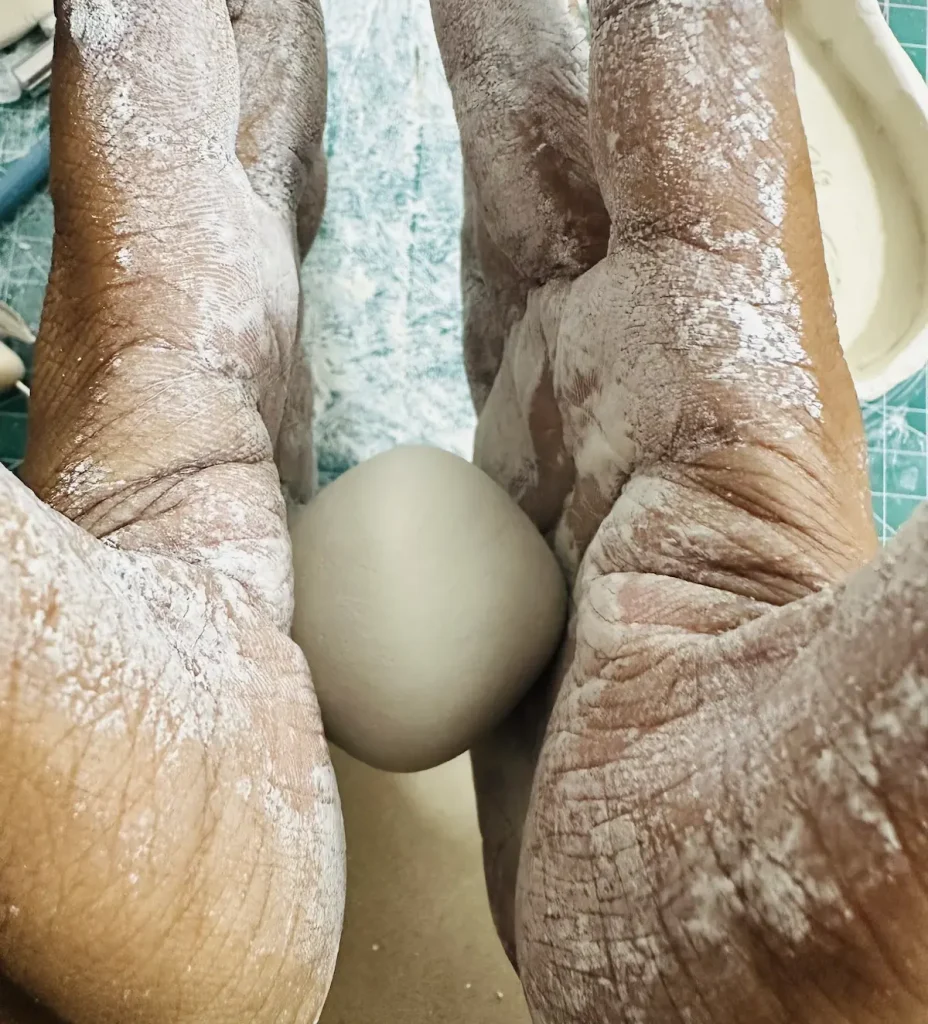
Next, I took my cutting tool and cut the ball in half. I think it gives a good 3D look to my avocado tray.
Then I used the score and slip method. I scored the bottom flat surface of the ball and the middle area of the tray, tapped with bit of water and pressed the ball gently to the tray base middle.
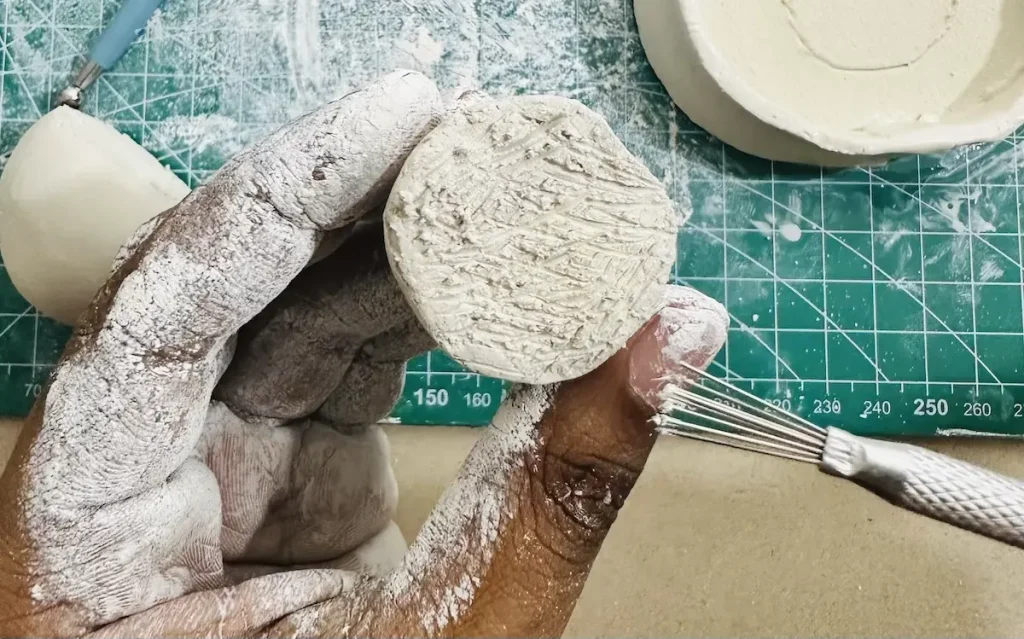
That came out so good. By adding that type of pit, you can use it to hold rings. Nice right?
Congratulations! Now you successfully made an avocado trinket tray as wished.
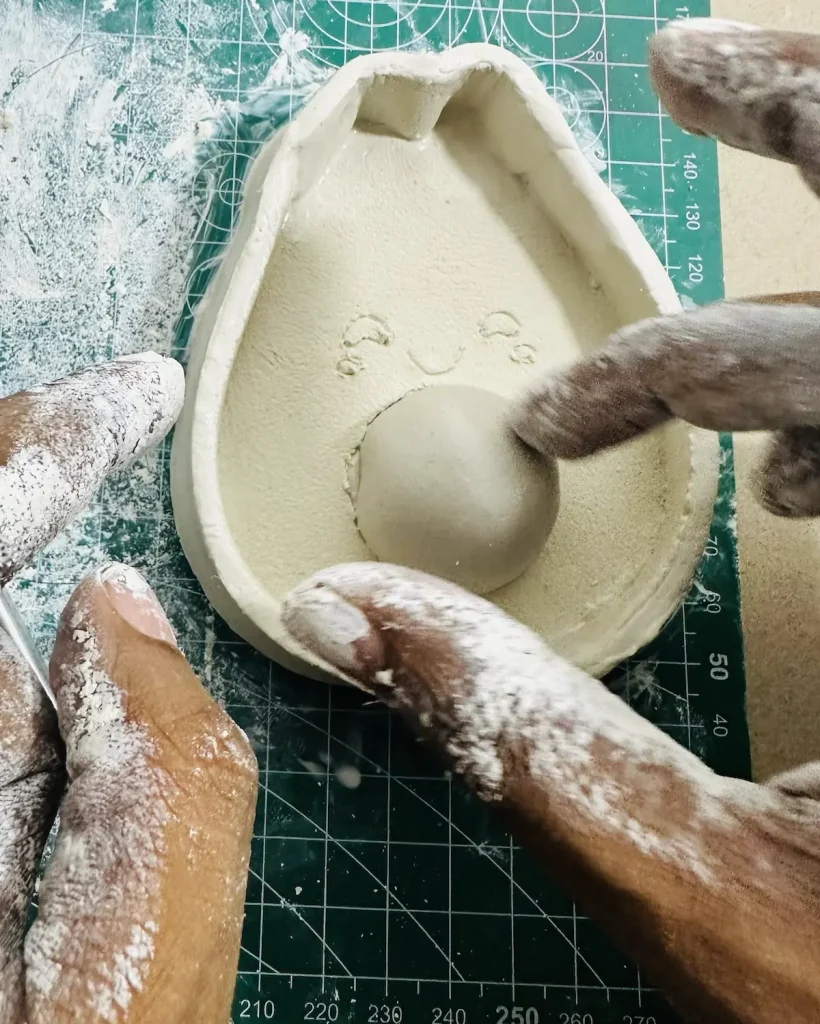
Make sure to smooth the whole surface again using your fingertips after dipping them in water to avoid imperfections and for a nice look.
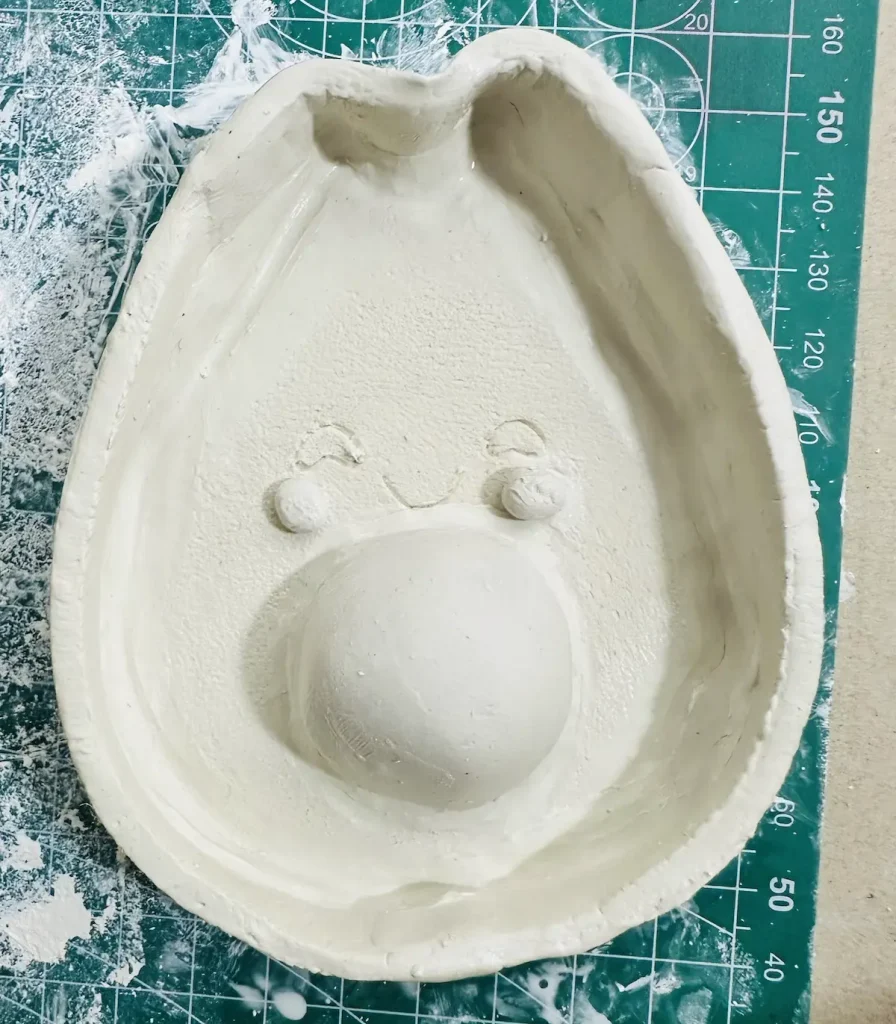
Step 6: Let the avocado trinket tray dry
Now let the tray you made dry for 24-48 hours in a cool and well ventilated area. This timeframe can be longer if your clay thickness is high or when the humidity in your area is high.
After 48 hours look if there are wet looking grey patches on the surface. If yes, let it dry for another 24 hours and check.
Never ever take it for painting until fully dried. Remember that! Air dry clay dissolve if you paint the project when it is still wet.
Plus, make sure not to place it in the sunlight because fast drying can cause uneven shrinkage and it can warp and crack the surface.
If you are happy with the result after drying, now it’s time for the decoration part with some paint. No one likes plain ash white, an undetailed tray, right?
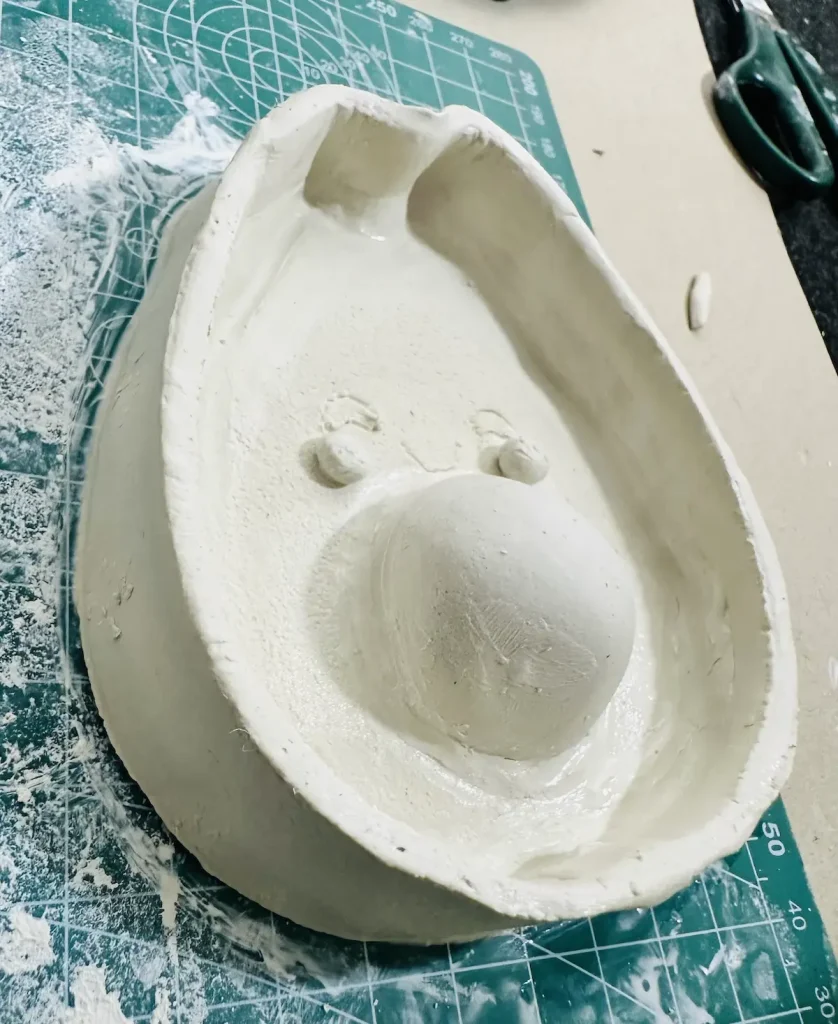
Tip: Optional but better if you can sand the whole air dry clay project with a fine grit sandpaper once it is fully dried before painting. Sanding helps to remove fine scratches, cracks and bumps on the surface. It makes the surface smooth which is good for painting.
Step 7: Painting your avocado trinket tray
Clean the whole tray well with paper towels before you start painting. I used acrylic paint. Acrylic paint is known as the best paint for air dry clay projects due to several reasons, such as,
- They come in vivid colors and give a shiny look
- Acrylic paint makes a water-resistant coating over air dry clay, which stop moisture and air bubbles inside the clay from reaching and reacting with the top sealer.
- Acrylic paint does not need lot of water like watercolors because applying a paint that contains a lot of water can weaken and dissolve the air dry clay.
Therefore, try your best to go with acrylic paint.
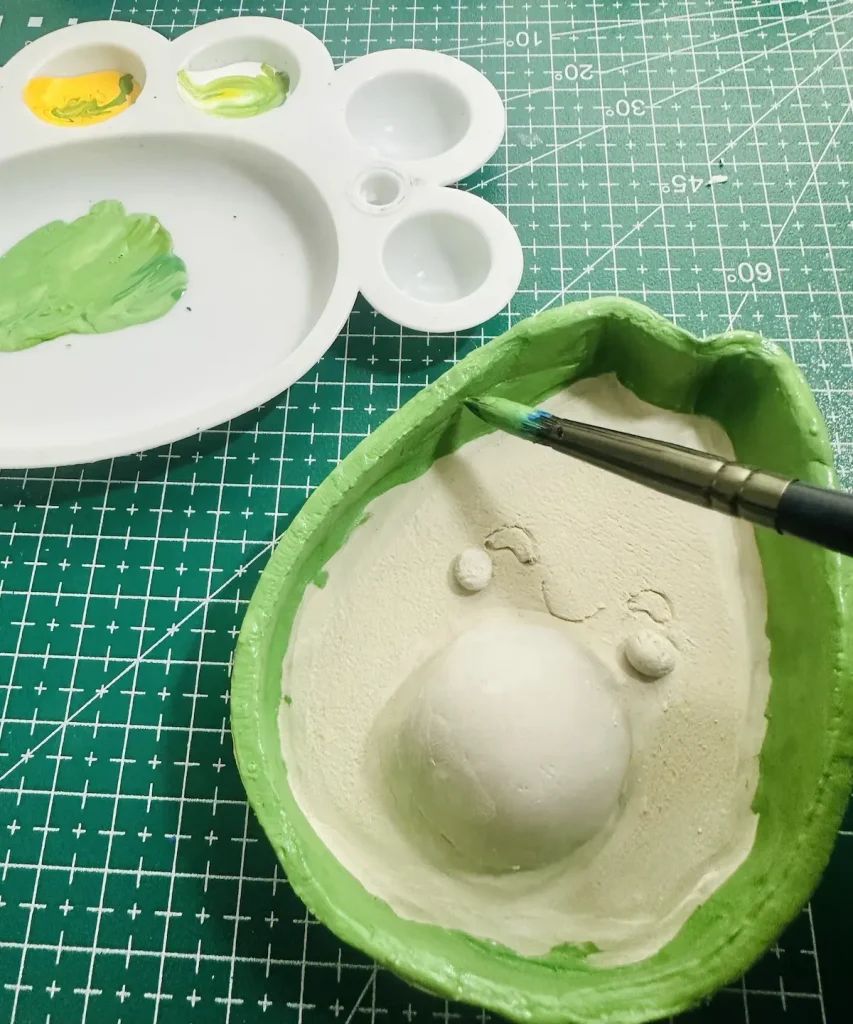
I started painting the outer rim of my avocado trinket tray first. But never make that mistake! When you paint the tray rim first, where you can hold it when you’re painting the pit, eyes and mouth? You’ll have to wait till acrylic paint you applied on the tray rim dries fully before painting the other layers. Still, fingerprints can be left.
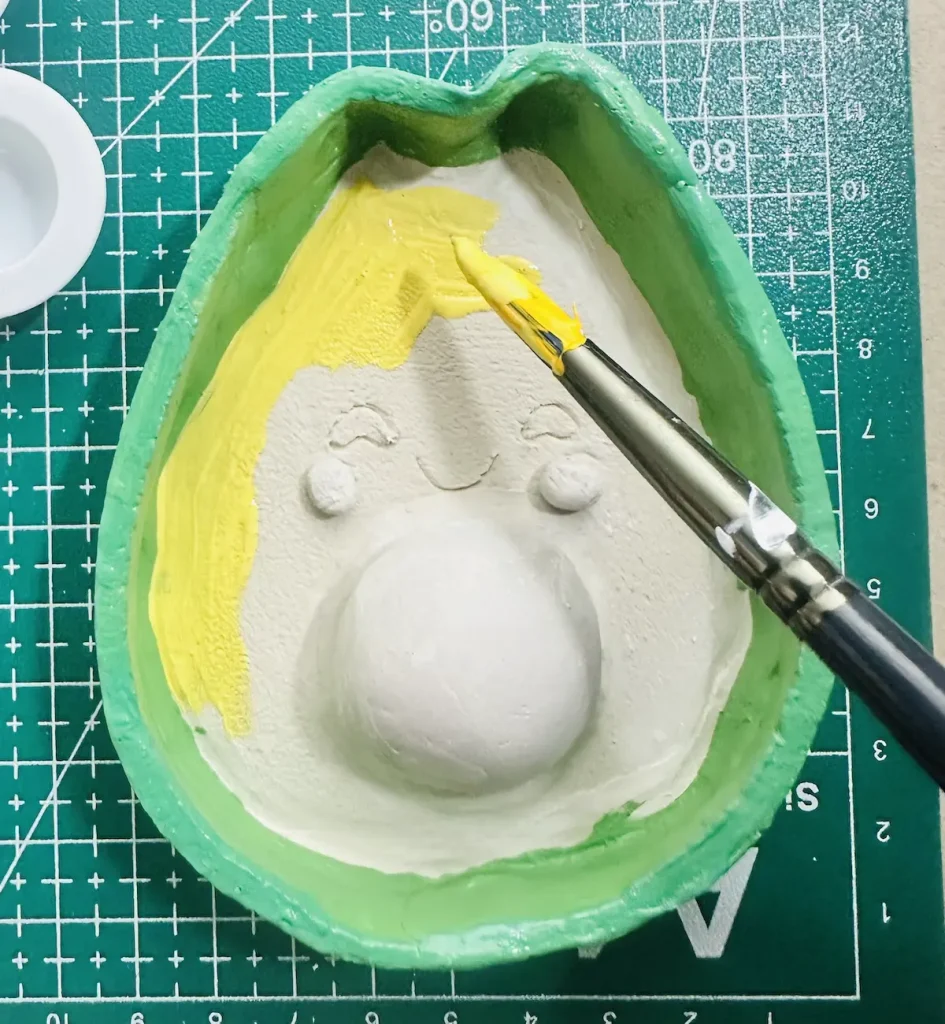
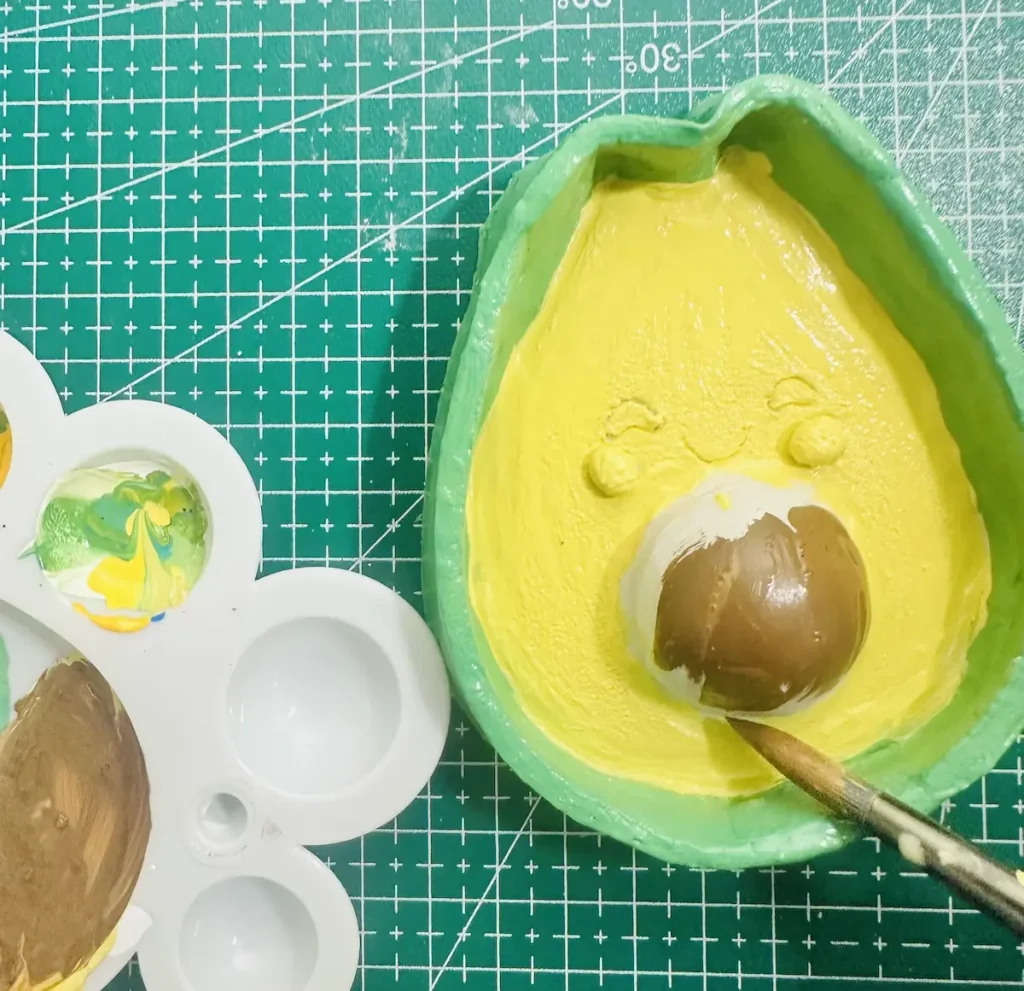
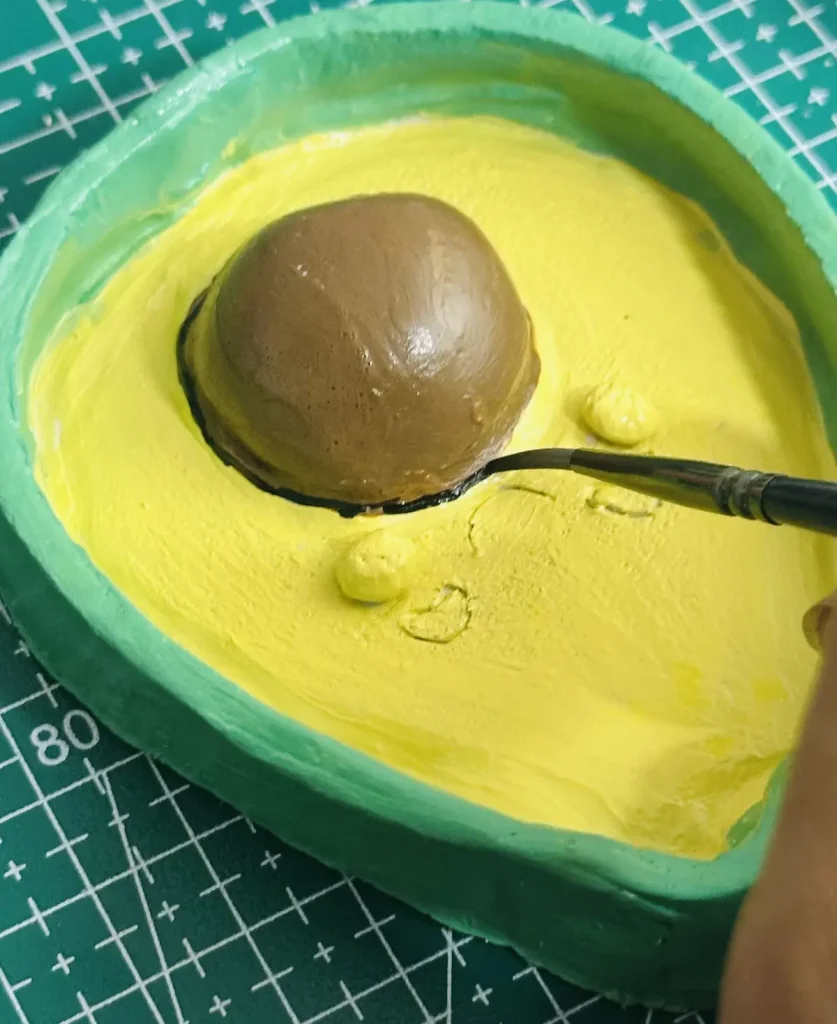
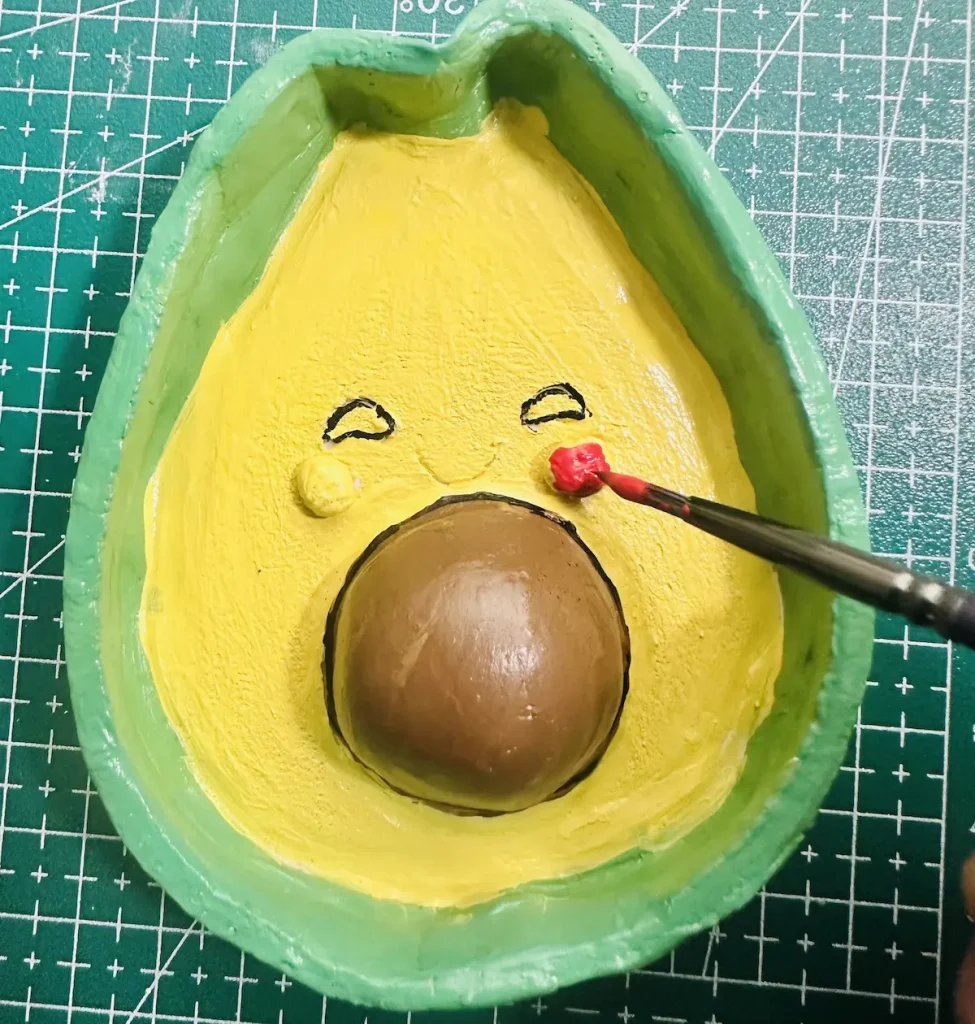
Start painting from the middle. Tray base first, then pit, next the eyes and mouth and finally the rim part.
I painted the tray base in yellow, the pit in brown, the rim in green, the eyes and mouth in black and the blushing cheeks in crimson.
You can mix different colors of acrylic paint on your color palette and get the color you want.
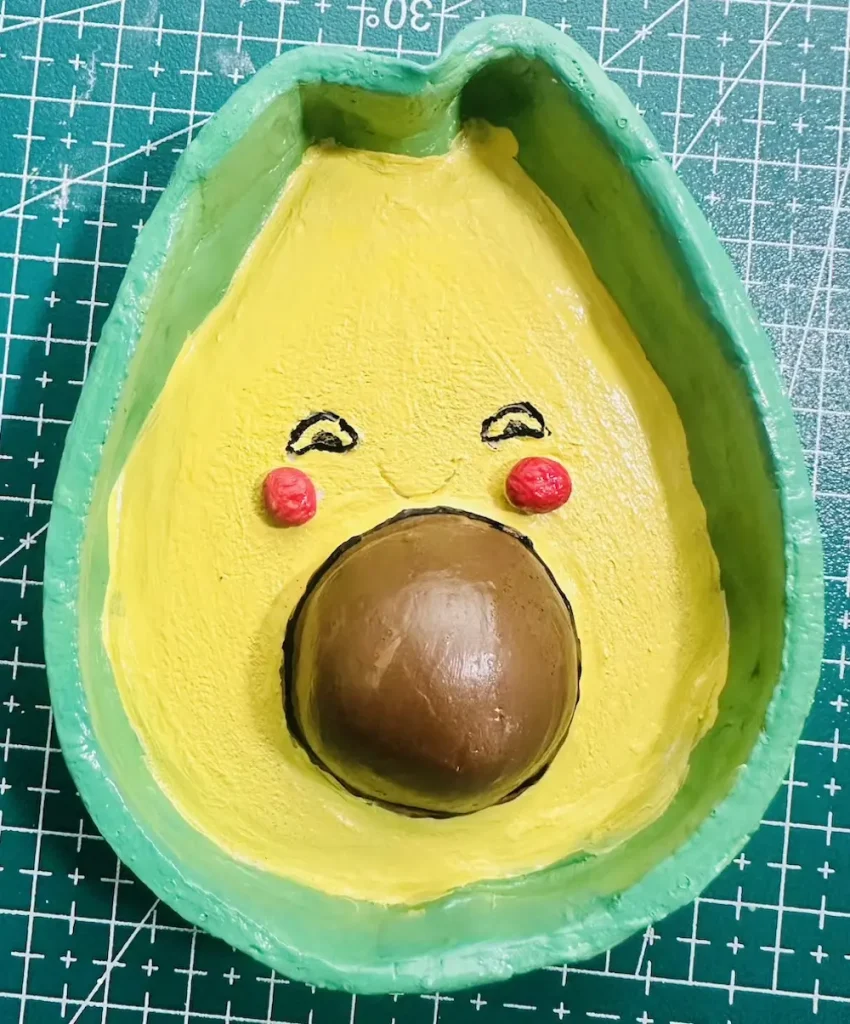
After painting, let the avocado tray dry for 1-2 hours before sealing.
Step 8: Sealing the tray
In my periodic project of making a trinket tray, I used my wife’s nail polish as the sealer and it was about to go so wrong in different ways 💅. I tried so hard to avoid those. Therefore, I invested on a quality sealer before starting my avocado tray project and I went with gloss varnish.
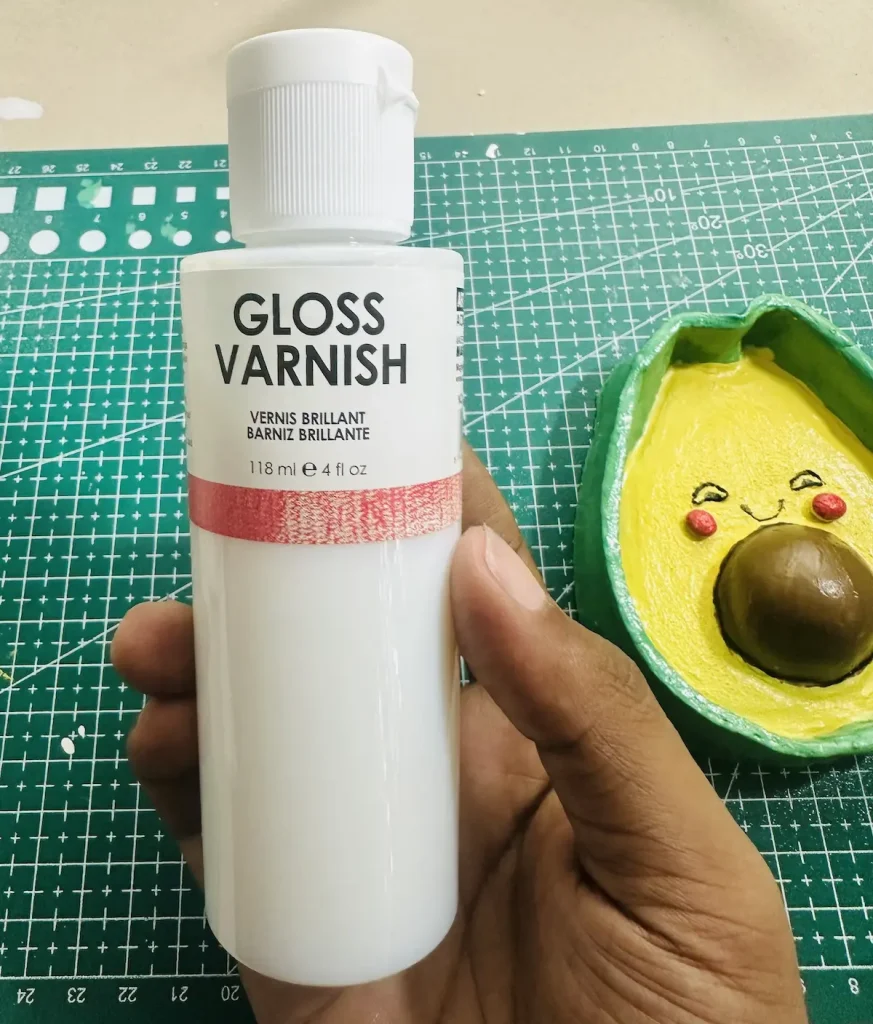
Sealing your air dry clay project is must to protect it from outside moisture.
Gloss varnish able to protect your air dry clay project long term since it makes an excellent water-resistant coating. It does not react with the acrylic paint underneath. Excellent protection and beautiful look guaranteed.
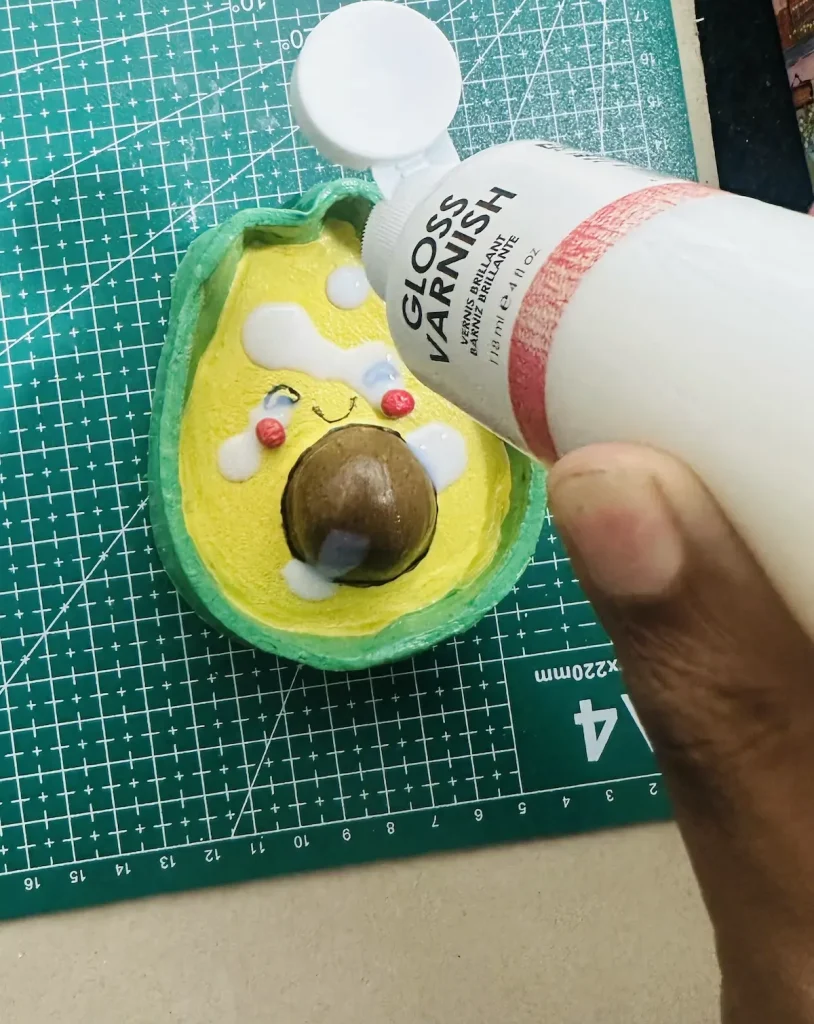
You can seal your air dry clay project with varnish, Mod Podge, polyurethane, UV resin or even with epoxy resin if you want an ultra glossy look.
Overall, I found sealing with varnish and Mod Podge is easy because no baking or hardener is required. They dry entirely by air through the natural evaporation of water.
I applied thin layers of gloss varnish in one direction for an even finish and to avoid leaving brush marks.
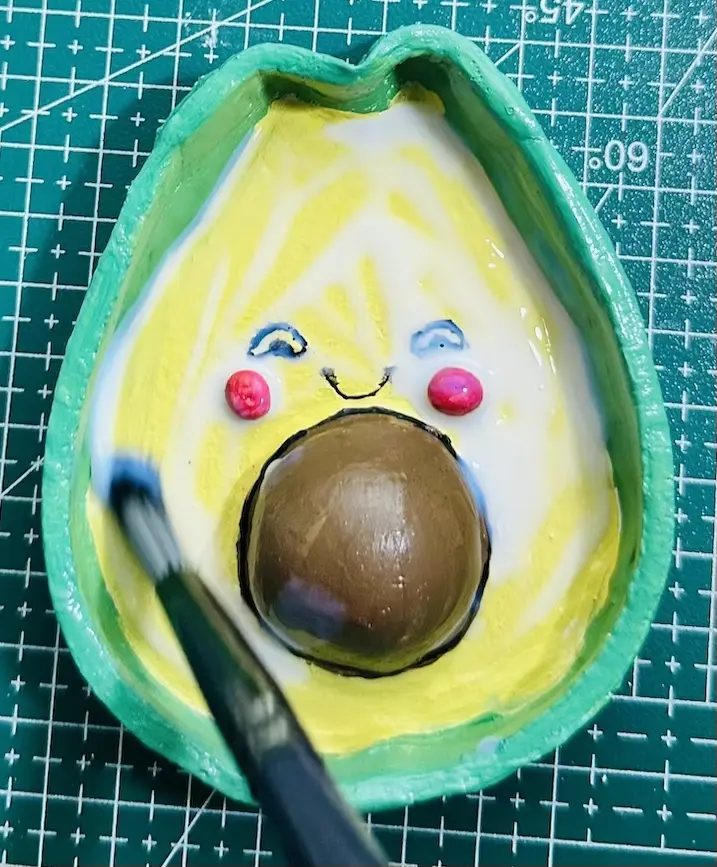
With gloss varnish, you can get glossy shiny look on the avocado tray. Make sure your coats are thin and cover the whole area.
After sealing, let the avocado tray dry for 24 hours in a well ventilated area.
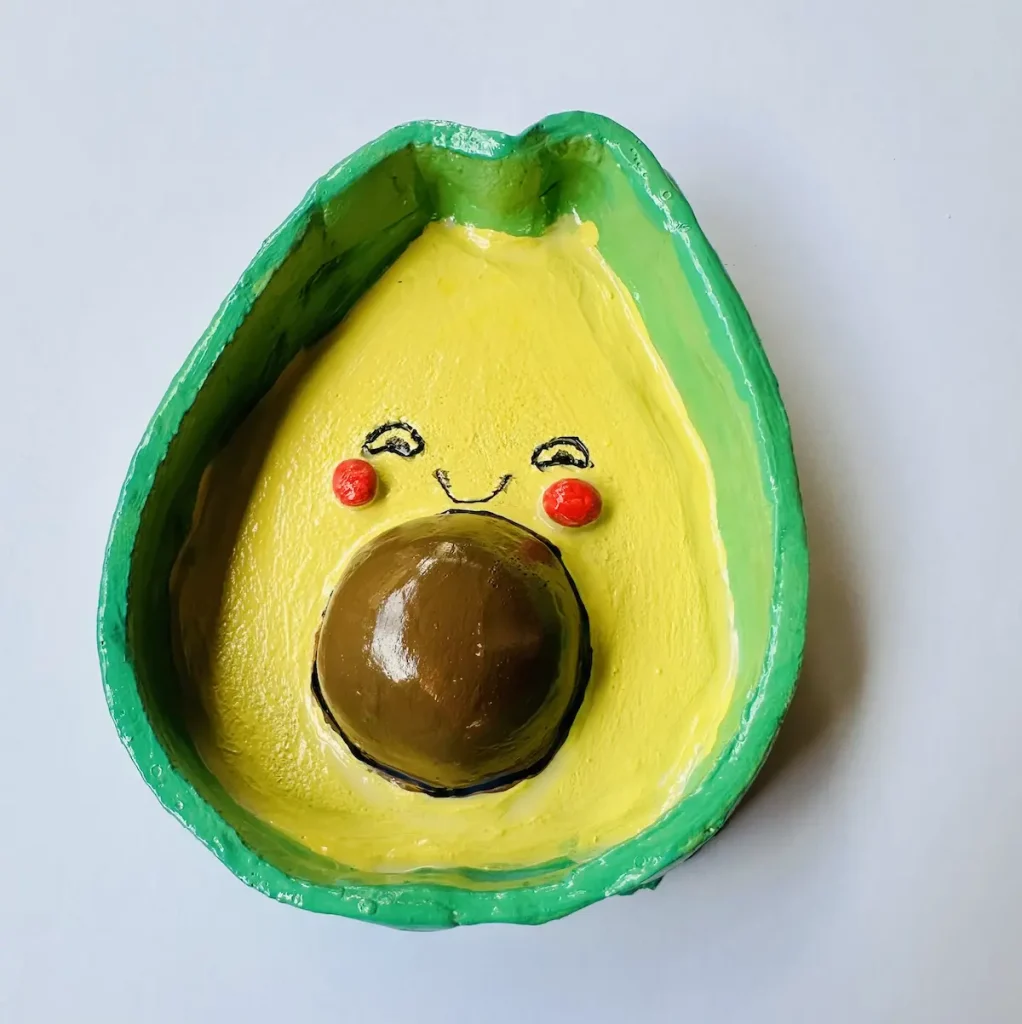
The final result after the project dried was so good and I was so happy because this one came out so much better than my previous trinket tray project. It showed me that practice makes you better and eventually perfect!
How long does an air dry clay trinket tray take to dry?
24-48 hours.
What is the best paint for air dry clay?
Acrylic paint.
How do you seal an air dry clay trinket dish?
Gloss varnish, UV resin or Mod Podge
Is air dry clay waterproof after sealing?
Yes, gloss varnish makes air dry clay project waterproof.
Final Thoughts
Now you know how to make a beautiful and cute avocado trinket tray using air dry clay. All the tips and techniques I described are simple and easy since I’m also a beginner.
You just have to focus more when you’re taking the shape, attaching pieces and when painting.
Now it’s you time to show your beautiful avocado tray creation. I’d love to see them.
Be sure to tag @clayandmestudios in your next avocado trinket tray project. I sure love to see them when you do. Until next time with another awesome project! Cheers! 🤟🏾
DIY Clay Avocado Trinket Tray

Supplies Needed
Air dry clay (Mont Marte or any brand)
Acrylic rolling pin or cooking rolling pin
PVC mat or silicone mat or unsealed wood
Clay tools
Clay cutting tool (or small knife)
Fine sandpaper
Cup of water or spray bottle
Sponge or silicone sculpting tool (optional)
Acrylic paint (black, white, crimson, brown, green, yellow)
Gloss varnish
Paintbrushes
Paper towels
Instructions
1. Prepare the Clay
- Cut a chunk of clay, wet your hands and the clay, and knead until super soft 🍕. Remember, no air bubbles!
2. Roll the Clay
- oll your clay to an even thickness (about ½ inch). Flip it often so it doesn't stick to the mat! 🔄
3. Trace and Cut Tray Base
- Use an AR app on your phone to trace the avocado shape directly onto the clay, then cut it out. Add the face details now! 🥑
4. Make and Attach Tray Rim
- Make thin clay lines for the rim. Use the "Score and Slip" method (score both surfaces + add water/slip) to attach them to the base. Press gently!
5. Make Avacado Pit
- Sculpt a ball for the pit, cut it in half, and use score and slip to attach it to the center. So cute! 🟤
6. Let it Dry
- Let it dry for 24-48 hours in a cool, ventilated area. No direct sunlight (we don't want cracks!). 💨
7. Paint Avocado Tray
- Clean it with paper towels. Paint the base yellow, pit brown, rim green, and add your face details. Acrylic paint is best! 🎨
8. Sealing and Finish
- Once dry, apply a coat of gloss varnish for that shiny, water-resistant finish. Let it dry for 24 hours. ✨
Video
Notes
- Please read blog post in its entirety for more tips + tricks.
Don't forget to tag @clayandmestudios with your creations! Cheers! 🤟🏾